You want to protect your computer from viruses. You’ve heard about ClamAV, but you’re unsure how to install and use it on Ubuntu. This tutorial will show you the ropes.
ClamAV is a free and open-source antivirus solution that several high-profile organizations use ClamAV, including Cisco, Google, IBM, McAfee, Microsoft, Sophos & Symantec.
In this tutorial, you will learn how to install ClamAV on Ubuntu and how to use it to scan your system for viruses. You will also learn how to update the database and install the GUI to make scanning easier.
Prerequisites
This tutorial will be a hands-on demonstration. If you’d like to follow along, be sure you have an Ubuntu system ready to go. This tutorial uses Ubuntu 20.04, but any recent version should work fine.
Learning How to Install ClamAV on Ubuntu
The apt package manager is the most convenient way to install ClamAV on Ubuntu. Follow these instructions below.
1. Open a terminal and run the following command to update the package repository index before you install ClamAV on Ubuntu.
apt update -y2. Run the below command to install ClamAV on Ubuntu. This command installs two packages: clamav and clamav-daemon. The former is the ClamAV scanner, while the latter is a background service that enables on-access scanning.
apt install clamav clamav-daemon -y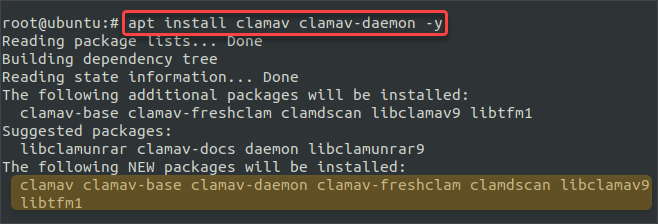
3. After the installation, confirm the ClamAV version by running the below command.
clamscan --versionYou will see an output similar to the one below. As of this writing, the current LTS version of ClamAV in the APT repository is 0.103.6.

Updating Virus Definitions/Databases
ClamAV uses virus signature databases to identify malware. These databases receive regular updates with the latest signatures. To stay protected, you must also download these updates and apply them to your ClamAV installation.
By default, the freshclam service will automatically download the database updates once a day when you install ClamAV on Ubuntu. But, you can also manually update the databases. Why update manually? There are two main reasons:
- You want to scan for viruses immediately and don’t want to wait for the automatic update.
- The automatic updater is not working correctly.
Updating the virus definitions is not complicated at all. A built-in command called freshclam, which is included when you install ClamAV on Ubuntu, can do all the work for you, including downloading the databases and reloading ClamAV.
Below are the steps to update the virus definitions.
1. To update the databases manually, stop the clamav-freshclam service first. This service is responsible for automatic updates. Run the below systemctl command to disable the clamav-freshclam service.
systemctl stop clamav-freshclam2. Next, run freshclam to download the updates.
freshclam3. After the updates, start the clamav-freshclam service so that it will automatically update the databases in the future.
systemctl start clamav-freshclam
Scanning for Viruses Using the CLI
Now that ClamAV is installed and the databases updated, it’s time to scan your system for viruses. There are two ways to do this: the command line or the graphical user interface.
You can skip to the next section if you want to learn about using the GUI. This section will focus on using the CLI.
The clamscan command is the command-line tool for running the virus scan. You can list the options available with the clamscan command like so.
man clamscan
Running a Directory Scan
While there are many clamscan options, the ones you’ll use in this section are:
- -i, –infected – Display only the infected files on the screen and will not show clean files. Use this option to suppress
- -r, –recursive – Performs a recursive scan of the folder and subfolders. Do not use this option to limit the scan to the top folder.
--remove - Automatically remove infected files. Be careful when using this option because ClamAV will also remove those files if a false-positive detection happens.
The scan could run from several minutes to hours, depending on how many files you have on your system. You may want to consider running it overnight or while you’re away from the computer.
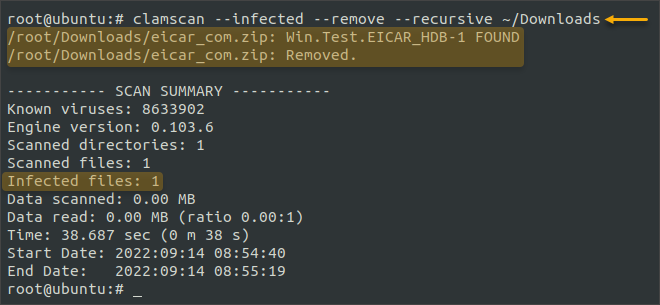
For example, run the command below to scan your Downloads folder recursively.
clamscan --infected --remove --recursive ~/Downloads
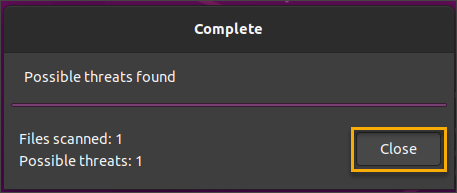
After the scan, you’ll get a summary result. As you can see below, the scan found one infected file. And because the –remove option is present, clamscan automatically deleted the file.
Running a File Scan
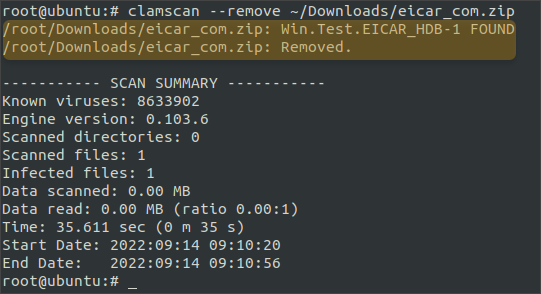
When you receive or download a file, you can run an on-demand scan to determine if the file is safe. The command is still clamscan, followed by the file path you want to scan. The --remove option automatically removes the file if infected.
clamscan --remove ~/Downloads/eicar_com.zip
Scanning for Viruses Using GUI
If you prefer a graphical user interface, you can install the ClamTk application, a lightweight front-end GUI for ClamAV.
Installing ClamTk
Install ClamTk by running the below command.
apt install clamtk -y
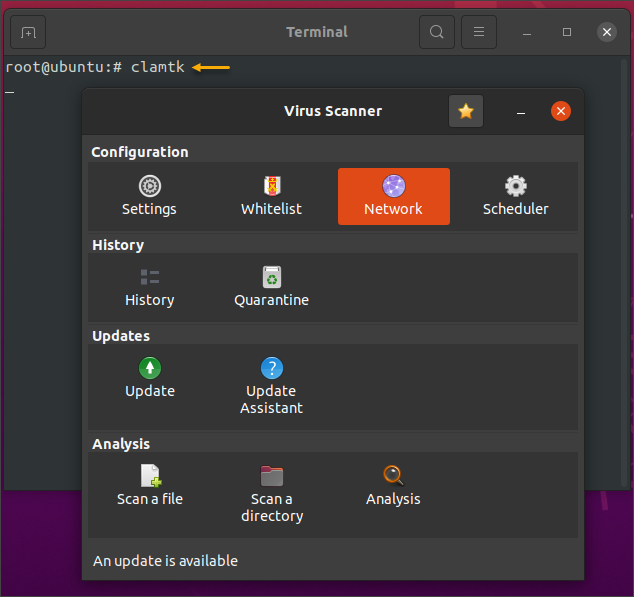
After the installation, launch the ClamTk application.
clamtk
The Virus Scanner window opens, showing you the main interface.
Updating Virus Database
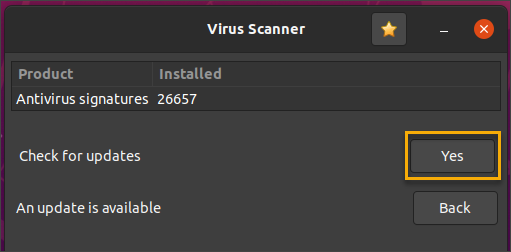
1. To update the databases, click on the Update icon.

2. Click Yes to confirm that you want to check and update the databases.
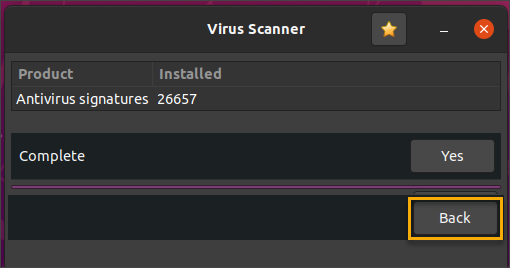
3. When the process is complete, you will see a window similar to the one below. Click Back to return to the main window.
Running a Virus Scan
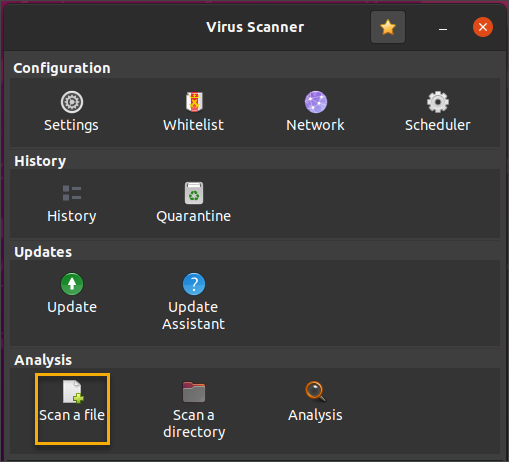
1. To scan your system for viruses, click on the Scan a file button to scan a specific file. Click on Scan a directory to scan an entire directory. In this example, click Scan a file.
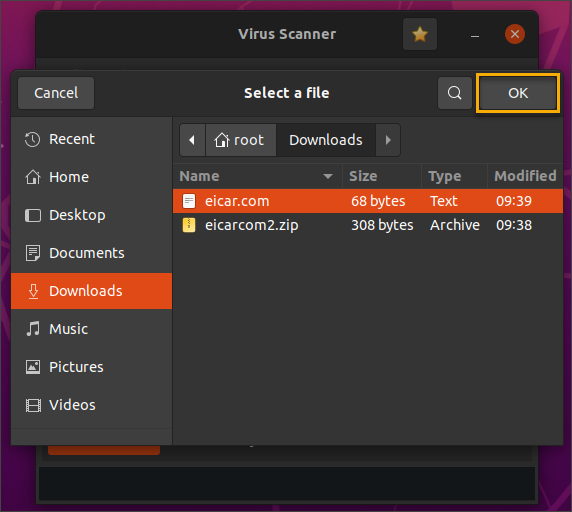
2. Locate the file to scan, select it, and click OK.
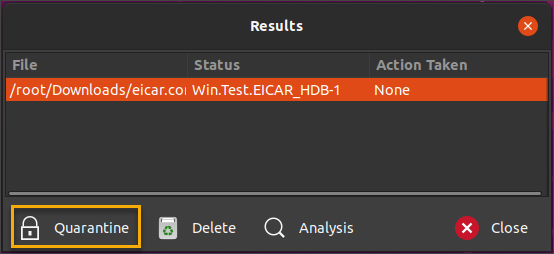
3. ClamTk will scan the file and display the results. If the scan finds the file is infected, you can either quarantine or delete the file. In this example, click Quarantine to quarantine the file.
4. The Action Taken changes to Quarantined. Click Close to exit the results.
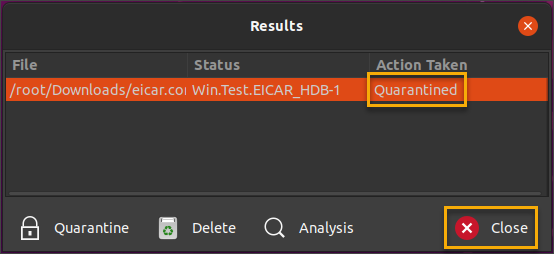
5. Click Close again to return to the main window.
Scheduling Regular Scans with ClamTk
Setting up a scheduled scan is ideal to ensure a clean system. With ClamTk, scheduling a regular scan is only a few clicks away.
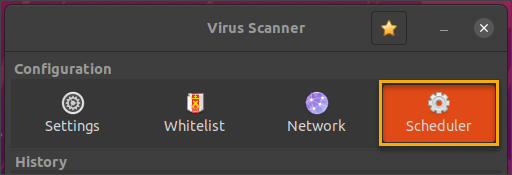
1. Click on Schedule from the main window.
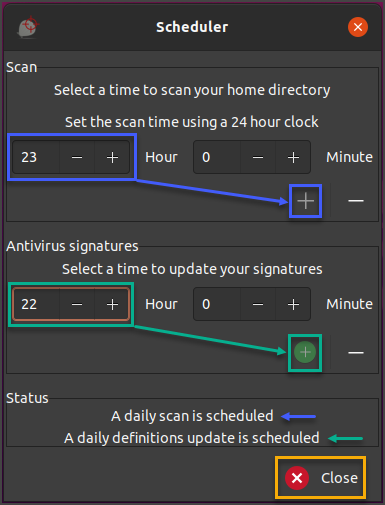
2. A new Scheduler window will open where you can configure the daily update and scan schedule. The time is in a 24-hour format.
Enter the time you want the update to run in the Antivirus signature field. In this example, the update will run at 22:00 every day.
Note: The update schedule must be before the scan schedule so that the databases will be up to date before the scan starts.
3. Enter the time you want the scan to run in the Scan field. In this example, the scan will run at 23:00 every day.
Note: You should schedule an update and scan when you know that you won’t be using the computer.
4. In the Status field, you will see that the daily scan and definition update show as scheduled. Click the Close button to exit the scheduler.
Conclusion
In this tutorial, you’ve learned how to install ClamAV on Ubuntu. You ran the clamscan command to scan your files and folders for infection. You’ve also learned how to install and use the ClamTk graphical user interface.
Scanning your computer for viruses is an essential maintenance task to keep your system safe from malware. ClamAV is a powerful tool that can help with ensuring a virus-free computer. Best of all, ClamAV is free! Don’t waste time and install ClamAV on Ubuntu now.