

Have you ever been stuck finding your files? Well, you are not the only one. But worry not. There are many ways in Ubuntu to find files, and you are in for a treat!
In this tutorial, you will learn how to find files even if you totally forgot their names or exact locations.
Read on and save yourself the stress of finding any of your files!
Prerequisites
This tutorial will be a hands-on demonstration. To follow along, be sure you have an Ubuntu system. This tutorial uses Ubuntu 20.04, but the steps should be similar to other recent versions of Ubuntu.
Using GUI in Ubuntu to Find Files
One way to find files on Ubuntu is to use the GUI. Navigating through the GUI is usually quicker than using the command line, especially if you are unfamiliar with the terminal or commands.
To find files via Ubuntu’s GUI:
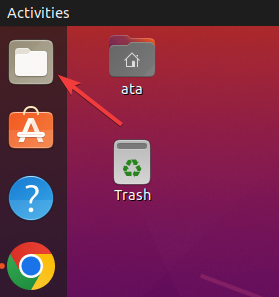
1. Click the Activities button (top-left), and a search bar appears, as shown below.
The Activities button is a shortcut like the Windows Start menu or the macOS Finder. On the other hand, the search bar is a quick way to find and launch applications, open documents, and view all your open windows in one place.
And yes, you guessed it right. The search bar also lets you search files on your system.

2. Next, type in a keyword in the search bar, and a list of matching results appears.
The screenshot below shows the results of the keyword search, which are divided into categories such as Applications, Documents, and Settings:
- The top result section is the Applications category (Google Chrome, Terminal…).
- The following section is the Settings category (Appearance, Color…).
- The last section is the Characters category, which shows any files on your system that contain the word “the” in their name.

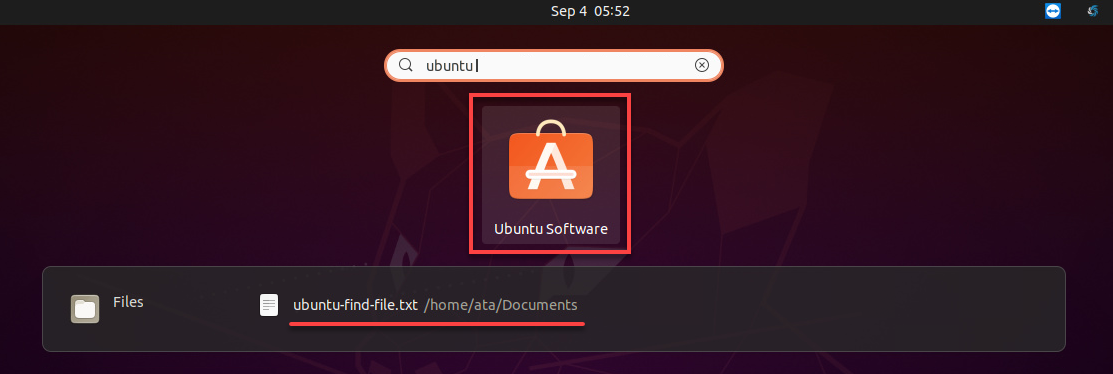
3. Now, use the same technique, and find other files in your system. For this example, search for ubuntu, and you will see applications and files that contain the word “ubuntu.”
You can see below that the first result is the Ubuntu Software application, followed by the ubuntu-find-file.txt file and its location(/home/ata/Documents).
Refining Search Results
If you have found the files you are looking for in the search results, that is good news. You can click on the file to open it. But if not, you will have to refine your search by adding additional keywords.
To refine your search results:
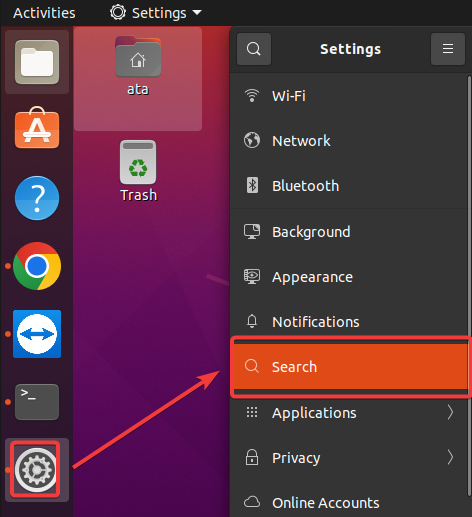
1. Open Ubuntu’s Settings and select Search.
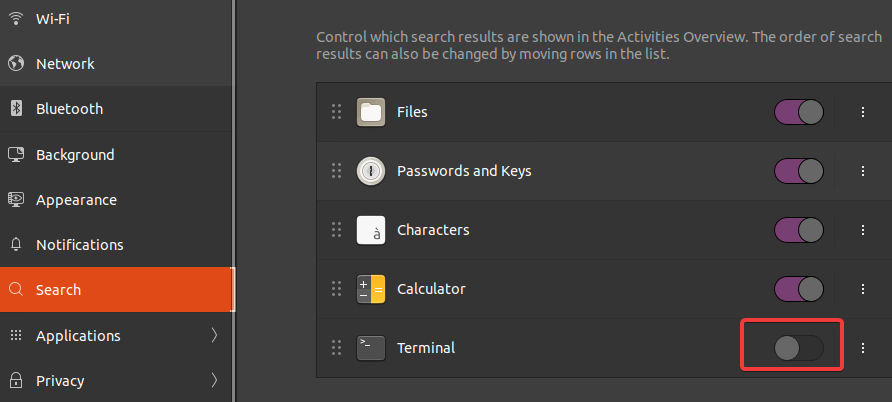
2. Next, switch the toggle button beside an item (either on or off). Doing so lets you include that category in your search results or not.
The below example switches off the option to show the Terminal results in search.
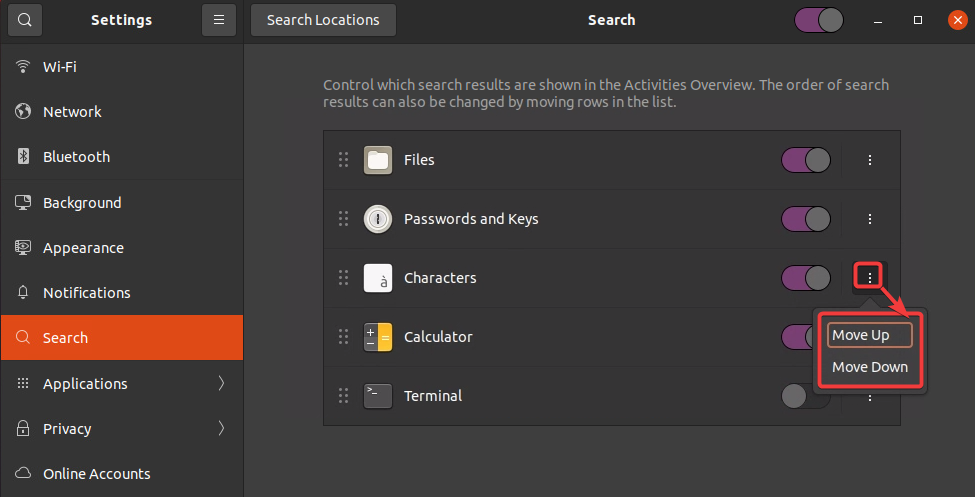
3. Click on the ellipsis next to an item and select Move Up or Move Down to change its position. Doing so changes the order in which the results appear by category to refine your search results further.
4. Now, open the file manager application since, in most cases, you only want to find a saved document, not an application or a setting.
5. On the file manager, click on the search icon on the top, and a search bar appears, as shown below.
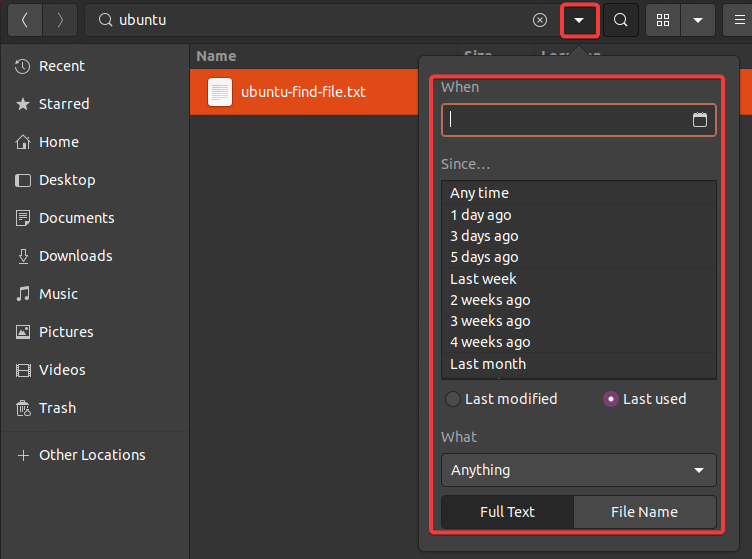
Enter a keyword like ubuntu into the search bar. The file manager searches for files or folders on your system that contain the keyword in their name or contents. Once found, a list of matching results appears in the right side panel.

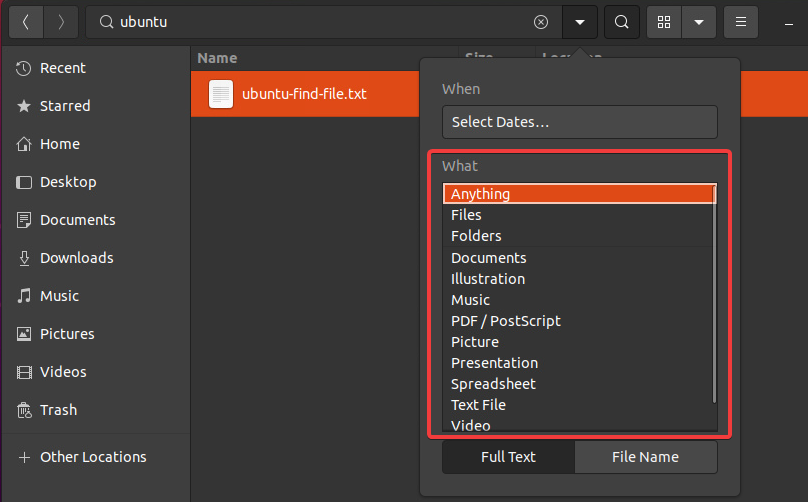
6. Lastly, click on the arrow down icon beside the search bar, and choose a specific file creation date and file type you are looking for to narrow down your file search. This feature is helpful in case the search returns tons of results or no results.
Finding Files Using the find Command
So far, you have seen how to find files via Ubuntu’s GUI. But if you are working most of the time in the terminal, the find command will suit your taste in finding files. The find command is a command line utility that allows you to search for files and directories on your system.
The find command is powerful, providing many options for customizing your search. And typically, the terminal is the only way to find a file, for example, when you are working remotely via SSH.
The basic syntax of the find command is as follows where:
path– allows you to specify the directory in which the search should start. If no path is specified, thefindcommand starts the search from the current working directory.opt– specifies various options that modify the behavior of thefindcommand.
find <path> <opt>
To find files with the find command:
1. Run the following command to find all files named ubuntu-find-file.txt in the specific Documents directory under the current working directory (./).
find ./Documents -name ubuntu-find-file.txtBelow, you will see the full path to each file that contains the specified keyword. If no results are found, you will get an empty output.

2. Next, run the same find command below, but this time, use the wildcard character * to find a specific pattern of characters.
For this example, the below command finds all files with a .txt extension in the Documents directory.
find ./Documents -name *.txtThe command returns the same ubuntu-find-file.txt file found, as shown below since its file extension is .txt.

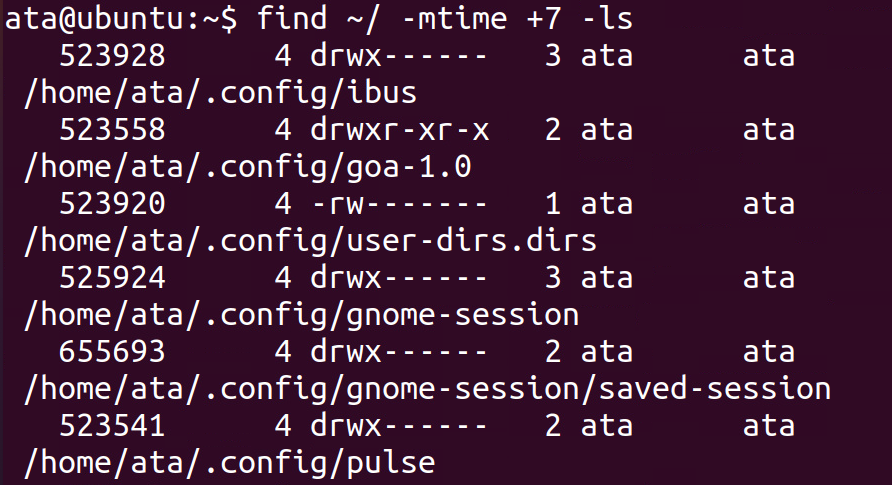
3. Run the following command to find files in your home directory (~/) that were recently modified (-mtime), like seven days ago (+7) and list their details (-ls).
This approach comes in handy if you are looking for configuration files that are modified from time to time.
find ~/ -mtime +7 -lsAs you can see, the -mtime option is helpful when you forget when you modified a particular file but remember the approximate time.
4. Finally, run the below command to find all files in the /var/log/ directory with a .temp extension and delete them.
The -delete option is helpful when you want to delete many files that match certain criteria simultaneously.
Note that this command does not provide output, and the -delete option will not ask for confirmation before deleting each file. So, take caution when using this option.
find /var/log/ -name *.temp -deleteFinding Files Using the locate Command
Do you see the find command as a powerful tool? Yes, it is, but the find command has one major drawback. The find command searches through the files and directories in real-time. This behavior makes the file search take a long time to complete depending on the number of files on your system.
So what other options do you have? Go for the locate command instead, which uses a database to find files and directories on your system quickly.
But before using the locate command, you must install the merging locate (mlocate) database package to your system. This package includes the required utilities used to create and update the database.
1. Run the below apt install command to install mlocate on your system.
sudo apt install mlocate -y
2. Next, run the updatedb command below, which does not provide output but updates the locate database. This command might take some time to run as it scans your entire file system for new and modified files.
Note that you must run this command periodically to ensure the database is up-to-date.
sudo updatedb3. After the update, run the below locate command to check the database’s statistics (-S). This command displays the total number of files in the database and other information.
locate -S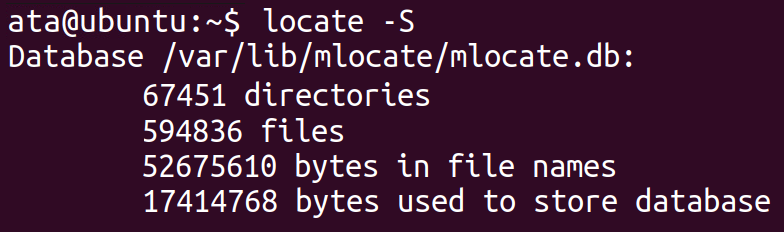
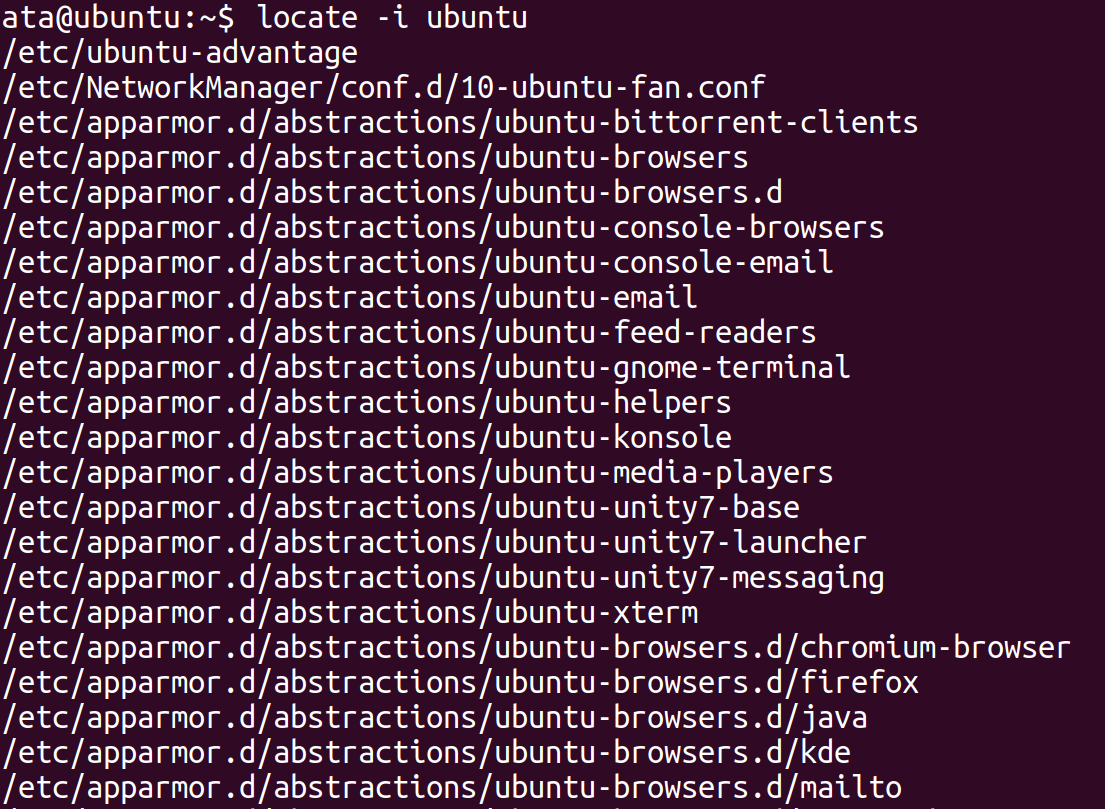
4. Now, run the following command to locate all files with the ubuntu keyword in their name, ignoring (-i) the text case of the keyword.
The locate command searches through the database instead of your system’s file structure in real-time. As a result, the command returns the search results much faster than the find command, even if your system contains countless files.
locate -i ubuntuThe output below shows just a small part of the file list containing the ubuntu keyword.
Since the command is case insensitive, you will also see files listed with “Ubuntu,” “UBUNTU,” or any other word variation.
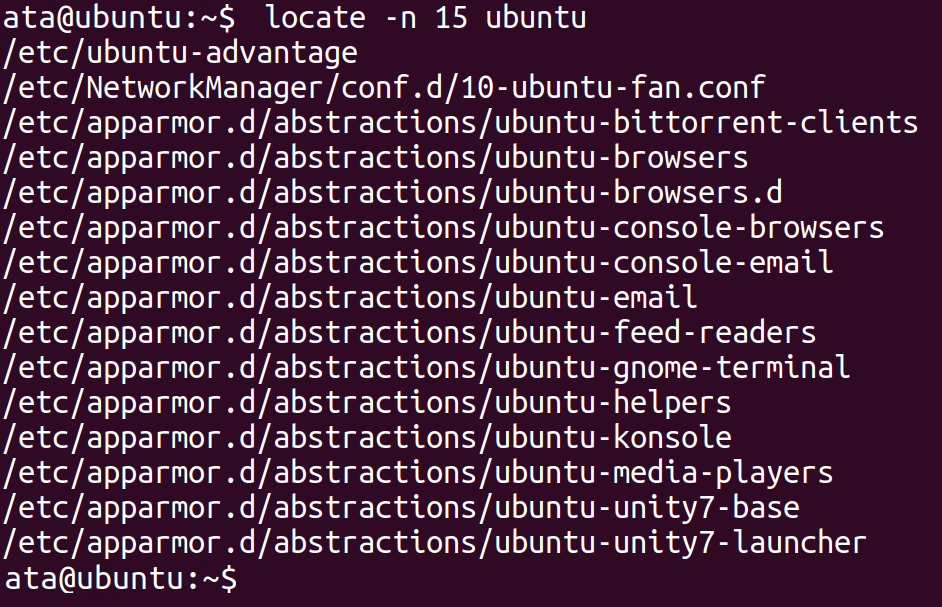
5. Run the following command to look for the same ubuntu keyword. But this time, remove the -i option to perform a case-sensitive search and limit the output to a certain number of results (-n 15).
locate -n 15 ubuntuThe output below shows that the list is much shorter and contains only files with the exact text case of the ubuntu keyword in their names.
Perhaps you need the total number of files in the database containing the keyword ubuntu. If so, run the below locate command to count (-c) all files in the database.
locate ubuntu -cBelow is the total number of files (103117) indexed by the locate command.

Conclusion
In this tutorial, you have realized that forgetting the name or where you saved a file can be less frustrating in `s. You have learned many ways in Ubuntu to find files via the GUI and the find and locate commands, along with their handy options.
Which way do you like the most in finding files? Regardless of your choice, you can now ease your mind, wipe those tears, and let this newfound knowledge pave the way to finding your files.