

Automation is crucial in the modern world of IT. Automation tools like Microsoft Azure Runbooks can help do tasks faster and more efficiently. Although the learning curve may be steep for some, especially for those new to Azure, the payoff is beneficial in the long run.
Not a reader? Watch this related video tutorial!This tutorial will show you how to create and run a Microsoft Azure Runbook. You’ll also learn a typical real-world use case example of using an Azure runbook in your Azure environment.
So keep reading and learn something new today!
Prerequisites
This tutorial will be a hands-on demonstration. If you’d like to follow along, be sure you have
- An Azure account with an active subscription. If you don’t have an Azure subscription, create a free account before you begin.
- The latest PowerShell version for your operating system. This tutorial uses PowerShell 7.2.5 on Windows 10.
- The latest Az PowerShell module must be installed on your computer. This tutorial will use the Azure PowerShell module version 8.1.0.
- A code editor, such as Visual Studio Code.
Creating an Azure Runbook Using the Portal
Whether you’re a new or seasoned user, the Azure Portal is the quickest way to create Azure Runbooks. This section will teach you how to create, edit, test, publish, and execute an Azure Runbook in the Azure Portal.
Creating an Automation Account
The primary requirement of a runbook is the automation account. An automation account is a container for your automation resources, like the modules, credentials, variables, and the runbook itself.
Follow the below steps to create a new Automation account in the Azure Portal.
1. Sign in to the Azure Portal using your preferred web browser.
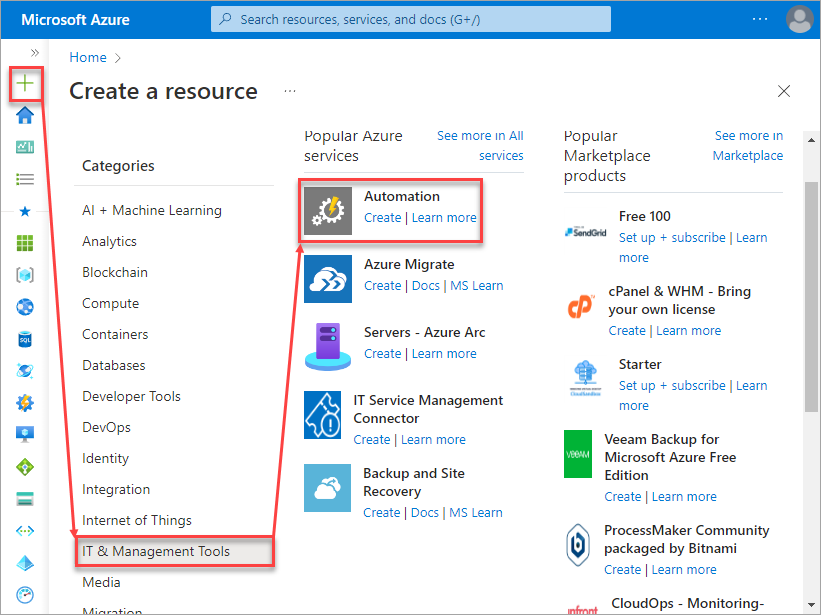
2. Click the Create Resource → IT & Management Tools → Automation (create).
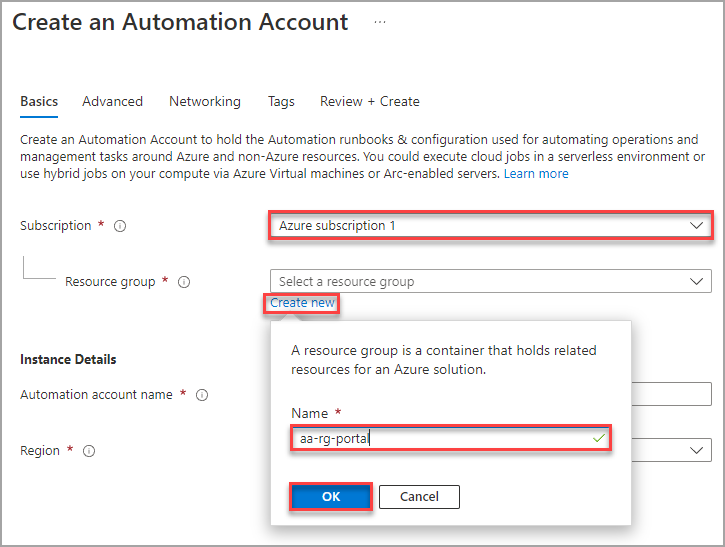
3. On the Create an Automation Account page, fill out the form under the Basics tab.
Select the Subscription in which you wish to create the automation account.
Click the Create new link under the Resource group box. Type the name for the new resource group and click OK. This example automation account’s name is aa-rg-portal.
Note: Creating a new resource group is optional. Alternatively, you can select an existing resource group from the drop-down.
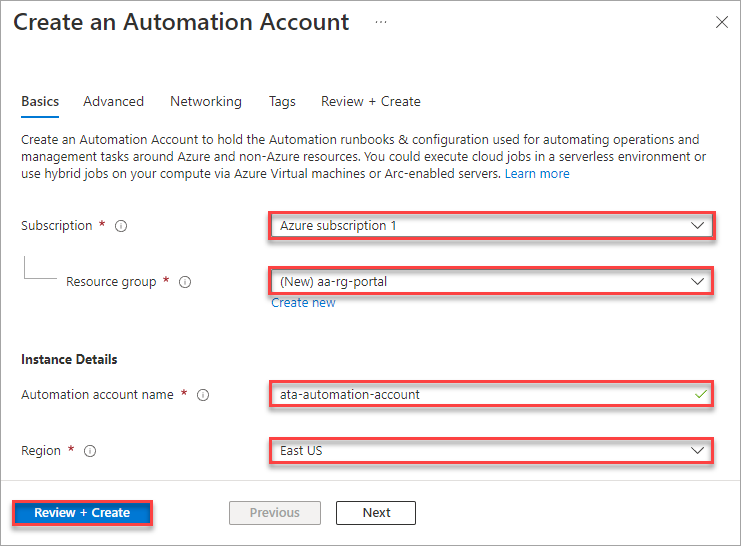
4. Next, enter the Automation account name and select the Region. Typically, you would choose a region that’s geographically optimal to your location. In this example, the automation account name is ata-automation-account, and the location is East US.
Click the Review+Create button once you’ve completed the details.
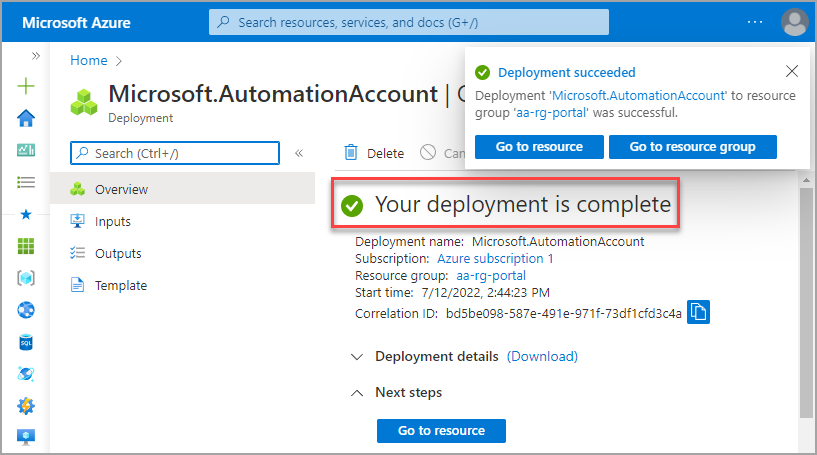
5. The page validates your automation account details. If you see the message Validation passed, click the Create button to initiate the automation account creation.
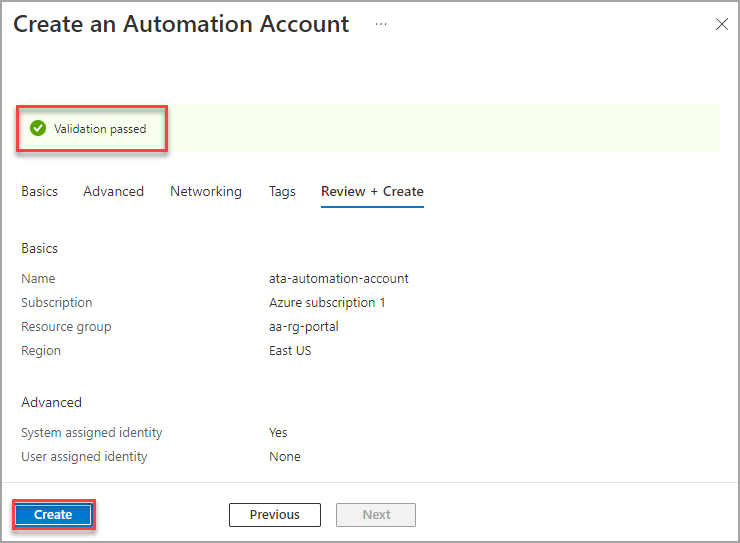
After the automation account deployment, you’ll see a confirmation message similar to the screenshot below.
Creating a PowerShell Runbook
You now have an automation account and can start creating an Azure Runbook in it. Follow the below steps to create a new runbook in the Azure Portal.
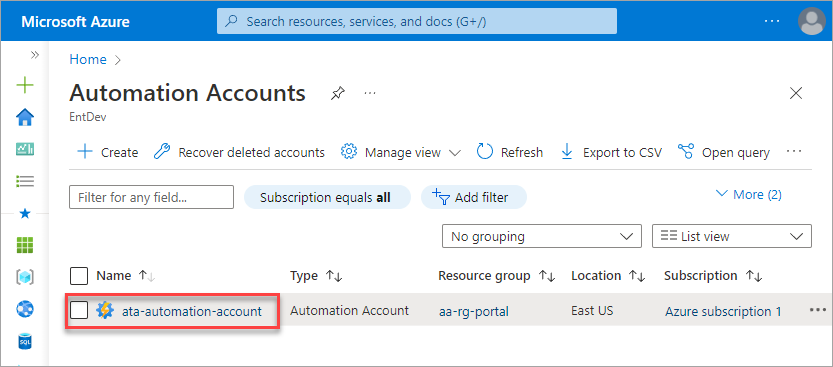
1. Navigate back to the Automation accounts blade and click on the name of your Automation account.
2. Under the Process Automation section, click Runbooks and the Create a runbook button near the top of the page.

3. On the Create a runbook page, fill out the runbook Name and choose the Azure Runbook type and Runtime version. This example will create a new Graphical PowerShell runbook called azure-runbook-01 based on Windows PowerShell 5.1 runtime.
The Graphical PowerShell runbook type means you are creating a PowerShell Runbook that you can only edit using the Automation graphical editor.
Refer to the Azure Automation runbook types documentation to know more about the different runbook types.
After filling out the runbook information, click Create.

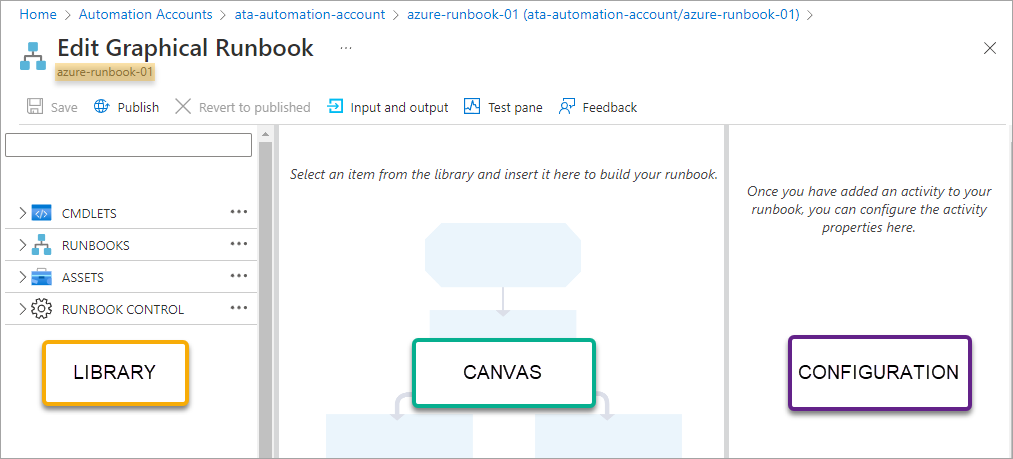
The graphical editor automatically opens the runbook for editing, as you can see below. The graphical editor has three panes: Library, Canvas, and Configuration.
Editing the Runbook
You’ve created an empty runbook. Your next task is to edit the runbook to make it do something. In this example, you’ll modify the runbook to perform a simple logic: output the message Hello Wold using the Write-Output cmdlet.
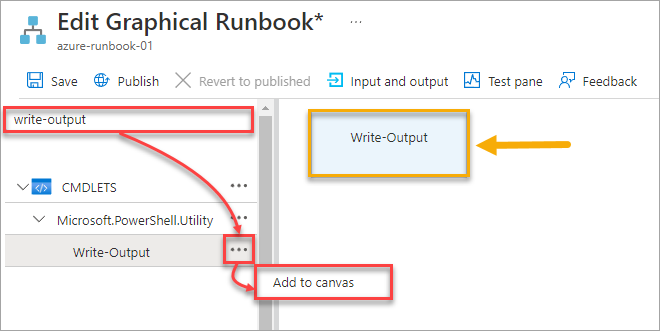
1. First, add the Write-Output cmdlet to the canvass. Type Write-Output on the library pane’s search box to quickly do so. Once you see Write-Output under the CMDLETS tree, click the ellipsis (…) → Add to canvas.
As you can see below, the Write-Output cmdlet is now inside the canvas. At this point, the Write-Output object you see on the canvass is called an activity.
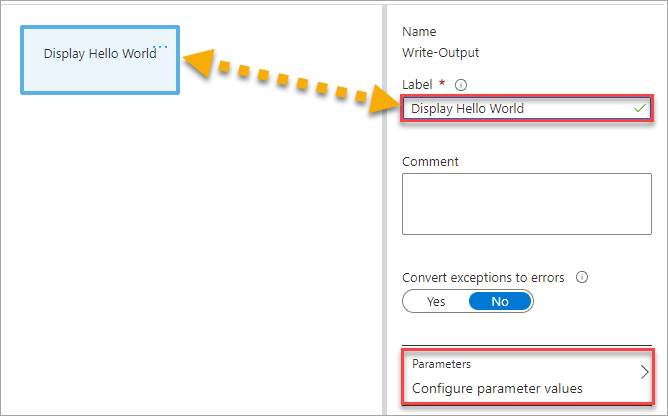
2. On the Configuration pane, change the activity label to Display Hello World. Next, click on Parameters.
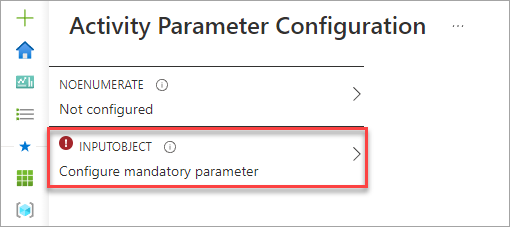
3. On the next page, you’ll see the list of the Write-Output cmdlet parameters. In this example, click the mandatory parameter INPUTOBJECT.
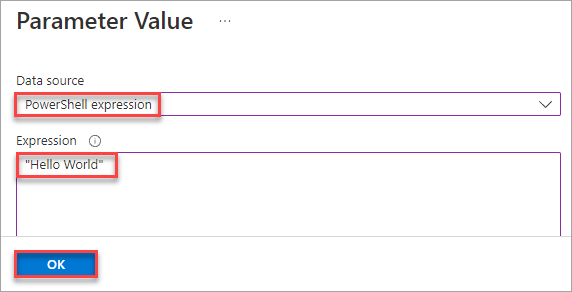
4. Now, choose the data source for the INPUTOBJECT parameter. Select the PowerShell expression option from the Data source drop-down in this example. In the Expression box, type the “Hello World” expression (including the quotes), and click OK.
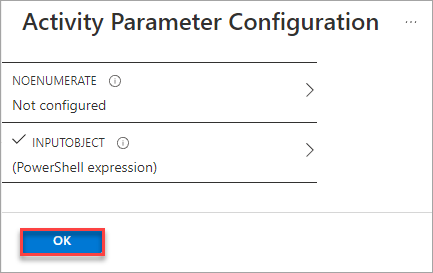
5. On the Activity Parameter Configuration, you’ll see that the INPUTOBJECT now has a checkmark indicating that you’ve already added the mandatory parameters. Click OK.
Testing the Runbook
You’ve created and configured a runbook, but does it work? To find out, the editor has a test pane where you can safely execute the runbook for testing.
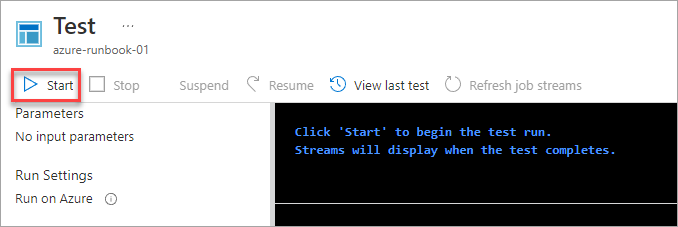
1. Click Test Pane at the top of the canvass.

2. Once the Test pane is open, click Start to run the runbook.
Note: Performing a runbook testing in the test pane automatically saves the current runbook.
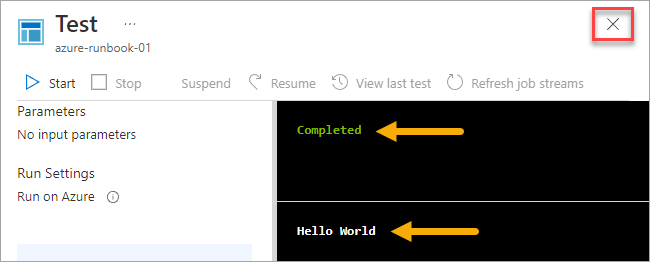
3. Wait for the test execution until you see the Completed message. The output pane shows the expected result: the Hello World message. Close the Test pane to go back to the editor.
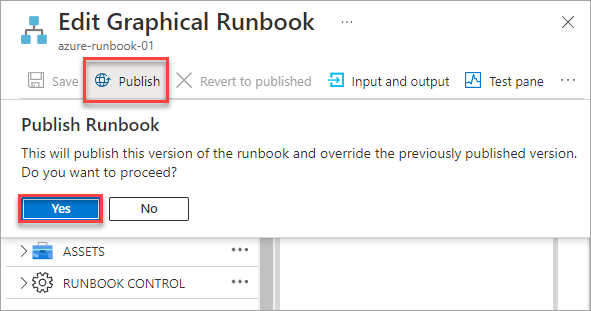
4. When you’ve returned to the editor, click the Publish button → Yes, to publish this runbook version.
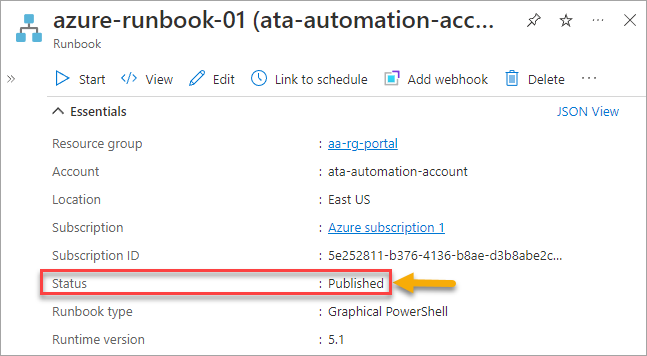
As a result, the runbook status changes to Published.
Creating an Azure Runbook with PowerShell
You can also create a PowerShell runbook using PowerShell. This section will show you how to create a PowerShell runbook using the Az PowerShell module cmdlets.
Creating an Automation Account
First, you must create the Automation account that will later contain your runbooks.
1. Open PowerShell with elevated privileges on your local machine.
2. Sign in to Azure PowerShell by running the following cmdlet.
Connect-AzAccount3. If you have more than one Azure subscription, run the below command to select the correct subscription to use.
Get-AzSubscription
Select-AzSubscription 'Subscription name or ID'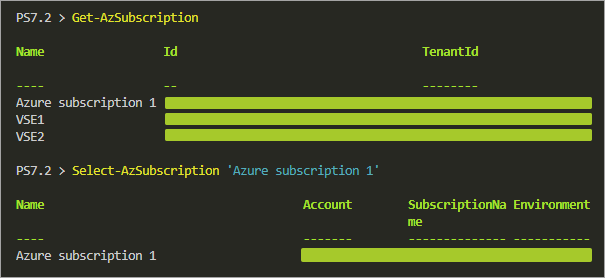
4. Next, run the below command to create a resource group. This command creates a resource group with the name aa-rg-poweshell in the eastus region.
New-AzResourceGroup -Name aa-rg-powershell -Location eastus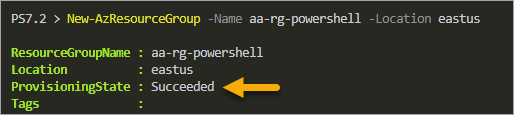
5. Now that you have a resource group run the below command to create the automation account. This command creates an automation account with the name az-automation-account in the eastus region.
New-AzAutomationAccount `
    -Name 'az-automation-account' `
    -Location 'eastus' `
    -ResourceGroupName 'aa-rg-powershell'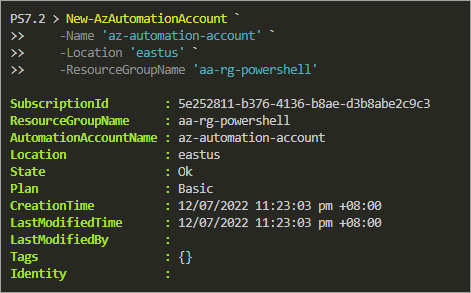
Creating a PowerShell Runbook
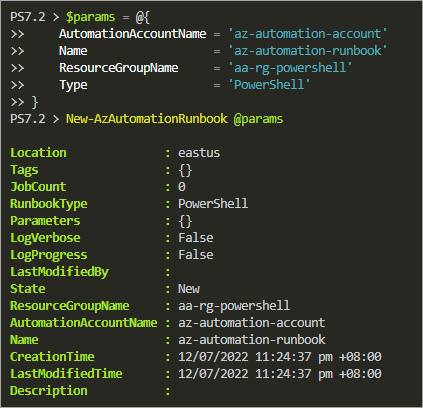
To create a new runbook using PowerShell, the New-AzAutomationRunbook cmdlet is your go-to command. Follow these steps to create the runbook.
Copy the following code snippet and run it in PowerShell to create a new Azure runbook. This code creates a runbook of type PowerShell named az-automation-runbook in the az-automation-account automation account.
$params = @{
    AutomationAccountName = 'az-automation-account'
    Name                  = 'az-automation-runbook'
    ResourceGroupName     = 'aa-rg-powershell'
    Type                  = 'PowerShell'
}
New-AzAutomationRunbook @params
Adding Code to the Runbook
You have successfully created a PowerShell runbook with PowerShell, but it doesn’t have any code. This section will teach you how to add code to the PowerShell runbook.
1. Open your code editor and create a new file called HelloWorld.ps1.
2. Copy and paste the following code into the code editor and save the file afterward.
Write-Output -InputObject "Hello PowerShell"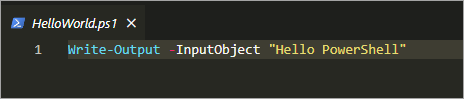
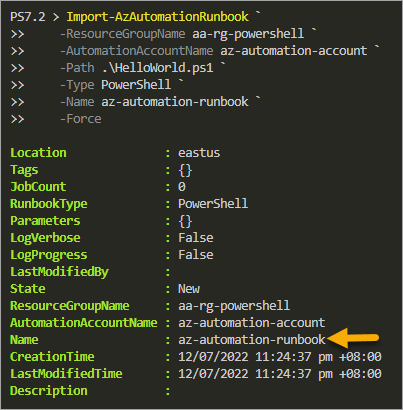
3. Now, import the PowerShell code into your Azure runbook by running the Import-AzAutomationRunbook command below. The command imports the code in HelloWorld.ps1 into the az-automation-runbook runbook.
The -Force parameter overwrites the existing runbook with the same name.
Import-AzAutomationRunbook `
    -ResourceGroupName aa-rg-powershell `
    -AutomationAccountName az-automation-account `
    -Path .\HelloWorld.ps1 `
    -Type PowerShell `
    -Name az-automation-runbook `
    -Force
The below screenshot shows a successful automation runbook import.
Publishing the Runbook
Unlike the graphical editor in the Azure Portal, there’s no Test pane equivalent in Azure PowerShell to test your Azure runbooks. The only way to start a runbook in PowerShell is to publish it first.
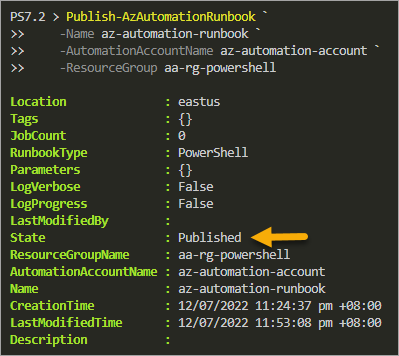
To publish an Azure runbook, run the Publish-AzAutomationRunbook cmdlet, as shown below. This cmdlet publishes the az-automation-runbook runbook.
Publish-AzAutomationRunbook `
    -Name az-automation-runbook `
    -AutomationAccountName az-automation-account `
    -ResourceGroup aa-rg-powershell
As you can see below, the runbook state is now published.
Publish-AzAutomationRunbook Starting the Runbook
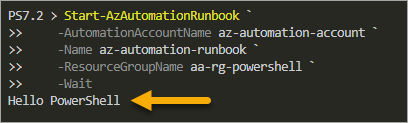
After you’ve successfully published the Azure runbook, run it by executing the Start-AzAutomationRunbook command below
Start-AzAutomationRunbook `
    -AutomationAccountName az-automation-account `
    -Name az-automation-runbook `
    -ResourceGroupName aa-rg-powershell `
    -Wait
Note: The -Wait switch causes the Start-AzAutomationRunbook to wait for the runbook to finish running before returning the result.
Automating with Azure Runbook: Stopping Azure VMs on Schedule
So far, you have created an Azure Runbook from scratch and added code to it using the Portal and PowerShell. Which method do you feel comfortable exploring?
In this example, you’ll create and configure a runbook that stops a selected Azure VM or all VMs in a resource group. But, instead of writing your own code, you’ll import an existing runbook from the Azure Runbook Gallery.
Note: This activity requires that you have at least one Azure VM running to be the target of the Azure runbook.
Importing an Azure Runbook from the Gallery
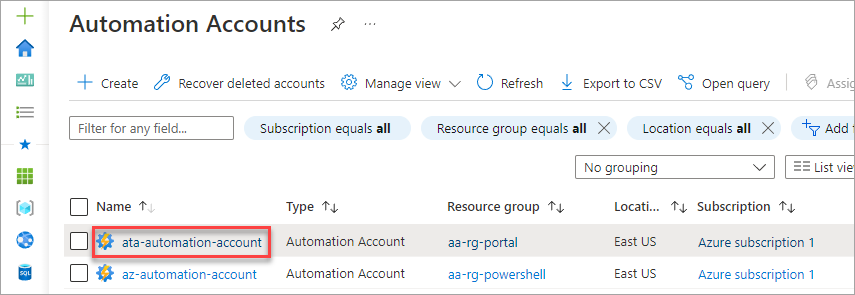
1. First, navigate to the Automation accounts blade in the Azure Portal.
2. You should see the automation accounts you previously created in the Portal and PowerShell. Click the ata-automation-account that’s in the aa-rg-portal resource group.
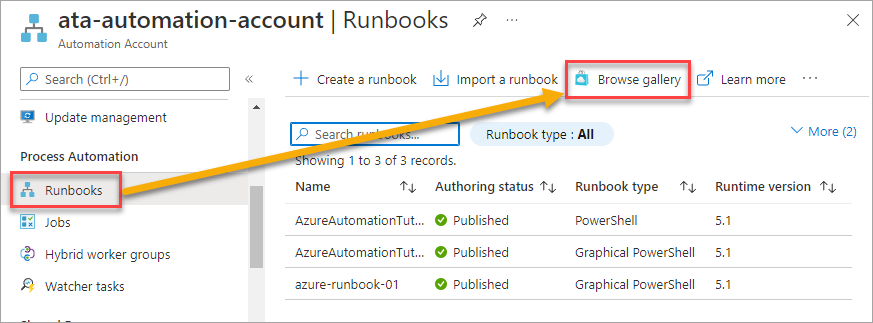
3. Click Runbooks → Browse Gallery.
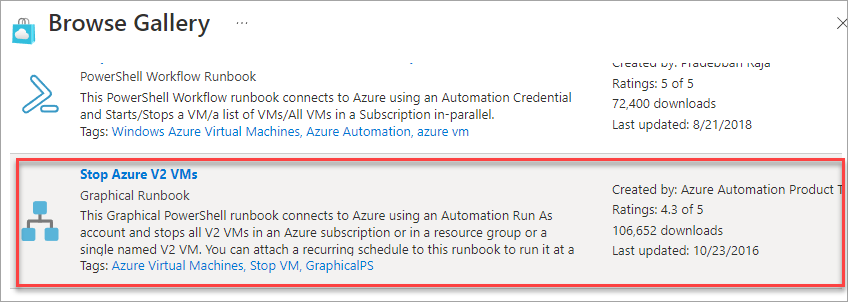
4. You’ll see many runbooks in the gallery, find the one named Stop Azure V2 VMs and click it.
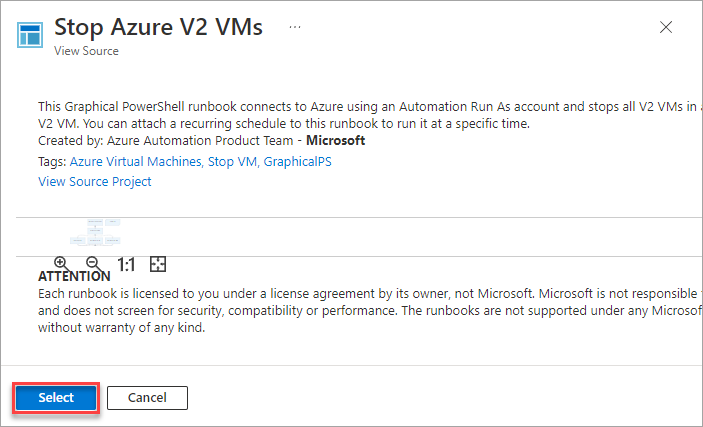
5. When the Stop Azure V2 VMs page opens, click Select.
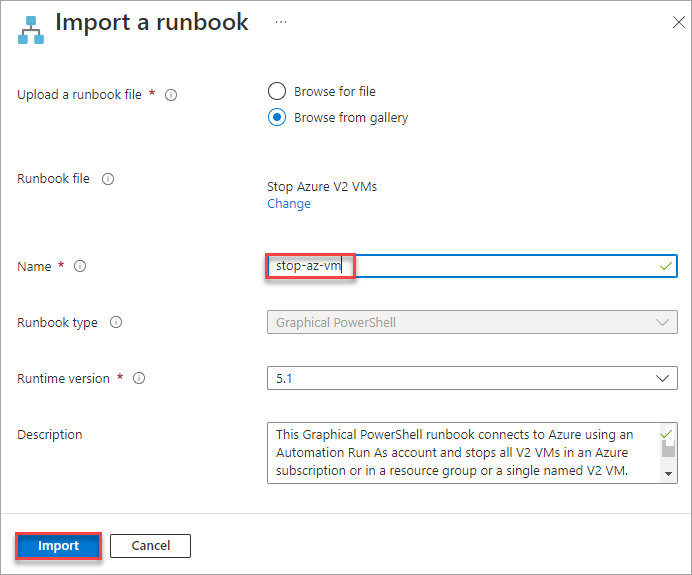
6. On the Import a runbook page, enter stop-az-vm as the runbook Name. Leave all other fields intact and click Import.
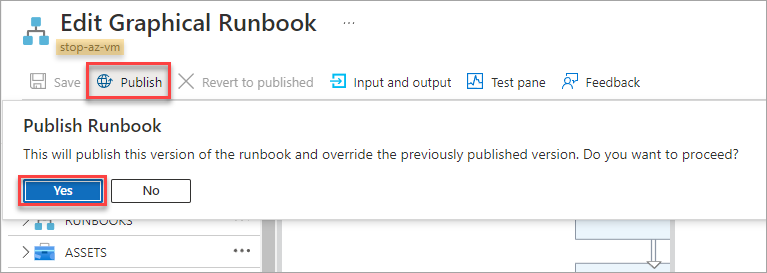
7. The runbook opens in the graphical editor automatically. At this point, you don’t need to make any changes yet. Click Publish, Yes, to publish this runbook version.
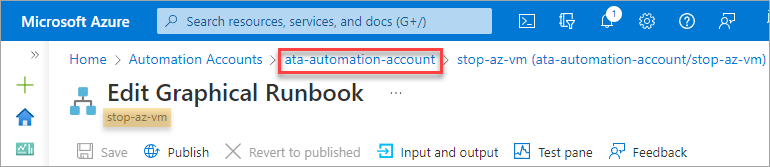
8. Click the Automation account link in the breadcrumbs to return to the automation account blade.
Creating the ‘Run As Account’
Your runbook involves a step to connect to Azure, which means there must be an account that has access to the target Azure resources, and here is where the Azure RunAsAccount comes in.
The RunAsAccount is a service principal in Azure Active Directory (AAD) with the required permissions. The Automation service creates and maintains this account for you—but first, you must create it.
1. Click the Run as accounts blade → Azure Run As Account.
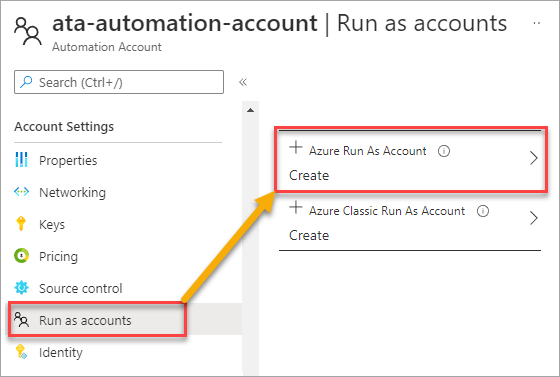
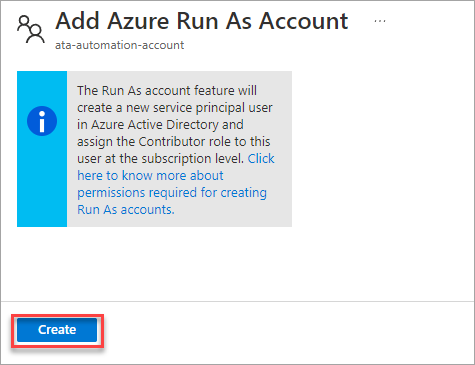
2. On the Add Azure Run As Account dialog, click Create.
3. Click on the new Azure Run As Account to view its properties.
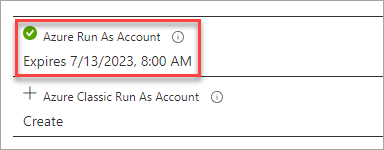
As you can see below, the Run As account also created other assets or shared resources in the automation accounts, such as Connection and Certificate. The Run As account is also tied to a service principal object in Azure that has a Contributor role to the subscription.

Note: The Run As Account expires based on the certificate expiration date. Click the Renew certificate button to renew the Run As Account along.
Adding a Schedule
To fully automate the task, the task has to run unattended at a specified interval. Suppose you require VMs to stop every Friday at 17:00; adding a schedule asset will help you achieve that goal.
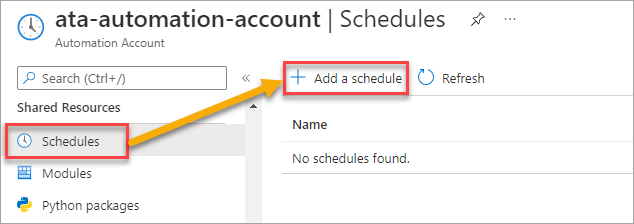
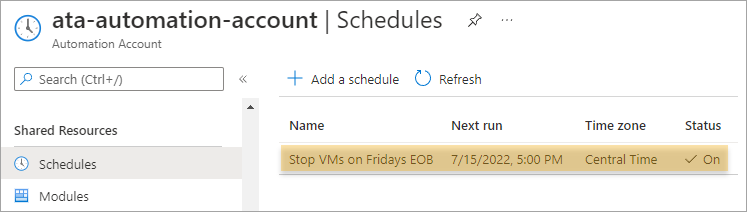
1. Under the Shared Resource, click Schedules → Add a schedule.
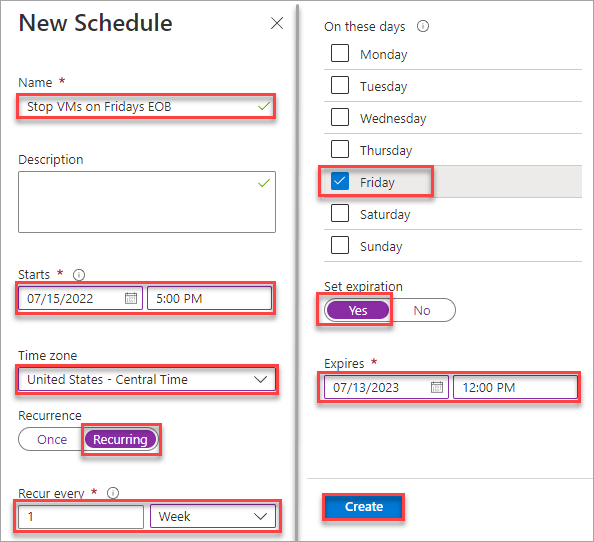
2. Next, configure the schedule as follows:
- Name: Stop VMs on Fridays EOB
- Starts: <date> <time>. This example sets the start date and time at July 15, 2022 5:00 PM.
- Time zone: Choose the appropriate time zone.
- Recurrence: Recurring
- Recur every: 1 Week
- On these days: Friday
- Set Expiration: Yes
- Expires: <date> <time>. Set the schedule expiration approximately one year from now.
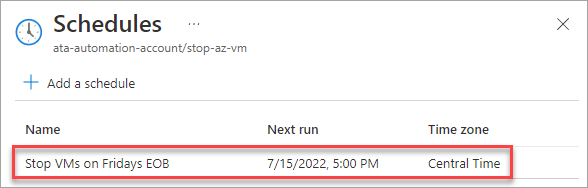
Once you’ve completed the schedule details, click Create.
You’ve successfully published a schedule inside your automation account.
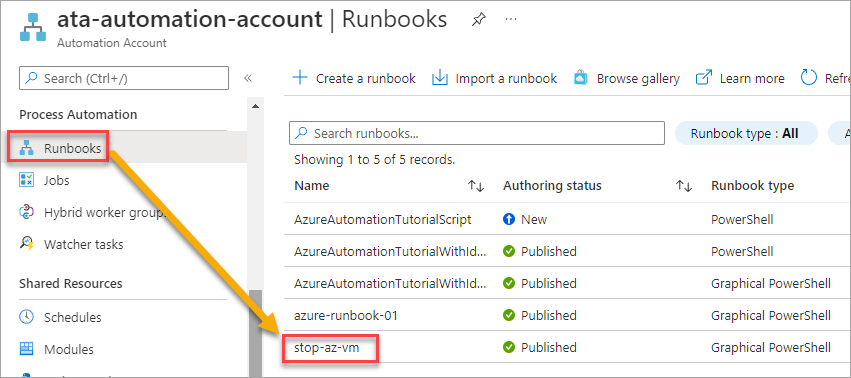
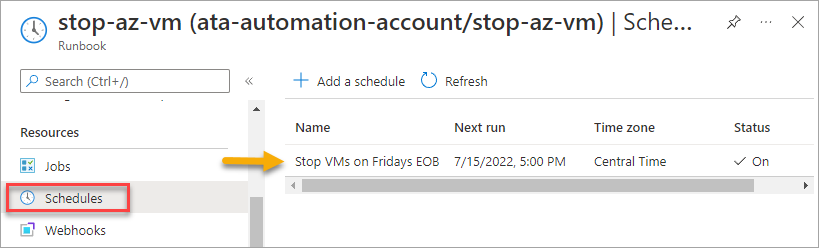
3. Now that you’ve created a schedule, you must link it to the runbook. To do so, open the runbook blade again by clicking on Runbooks → stop-az-vm.
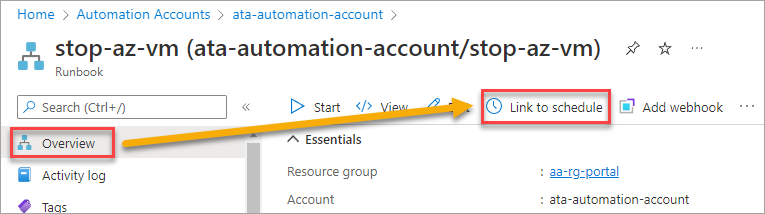
4. Next, click Link to schedule on the Overview blade.
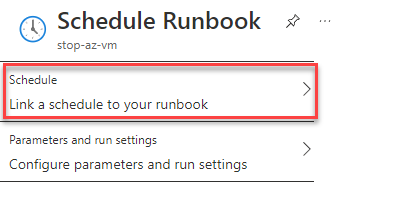
5. On the next page, click Schedule.
6. Click the Stop VMs on Fridays EOB schedule from the list.
7. Finally, click OK to finish linking the schedule to the runbook.
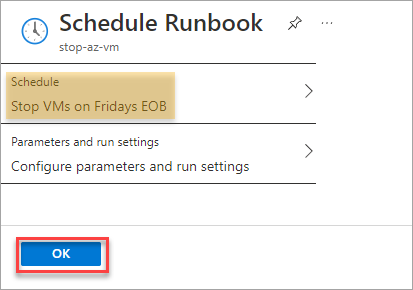
You’ve successfully linked the schedule to the runbook.
Running a Final Test
You’ve finished configuring the runbook and scheduled the job to run. But before you leave the runbook as it is, run a final test to ensure that the runbook works as expected.
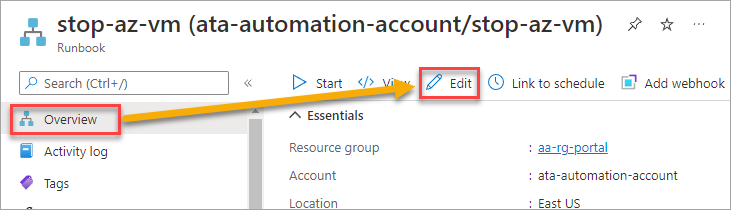
1. Click Overview → Edit to open the graphical editor.
2. On the graphical editor, click the Test pane.

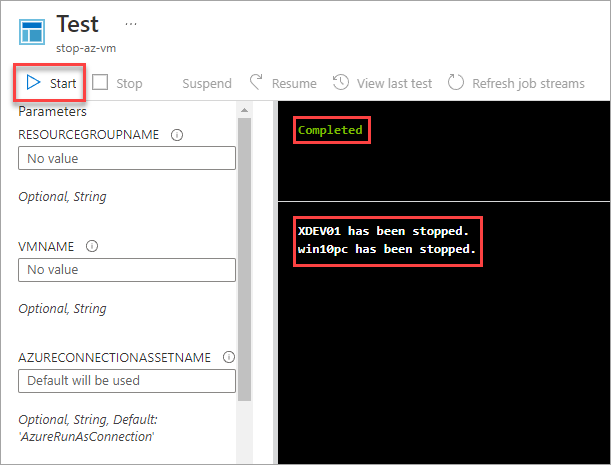
3. Do not change the parameters at this point and click Start. The runbook will connect to Azure and attempt to stop all running VMs inside the subscription.
To run against a specific resource group or VM, enter the resource group or VM name, or both.
As you can see below, the runbook stopped the two VMs in this Azure subscription.
4. Finally, close the test pane and the graphical editor.
Conclusion
In this article, you’ve learned how to create a Microsoft Azure Automation account and how to create runbooks using the graphical editor and PowerShell. You’ve also learned how to test your Azure Runbook to confirm that they are working as expected.
Runbooks lets you automate various tasks in Azure, such as VM creation, database backup, etc. Automation can save you time and money by automating repetitive tasks. Try creating your own runbooks to automate tasks in your Azure environment.