

Many companies use SharePoint to manage shared folders, documents, and lists between users/workers of an organization. But just because the files are stored in a public place online does not mean anyone should have full access to them. Granting the right SharePoint permissions will do the trick in controlling who can access what.
In this tutorial, you will learn how SharePoint permissions work to control the viewing and editing of folders, documents, or lists.
Read on and prepare to set boundaries with SharePoint permissions!
Prerequisites
This tutorial will be a hands-on demonstration. To follow along, be sure you have a Microsoft Office 365 account.
What are SharePoint Permissions?
SharePoint permissions allow you to handle users’ access to a SharePoint Site by assigning different permissions levels.
There are predefined sets in SharePoint Online which are suitable for most use cases. Below are the default ones:
| Permission Level | Description |
| Full Control | Users have full control of the site. |
| Design | Users can view, add, update, delete, approve, and customize. |
| Edit | Users can add, edit and delete lists; they can view, add, update and delete list items and documents. |
| Contribute | Users can view, add, update, and delete list items and documents. |
| Read | Users can view pages and list items, and download documents. |
| Restricted View | Users can view pages, list items, and documents; they can view documents in a browser but cannot download them. |
| Limited Access | Assigned to a user or group when sharing an item, where they can access the site and view the selected item. |
Creating a SharePoint Site
SharePoint’s structural base is a site, so everything in SharePoint is built on top of a site. All the different sections’ permissions under a site can be controlled by the site’s permissions.
By default, all SharePoint sites are created with the three security groups below:
- Owners – Have full control of site content, theme, permission and site settings, and hub associations.
- Members – Can edit and view site content, including files, pages, lists, and navigation.
- Visitors – Only have read permissions.
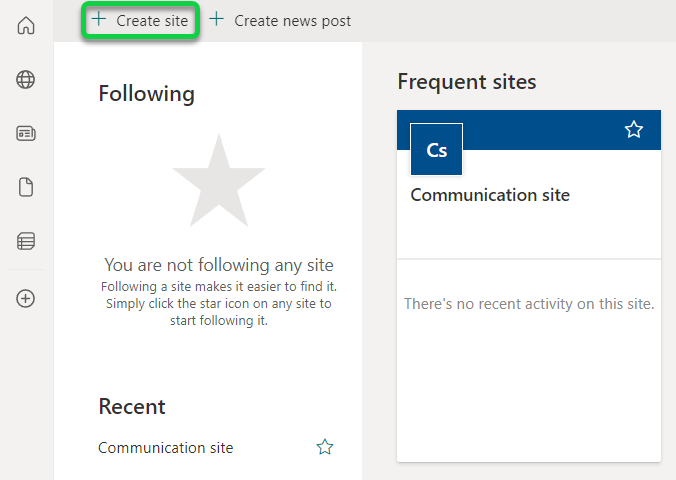
To see how SharePoint permissions work in action, you will first create a SharePoint site in this tutorial with the following steps:
1. Open your favorite web browser, and log in to SharePoint.
2. Next, click Create site (upper-left) on the SharePoint start page, which opens a pop-up wizard on the right (step three).
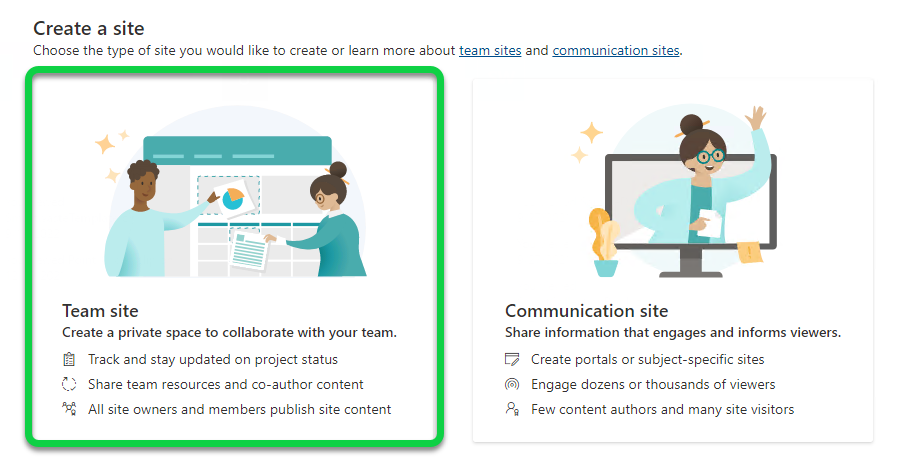
3. On the pop-up window, click Team site as the site type for your SharePoint site.
When creating a new SharePoint site, you usually have two options: a Team site or a Communication site. But note that SharePoint administrators also have other options to choose from.
4. Now, fill in the information for your site, and click Next to create your SharePoint site.
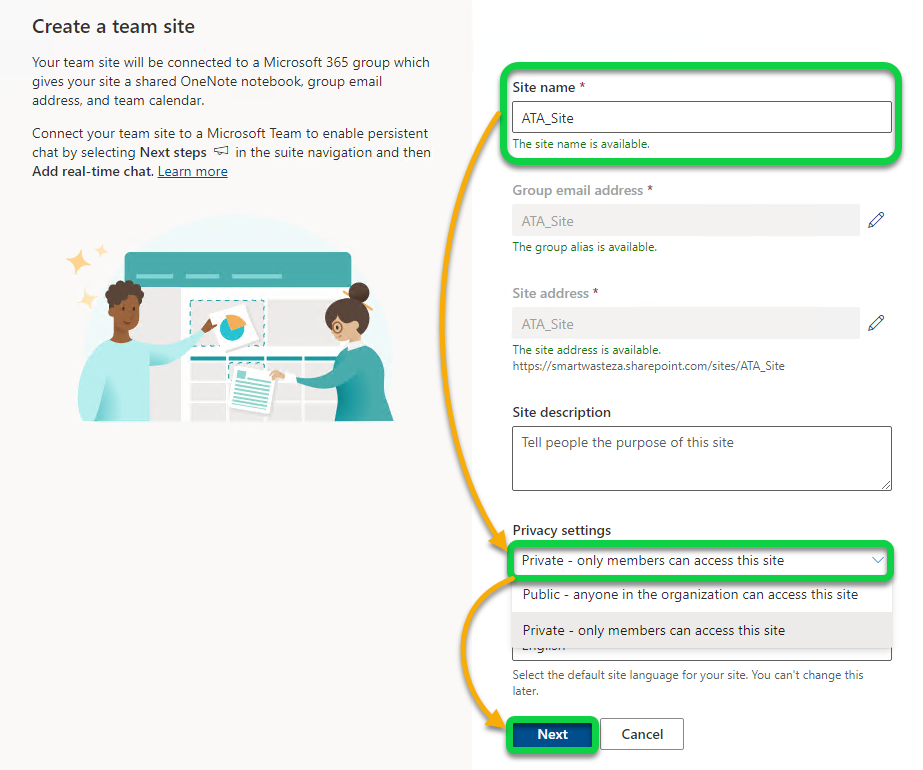
Depending on your Privacy settings choice, the following users will have permission to access the SharePoint site by default:
| User | Team Site (private) | Team Site (public) | Communication site |
| Owners | Only Selected users | Only Selected users | Only Selected users |
| Members | Only Selected users | Anyone in the organization | Anyone in the organization |
| Visitors | – | – | – |
Setting Default SharePoint Site Permissions
With your SharePoint site created, it is time to work on setting SharePoint permissions. SharePoint uses Security Groups to help handle permissions by assigning users to predefined permissions. Security Groups can be applied to individual documents or entire sites.
Site permissions let you create permissions for the whole site, which allows you to set the security setting at a site level, affecting all document libraries, lists, pages, and more.
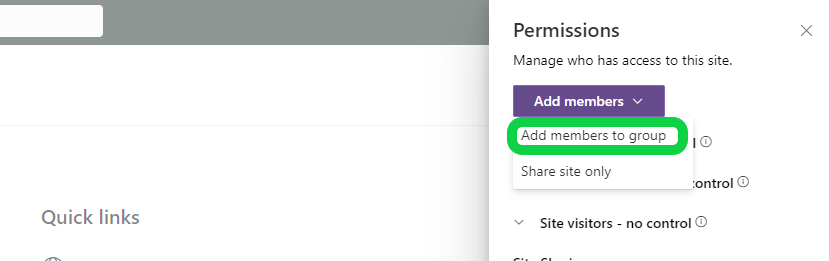
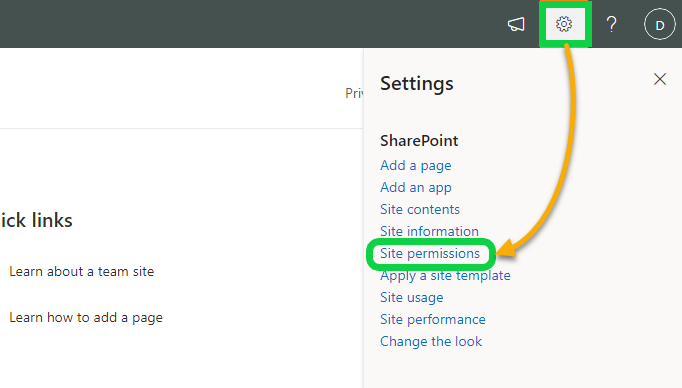
1. On your SharePoint site’s page, click the settings (gear) icon and select Site Permissions to view and make changes to the site permissions.

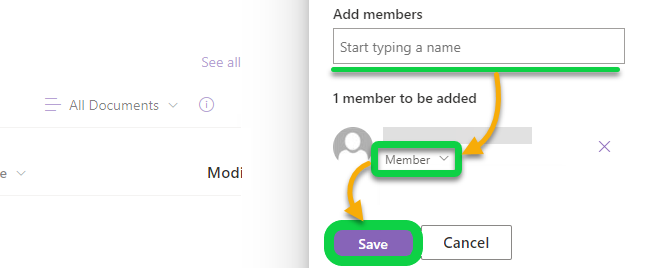
2. Next, click the Add members dropdown, and select Add members to group to choose adding members to a group.
3. Under the Group membership, click Add members to initiate adding members to the default permissions group.

4. Now, search for a user in the search bar. Once found, choose Member in the dropdown field, and click Save to add the user with assigned permissions.
Creating a Security Group for Customized Permissions
So far, you have learned to assign a user to SharePoint’s default permission groups. But can you customize permissions? Yes, SharePoint lets you create custom permissions for unique cases via Security Groups and Document Library Permissions. But for a start, you will work on creating your security group.
Permission levels can be assigned to individual users or a group of users in the same class. But when working with many users, the best way to handle permissions is to use security groups with predefined permissions.
To create a security group, follow these steps:
1. Open the settings menu and click on Site Permissions to view and make changes to the site permissions.
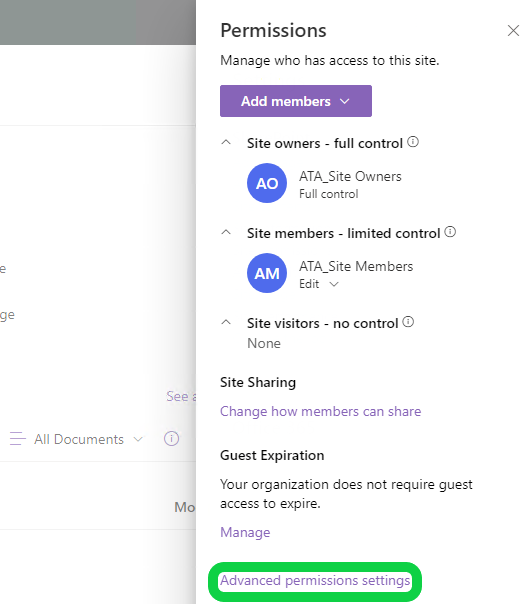
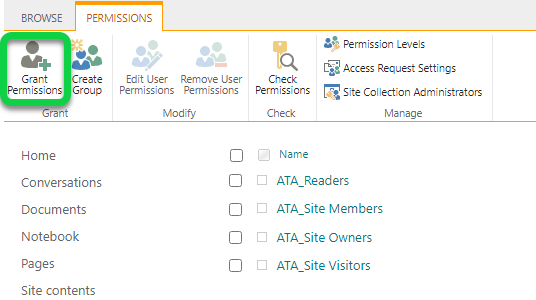
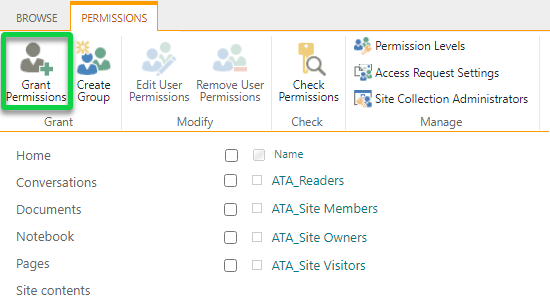
2. Next, click the Advanced permissions settings hyperlink to access the PERMISSIONS page, as shown below.
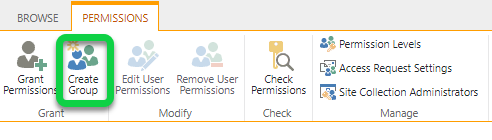
3. In the PERMISSIONS page, click Create Group to initiate creating a group.
4. Now, configure the group with the following:
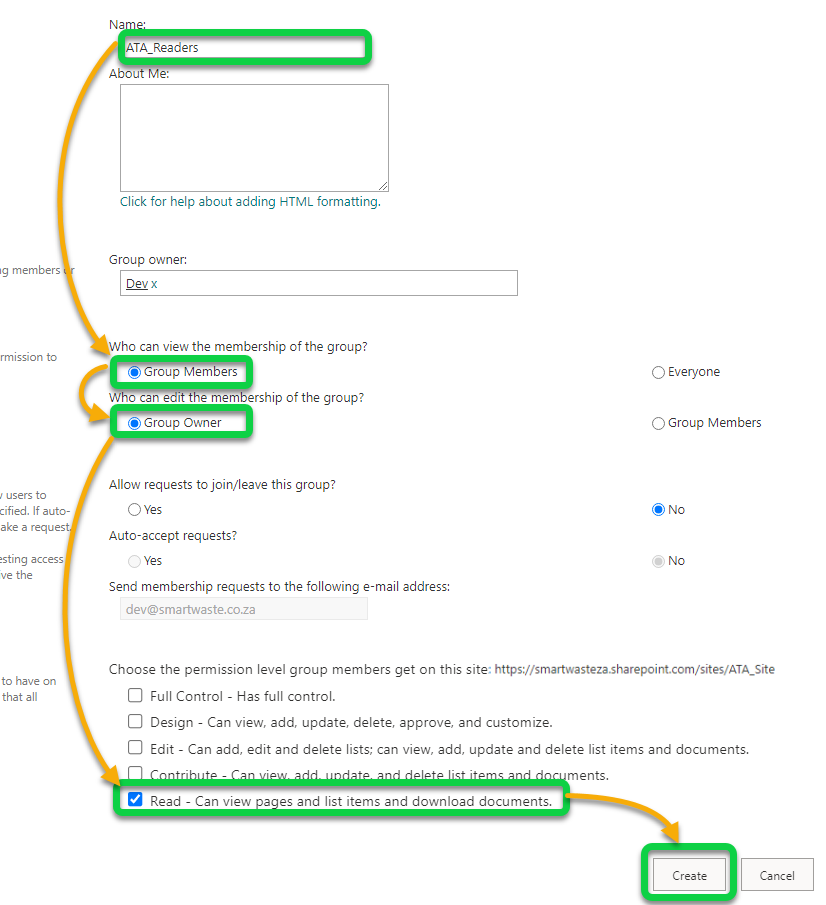
- Give the group a meaningful name (i.e., ATA_Readers).Select who can view and add members to the group. In this case, choose the Group Members and Group Owner options.Choose the permission level to assign to the group members. But for this tutorial, choose the Read view to grant the group read-only permissions.
5. After creating the group, go back to the PERMISSIONS page, and click Grant Permissions to assign users to your newly-created security group.
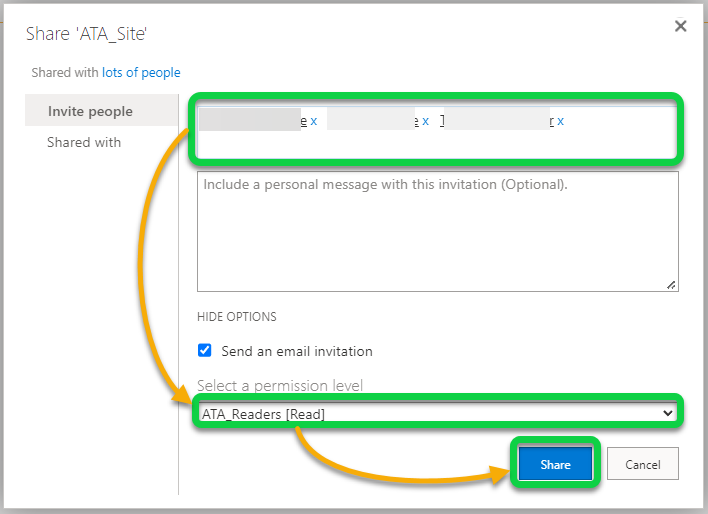
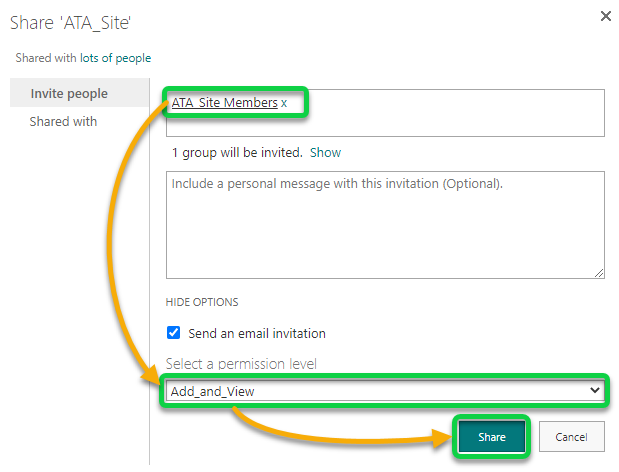
6. On the pop-up window, share the site as follows:
- Search and select the users or groups to share the site.
Each group can be assigned one or multiple permission levels.
- Choose the newly-created permissions group as the permission level.
- Click Share to share the site with selected users with restricted permission set in the permissions level.
Setting Document Library Permissions
When site-level permissions are not suitable for your situation, setting permissions on the document library or lists in SharePoint will do the trick.
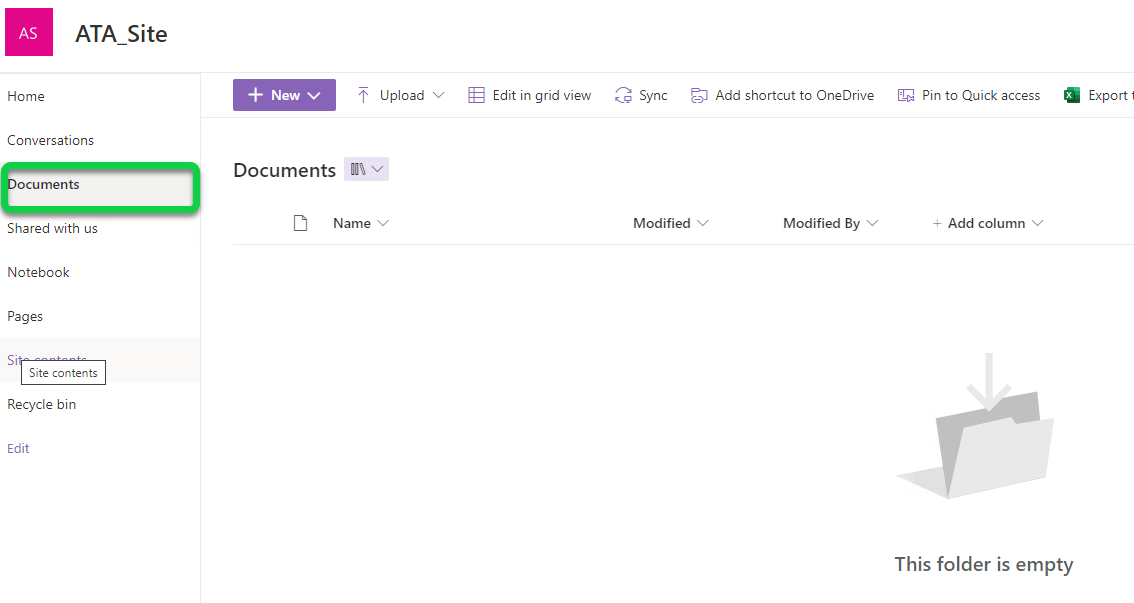
To change permissions on a document library, you first need to open the library:
1. Navigate to your site’s Documents page to access more SharePoint settings.
2. Next, click the settings (gear) icon, and choose Library settings.
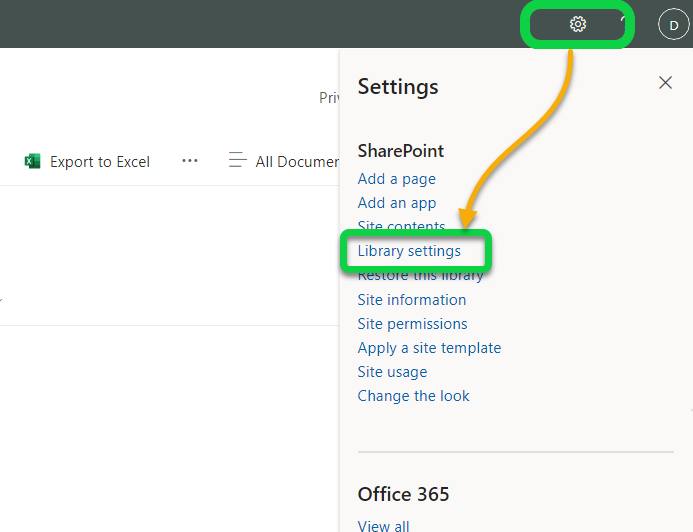
3. Under the Library settings, click the More library settings hyperlink.

4. Now, click the Permissions for this document library hyperlink to access the PERMISSIONS page for this specific document library.
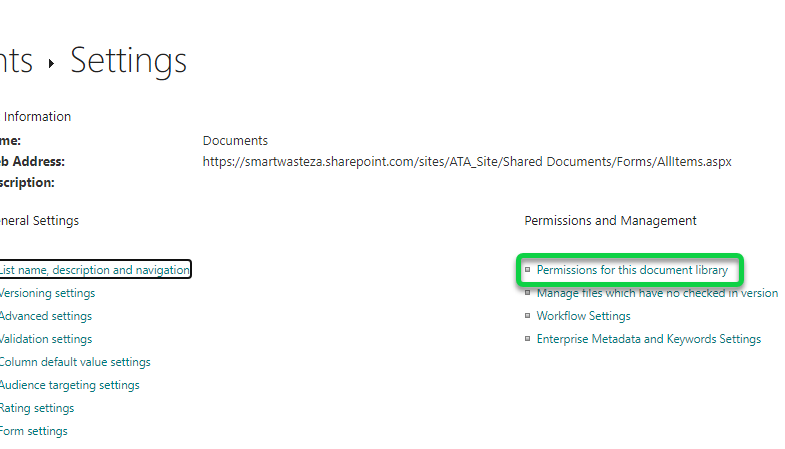
5. Finally, click on Stop Inheriting Permissions to stop inheriting permissions from the parent. Doing so copies all existing permissions to the document library, making them unique.
💡 Remember that changes made at the site level later are not applied to this document library after you stop inheriting.
At this point, you can now modify the permissions as you did at the site level. You can add a custom security group, grant additional permissions to users or groups, or change the permission level of the existing groups.

Creating a Custom SharePoint Permission Level
At this point, you already know how to play around with the default permission levels. But what if those default ones do not fit your organization’s security requirements?
Worry not. In SharePoint, you can create custom permission levels for total control of the site permissions.
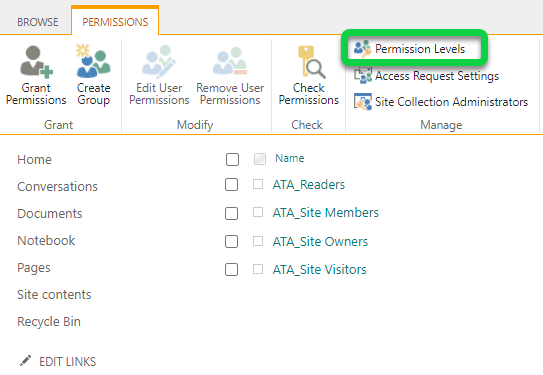
1. Navigate to the Advanced permission settings as you did in step two of the “Creating a Security Group for Customized Permissions” section.
2. Next, click Permission Levels in the PERMISSIONS ribbon tab to access all permission levels.
3. On the Permission Levels page, click Add a Permission Level to initiate adding a new permission level.
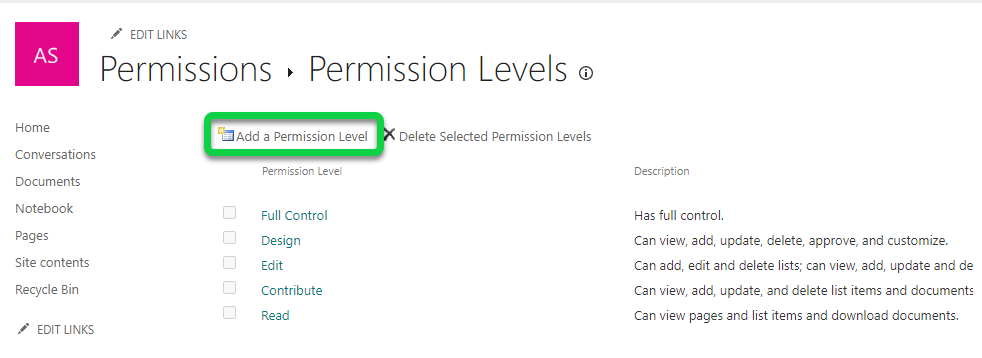
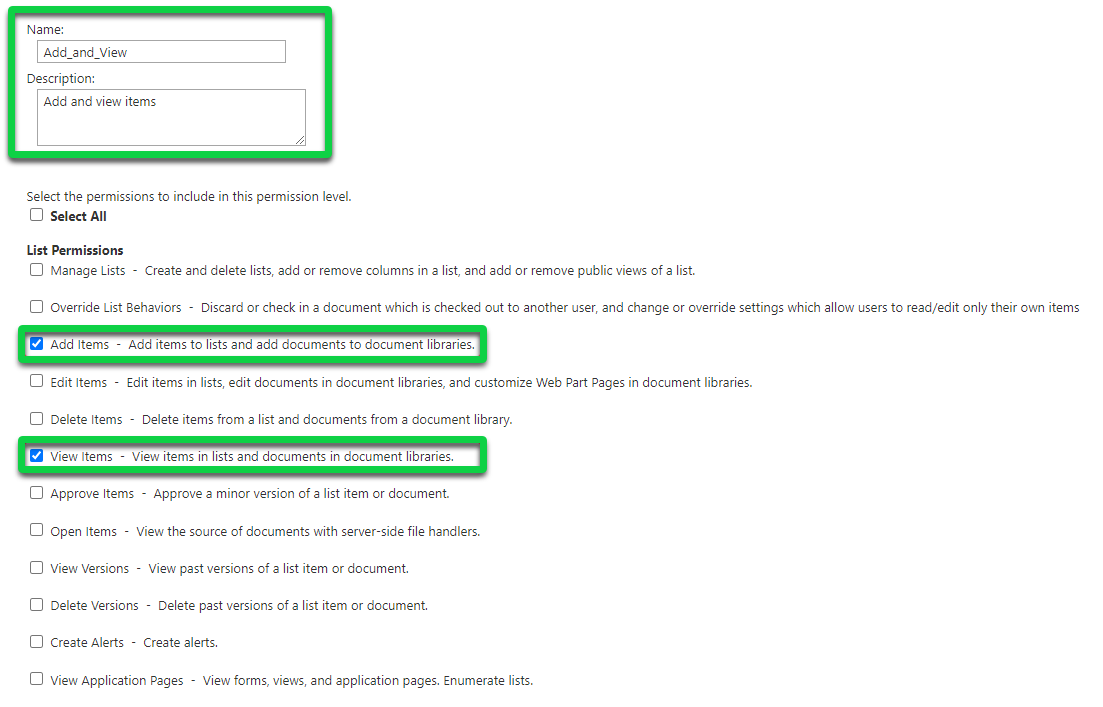
4. Now, provide a Name, Description for the permission level.
Once provided, tick the Add Items and View Items boxes to allow users to add and view documents only.
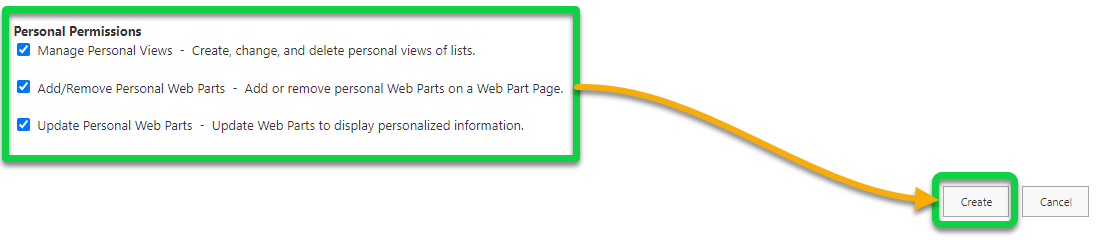
5. Lastly, tick all Personal Permissions, as shown below, to give the user personal permissions, and click Create (bottom-right) to create the new custom permission level.
At this point, you can now apply this custom permission level to your documents.
Assign a Custom Permission Level to Users
After creating a custom permission level, you can now assign a user to the permission level. How? Depending on whether you are working on a Microsoft 365 group site, assigning a user to a custom-level permission can be achieved differently.
Non-Microsoft 365 Group sites
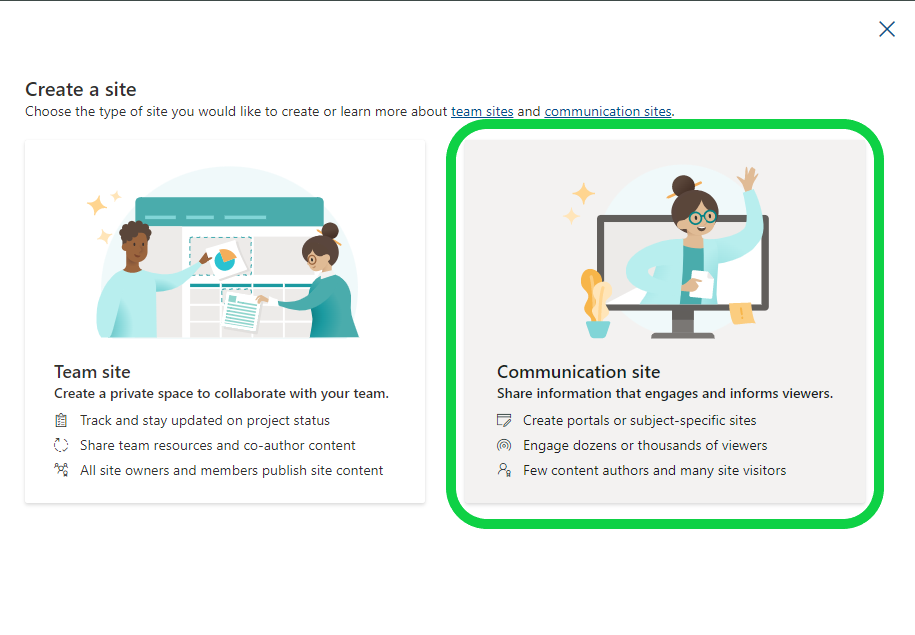
Non-Microsoft 365 group sites include classic SharePoint sites, Modern Team Sites without a Group, or Communication Sites. But for this tutorial, you will create a Communication Site.
1. Initiate creating a new SharePoint site. But this time, choose the Communication Site.
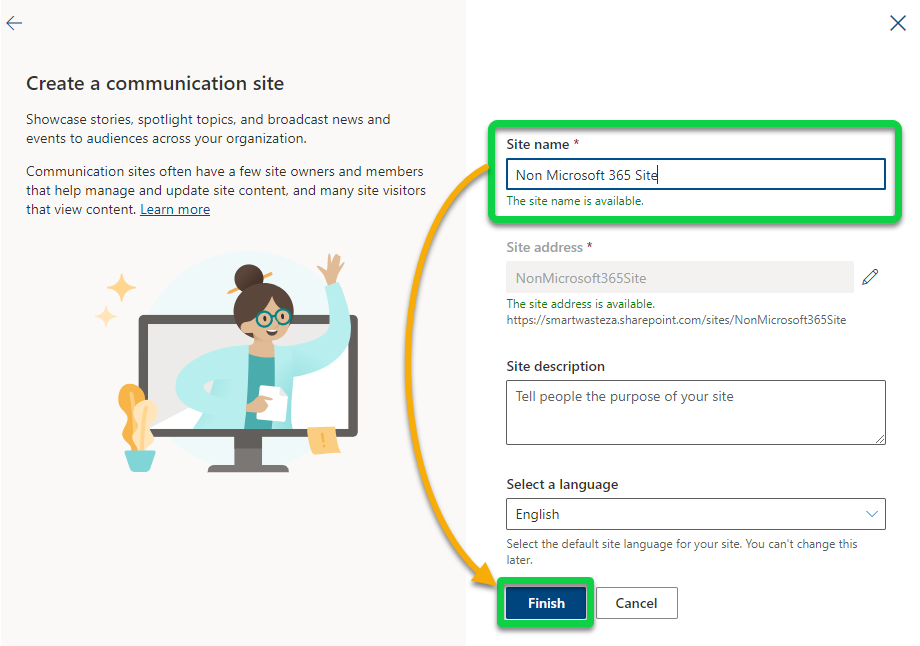
2. Next, name your site and click Finish to create the Communication Site.
3. After creating the site, navigate to the Advanced permissions settings.
4. Under the PERMISSIONS tab, tick the Members checkbox, and click Edit User Permissions to edit user permissions for the site.
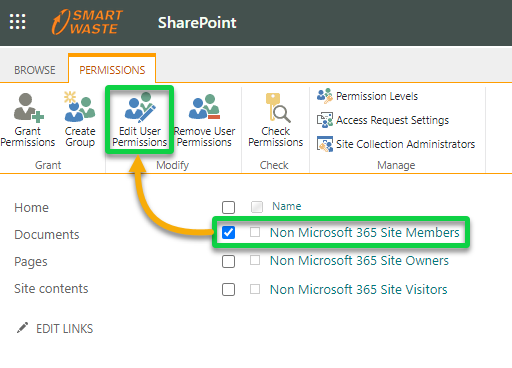
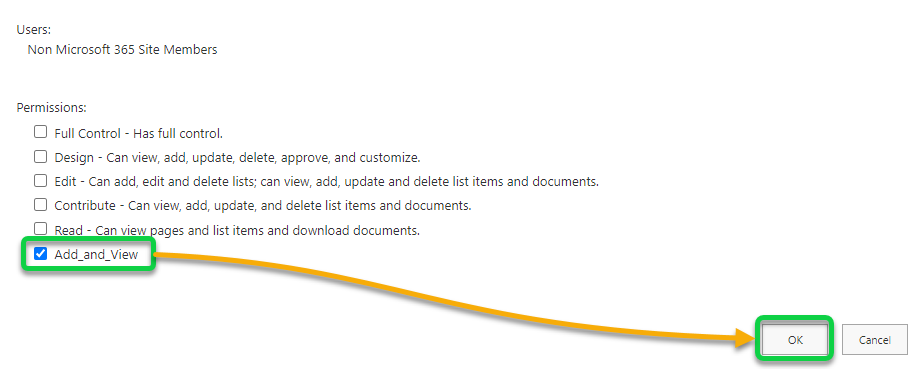
5. Tick the custom permission level box (Add_and_View), and click OK to assign the permission level.
Microsoft 365 Group sites
Since this tutorial involves a Microsoft 365 group site, you will also see how to assign custom-level permission to Microsoft 365 group sites.
1. On the Advanced permissions setting, tick the Microsoft 365 group.
Notice below that the Edit User Permissions option is disabled, so jump to the next step to edit user permissions.
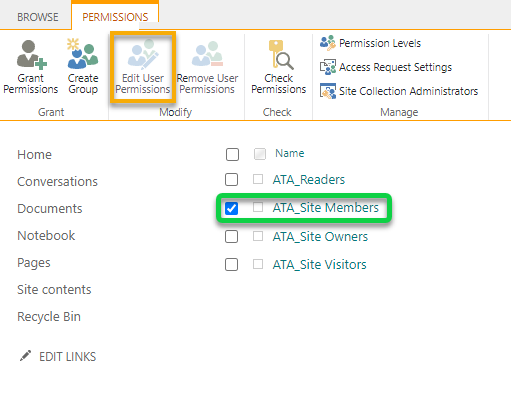
2. Navigate to the Site Permissions screen, and change the ATA_Site Member’s group permissions from Edit to Read. Doing so removes the group from the Site members permissions.

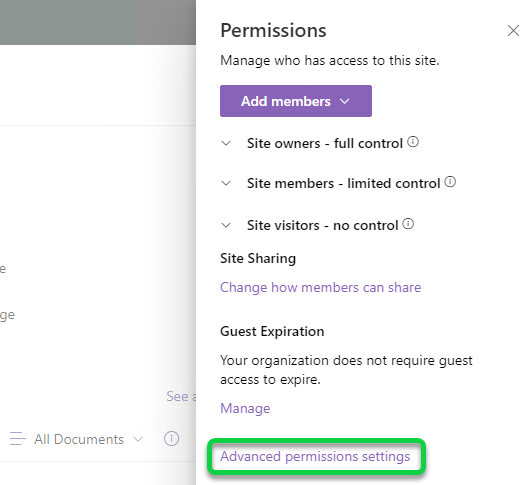
3. Once changed, click on Advanced permissions settings to access the PERMISSIONS page one last time.
4. Now, click on Grant Permissions to initiate granting permissions to users.
5. Finally, add the ATA Site Members back to the site, but now with the Add_and_View permission level selected.
And that is all! You have changed the site permission level from default to the custom one you created.
Conclusion
Setting up SharePoint permissions is critical when working with sensitive data. And in this tutorial, you have learned to set different SharePoint permissions to better control who can access what. You have seen the best option to keep a good overview of permissions is to group users and treat permissions per groups rather than individuals.
With this newfound knowledge, why not tighten security for your shared folders? Perhaps create a group for top management, and set them as groups with permission to view the folder’s content?