Do you want to run Jenkins in Docker but unsure whether to use volumes or keep the data containerized? If Jenkins is containerized, how do you backup the data? Do you need to back up the entire container? Can information persist outside the container, and how? Using Docker Compose with volumes could help you ensure that your Jenkins data be safe even if the Docker container broke.
Apart from backing up data, using Docker volumes allows you to also share Jenkins data between multiple containers.
Keep on reading because, in this article, you will learn how to run Jenkins in Docker and Docker Compose. You’ll learn how to find and potentially backup the Jenkins data inside and outside the Docker container.
Requirements
There will be a lot of learning examples in this article. If you’d like to follow along, you will need:
- A computer with Docker and Docker Compose installed. The demos in this article are done in Ubuntu Server 20.04. You may use Docker on Windows or macOS if you’d prefer.
This article does not cover how to install and setup Docker and Docker Compose. You may refer to the official Docker documentation. The ATA blog also has many articles related to Docker that you may also want to read.
Running Jenkins in Docker
To run a Jenkins in Docker, you first need to pull the image from a repository. In this example, the Jenkins image is pulled from Docker Hub. You have the option to download the image first before creating a container. Or you can also run a container and let Docker download the image on the fly.
The command below will run a Jenkins container using the docker run command. The --name [NAME] option is where you assign a name for the Docker container. If the container name is not specified, Docker assigns a random name to the container.
The -p [host-port:container-port] option means to expose the port or ports inside the container to your host computer. In the code below, the ports 8080 and 50000 are exposed to the Docker host using the same port numbers.
Lastly, jenkins/jenkins:lts means that the container to run will use the jenkins:lts Docker image from the Jenkins repository. You may change the values name and host port numbers if needed, but do not modify the container port numbers.
Please copy the code below and run it in your terminal.
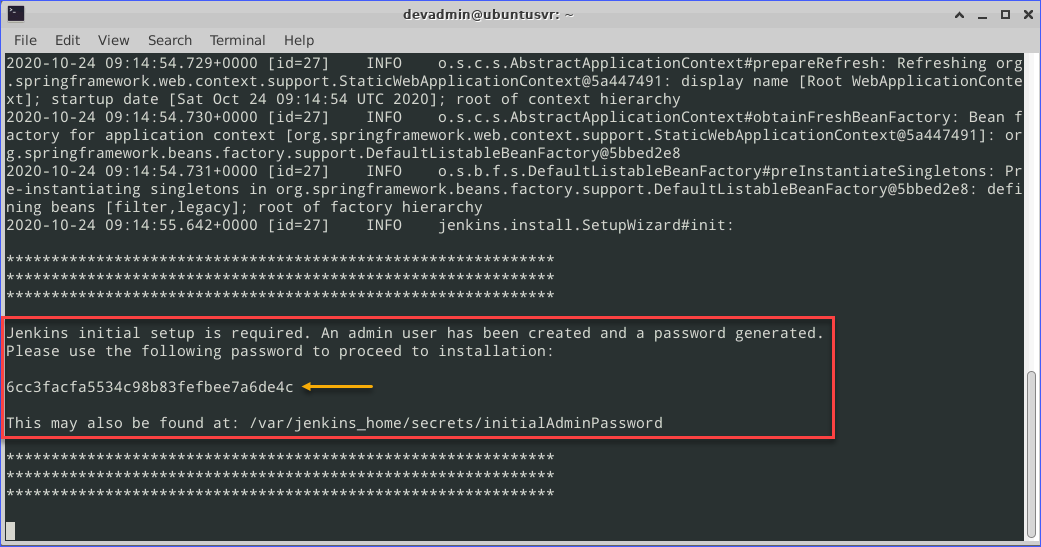
docker run --name my-jenkins-1 -p 8080:8080 -p 50000:50000 jenkins/jenkins:ltsAfter running the command above, Docker starts to create a new container. Once the Jenkins container is running, take note of the initial admin password displayed on the terminal. The admin password is needed during the Jenkins initial setup.
Completing the Jenkins in Docker Initial Setup
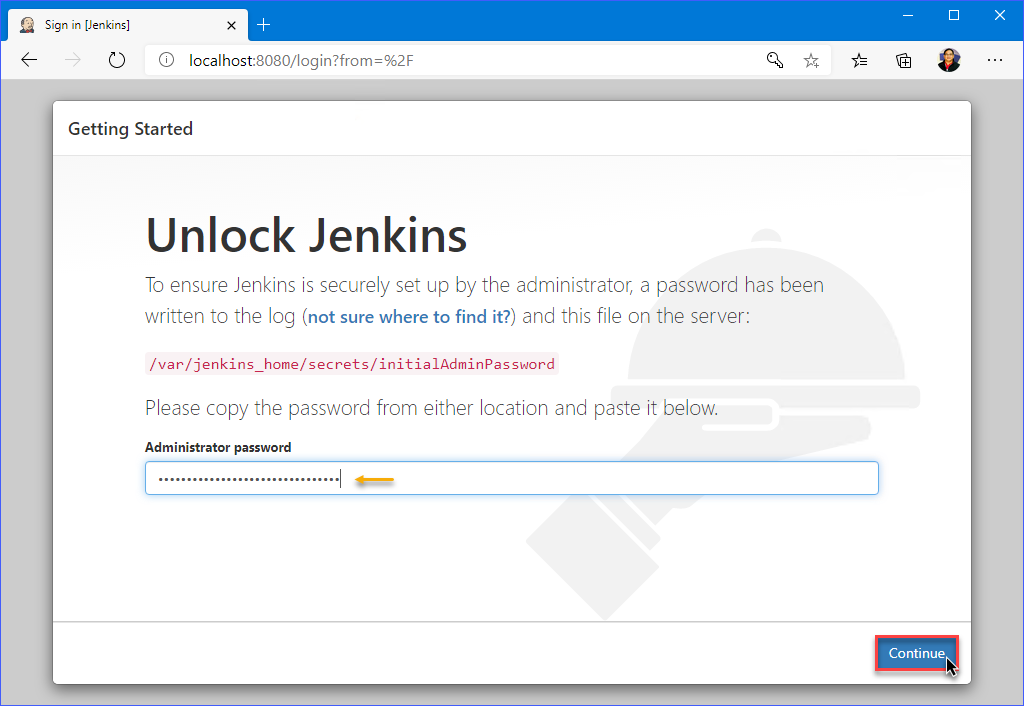
After the Jenkins container entered the running state, you can now access the Jenkins admin page. If you remember from the command you used to create the container, the port number is 8080. So to access the Jenkins instance, navigate to HTTP://localhost:8080.
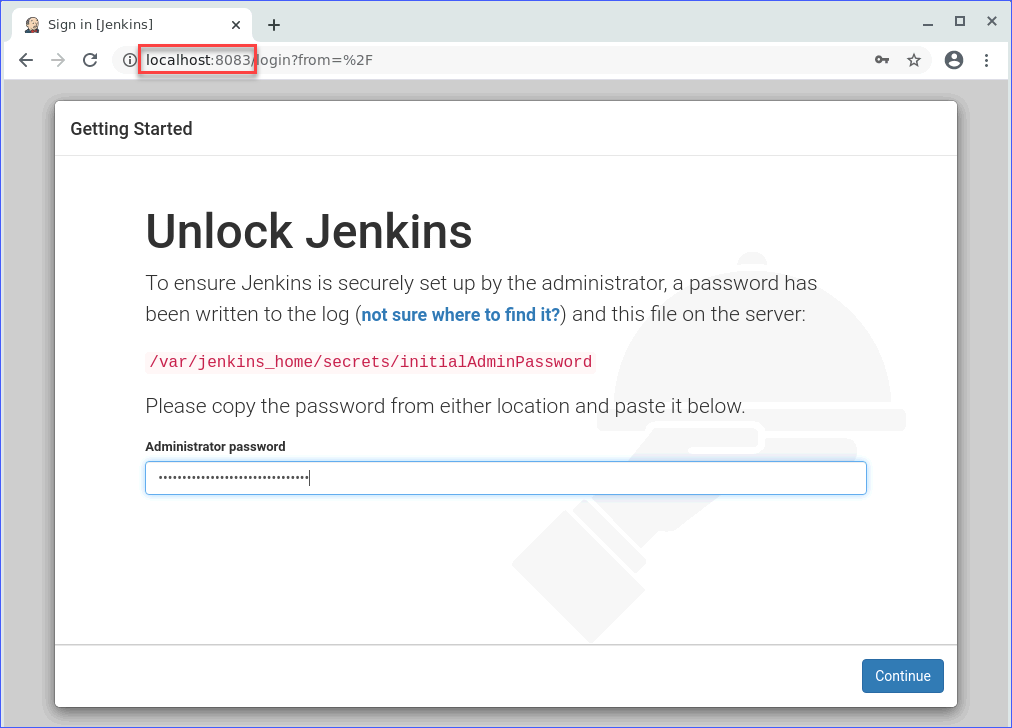
As you can see below, the Unlock Jenkins page requires you to enter the initial admin password. You should have copied the initial admin password previously. Enter the password in the Administrator password box and click on Continue.
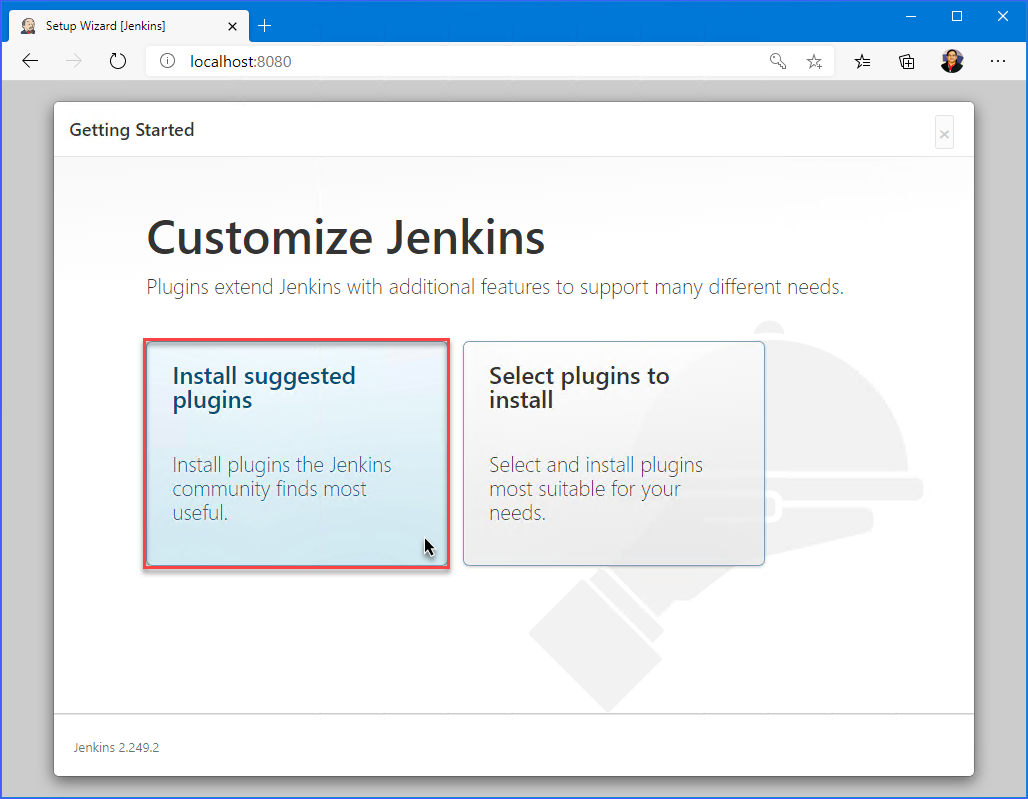
On the Customize Jenkins page, you’ll have the option to Install suggested plugins. These suggested plugin are the plugins that the Jenkins community typically install. If you have a pre-selected set of plugins to install, choose the Select plugins to install option.
For simplicity, the Install suggested plugins is the selected option for this example.
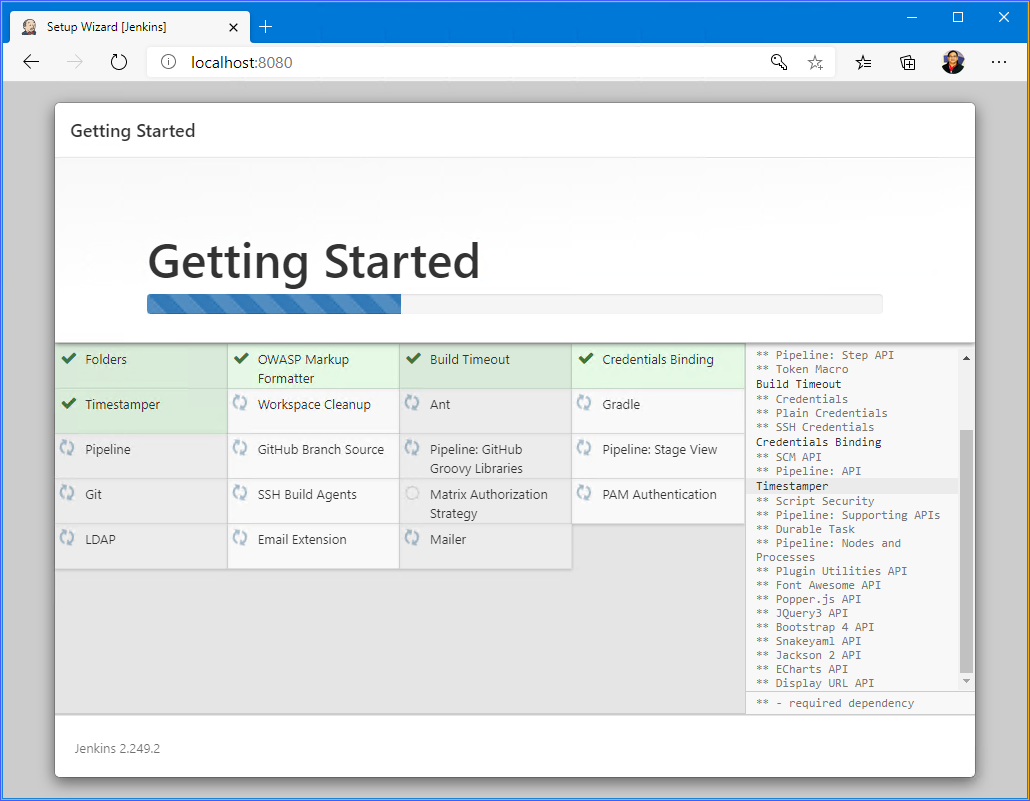
The plugins will be installed, and you can only wait until the installation is finished. As you can see below, there are fourteen (14) suggested plugins being installed. The number of recommended plugins may increase or decrease over time. By the time you installed your Jenkins in Docker, the suggested plugins may already be different.
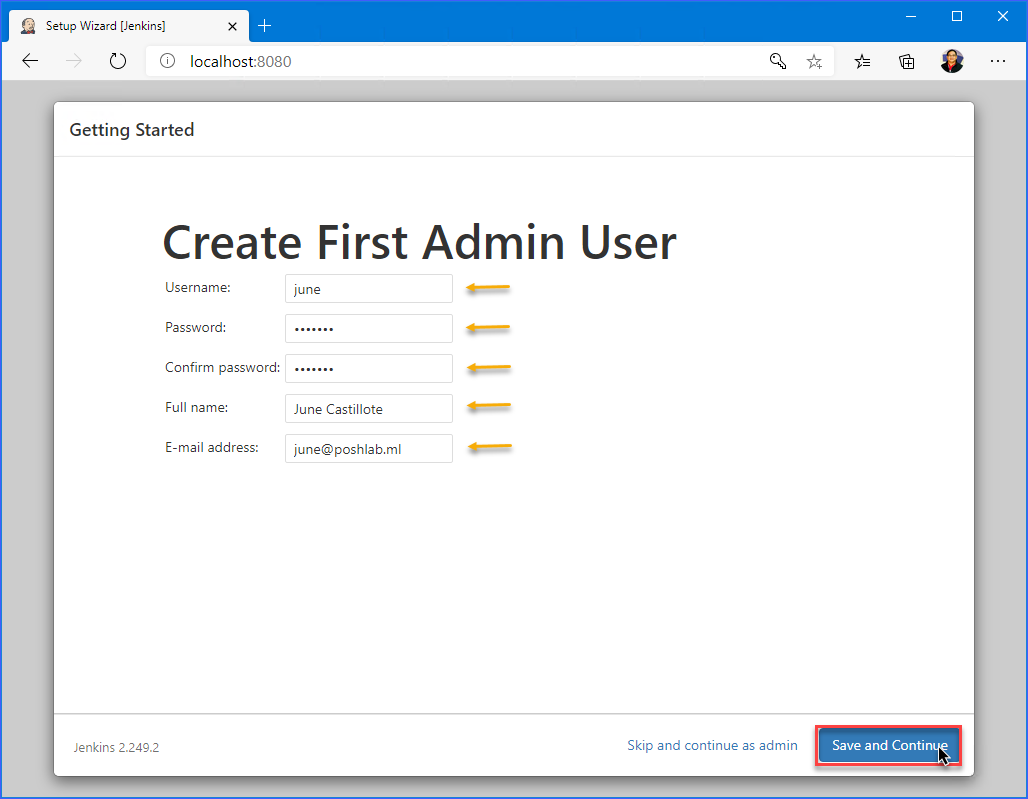
Immediately after the plugins’ installation finished, you will see the Create First Admin User page. This page is where you will create the first Jenkins administrator account. Fill in all the boxes as required and click on Save and Continue. Make sure to remember the administrator credential you have just created.
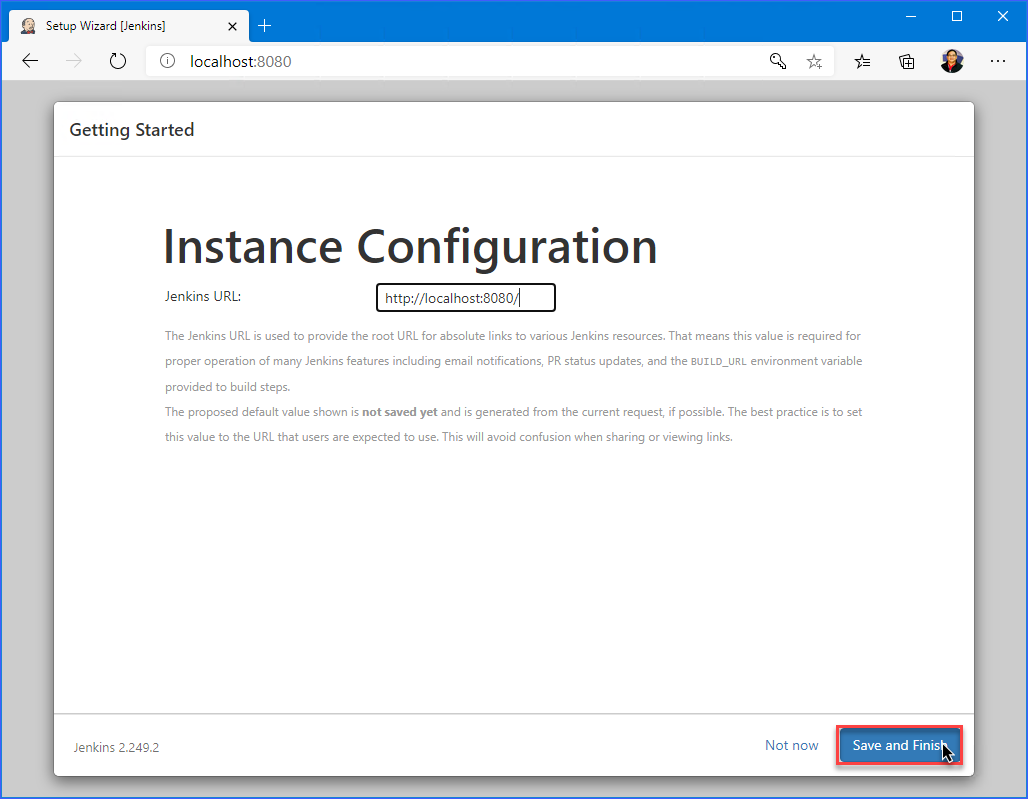
On the Instance Configuration page is where you can change the Jenkins admin page URL. The URL value would typically be the actual URL that will be accessed by the Jenkins users. For this example, leave the default value of http://localhost:8080 and click on Save and Finish.
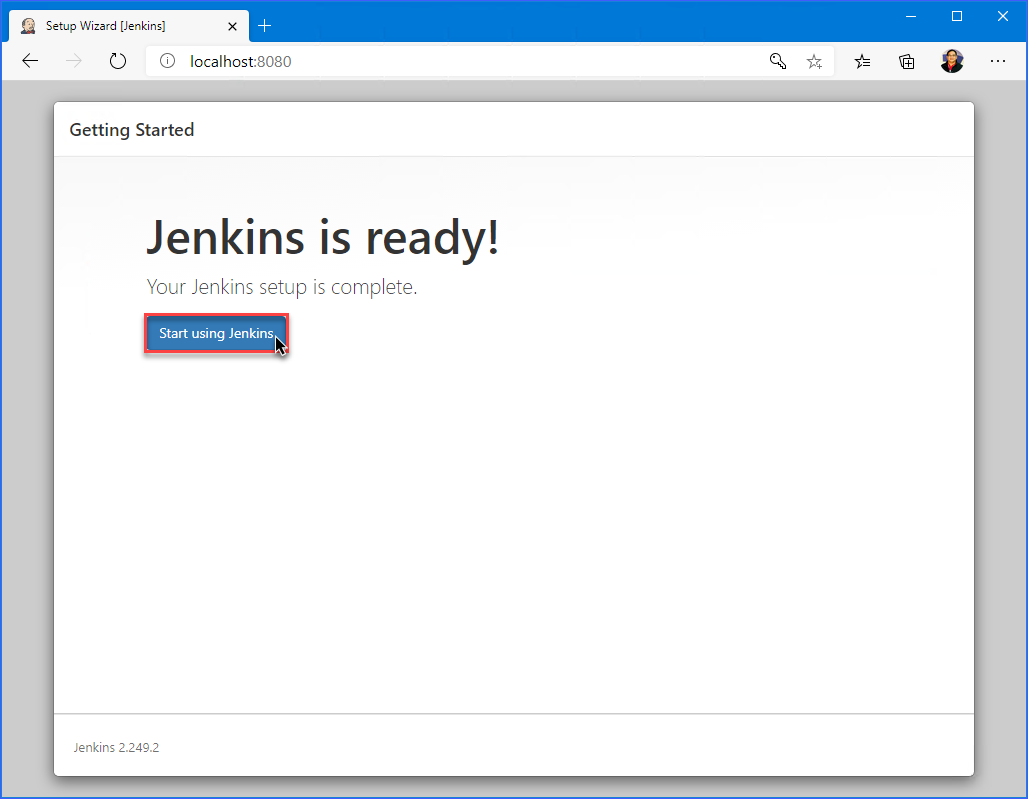
On the final setup page, you will see the confirmation that the Jenkins in Docker setup is complete. Click on Start using Jenkins.
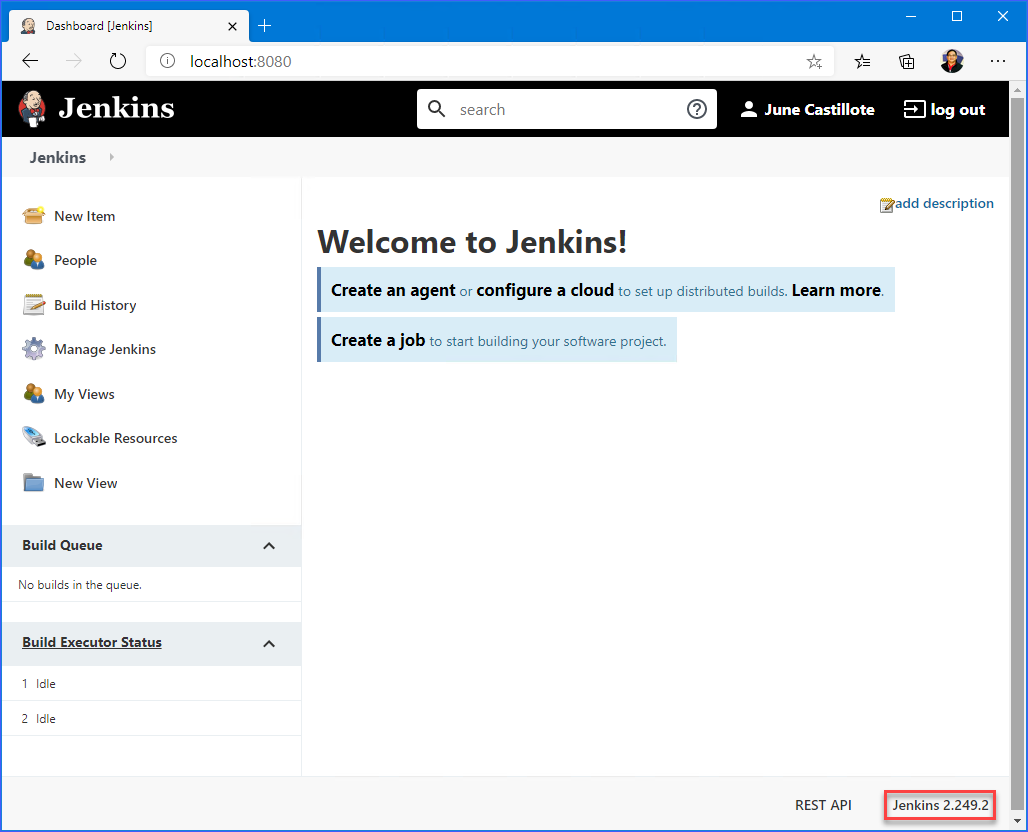
When you see the Welcome to Jenkins page, as shown below, then you’ve completed the Jenkins installation. At this point, you can start configuring Jenkins in Docker and creating new items or projects.
Finding the Jenkins Data in the Container
In the previous section, you created a Docker container to run an instance of Jenkins. Docker containers, just like everything else on a computer, may break. If the container becomes unavailable for some reason, then the Jenkins data is gone too.
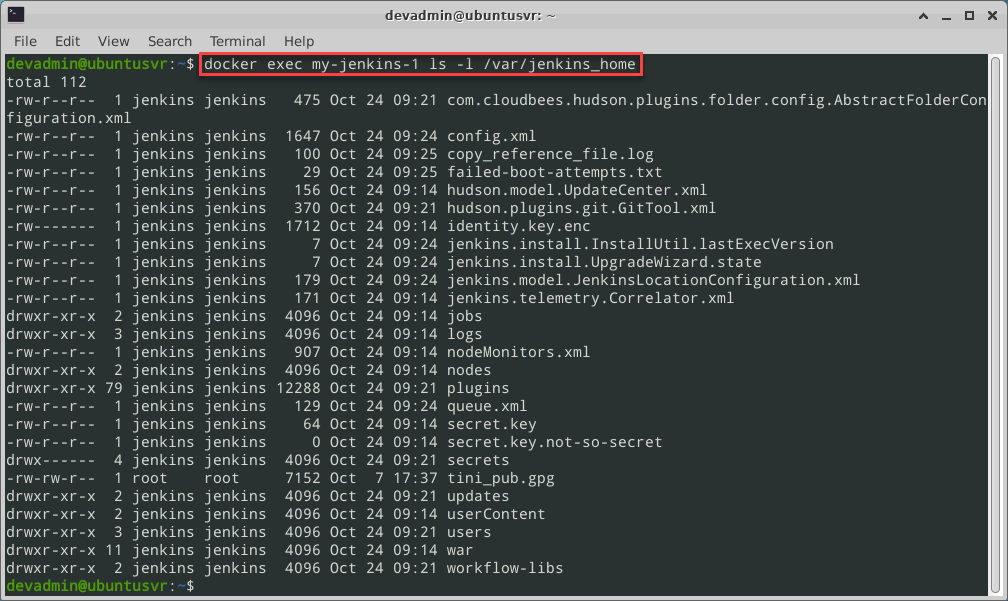
To better understand the Jenkins data placement, the code below uses the docker exec command to list the contents of the /var/jenkins_home. The Docker container name in this example is my-jenkins-1.
docker exec my-jenkins-1 ls -l /var/jenkins_homeYou can see below the result of running the command above. The contents of the /var/jenkins_home directory are listed. The /var/jenkins_home directory contains the settings, users, plugins, and other critical items.
Backing Up the Jenkins Data from the Container to the Host
At this point, you’ve confirmed that the Jenkins data is found inside the container. You should copy the Jenkins data from the container to the host. And once the Jenkins data is out of the container, you can then take a backup.
It is a good thing that Docker has built-in support for copying files between the Docker container and the Docker host. Using the command docker cp <container id>:/path/in/container /path/in/host
The example below uses the docker cp command to copy the my-jenkins-1 container’s data to a Docker host location. Note that the container doesn’t even need to be running to execute this command successfully.
docker cp my-jenkins-1:/var/jenkins_home ~/jenkins_backup
The demo below shows the command above in action. As you can see, the destination directory is automatically created by the command.

Now that you’ve extracted the Jenkins data from the container, you can perhaps compress and archive the entire folder. You may need to do the same task every time you make changes to Jenkins.
Running Jenkins in Docker with Volume Mount
To make your Jenkins data persistent and consistent outside of the Docker container, you should use a Docker volume.
As explained in the previous section, the Jenkins configuration files are located inside the Docker container at /var/jenkins_home. To ensure that the Jenkins files are saved outside of the container, you can use the -v option with the docker run command.
The code below will create a new Docker container with the name my-jenkins-2. The ports 8080 and 50000 will be exposed to the host. Additionally, the /var/jenkins_home directory inside the Docker container will be mounted as a volume on the host as jenkins_home.
docker run --name my-jenkins-2 -p 8080:8080 -p 50000:50000 -v jenkins_home:/var/jenkins_home jenkins/jenkins:lts
After running the command above, the new Docker container should be created and enter the running state. You can confirm that the container is running using the docker ps command.

Listing all running containers
Finding the Jenkins Data on the Docker Host
So, where’s the Jenkins data folder now? Based on the command you used to create the my-jenkins-2 container, the mounted volume is jenkins_home. To know where in the filesystem is the jenkins_home location can be found, use the docker volume command.
The command below will display the details of the jenkins_home volume on the Docker host.
docker volume inspect jenkins_home
The screenshot below shows the information about the jenkins_home volume as the result of running the command above.
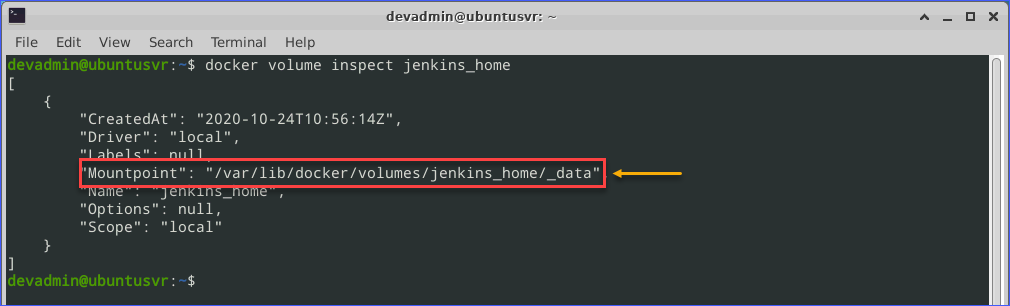
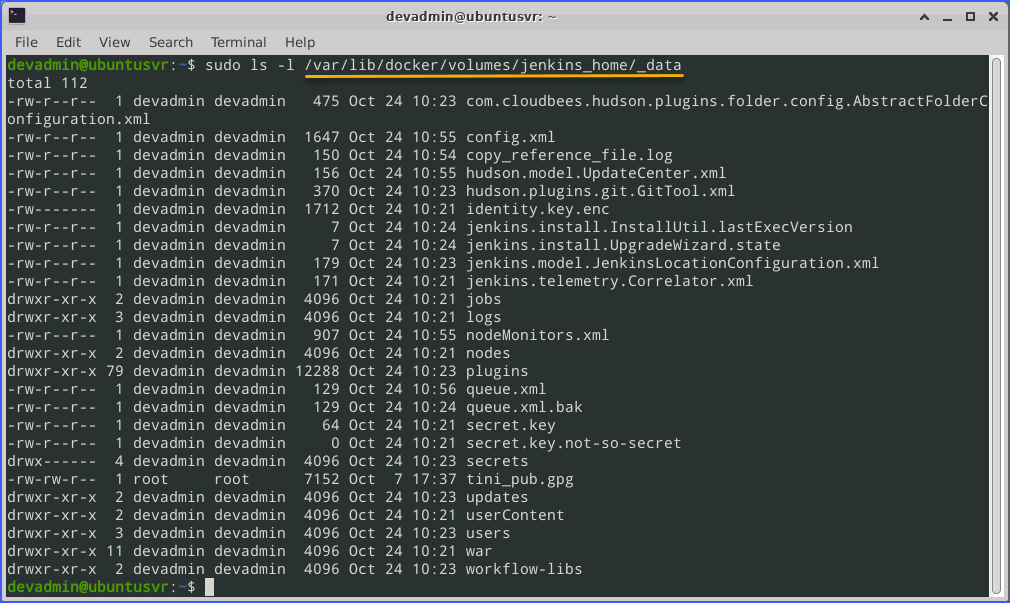
Now that you know where to find the Jenkins data, you can confirm by exploring the mount point location. In this example, the jenkins_home volume mount point is in /var/lib/docker/volumes/jenkins_home/_data.
Now that the Jenkins data persists outside of the container, you can backup the directory for safekeeping. Also, even if the Jenkins container is deleted, the data will remain on the Docker host.
Running Jenkins using Docker Compose with Volumes
Another way to run Jenkins is by using the docker-compose command. With Docker Compose, you can deploy one or more instances of Jenkins, if needed. But before doing so, you need to create a Docker Compose file for each instance.
Creating the Docker Compose Files
By default, the docker-compose command reads the file with the name docker-compose.yml or docker-compose.yaml in the same working directory where you issue the command.
Using your choice of available text editor, open a new blank file. Then, copy the YAML code below, paste it in your editor, and then save the docker-compose.yml file.
# docker-compose.yml
version: '3.7'
services:
  jenkins:
    image: jenkins/jenkins:lts
    privileged: true
    user: root
    ports:
      - 8083:8080
      - 50003:50000
    container_name: my-jenkins-3
    volumes:
      - ~/jenkins_data:/var/jenkins_home
      - /var/run/docker.sock:/var/run/docker.sock
This article does not cover the anatomy of a Docker Compose file. You can consult the official compose file reference documentation to understand further what each setting in the compose file means.
But, in this example, you can breakdown the most important settings in both Docker Compose files as listed below.
- image: This is the base image to use for creating the Docker container instance.
- ports: This is where to define the port mapping between the Docker host and the container.
- volumes: These are the volumes mapped between the Docker host and the container.
- container_name: This is the name you want to assign to the container you are creating. In this example, the container name is my-jenkins-3.
Starting the Jenkins Container using Docker Compose
Now that you’ve saved the two Docker Compose files, you can now use them to start the two Jenkins Docker container instances.
To start the my-jenkins-3 container, use the command below. Note that the command below assumes that the docker-compose.yml file is in the same directory where you run the command.
# Start the my-jenkins-3 container
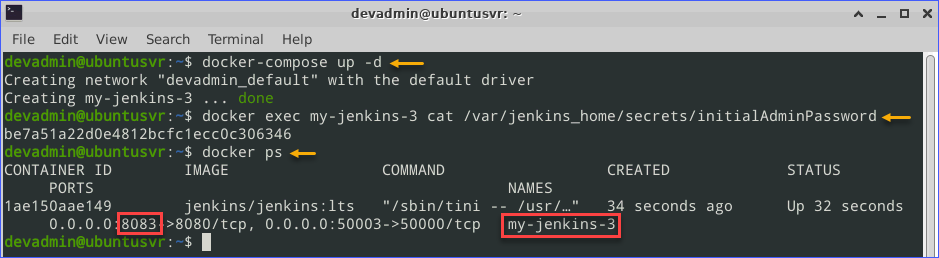
docker-compose up -d
# Get the initial admin password
docker exec my-jenkins-3 cat /var/jenkins_home/secrets/initialAdminPassword
# Confirm the my-jenkins-3 container is running
docker ps
The my-jenkins-3 container then starts and enters the running state, as you can see below.
Navigate the URL http://localhost:8083 using your browser to access Jenkins and complete the initial setup.
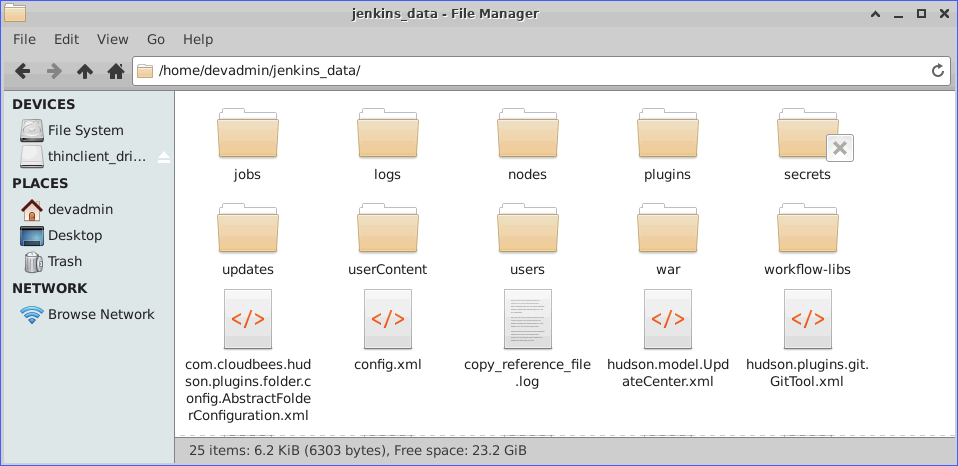
After you’ve completed the initial Jenkins setup for the my-jenkins-3 container, you can confirm that the ~/jenkins_data folder is populated with the Jenkins data files.
Since the Jenkins data files persist on the Docker host, even if the my-jenkins-3 docker container gets deleted, the configuration shall survive. To further test the persistence of the Jenkins config, stop the my-jenkins-3 container using the command below.
docker-compose down
Note that using the downer-compose down command automatically deletes the container itself.

Now, start the my-jenkins-3 up again using the command below.
docker-compose up -d
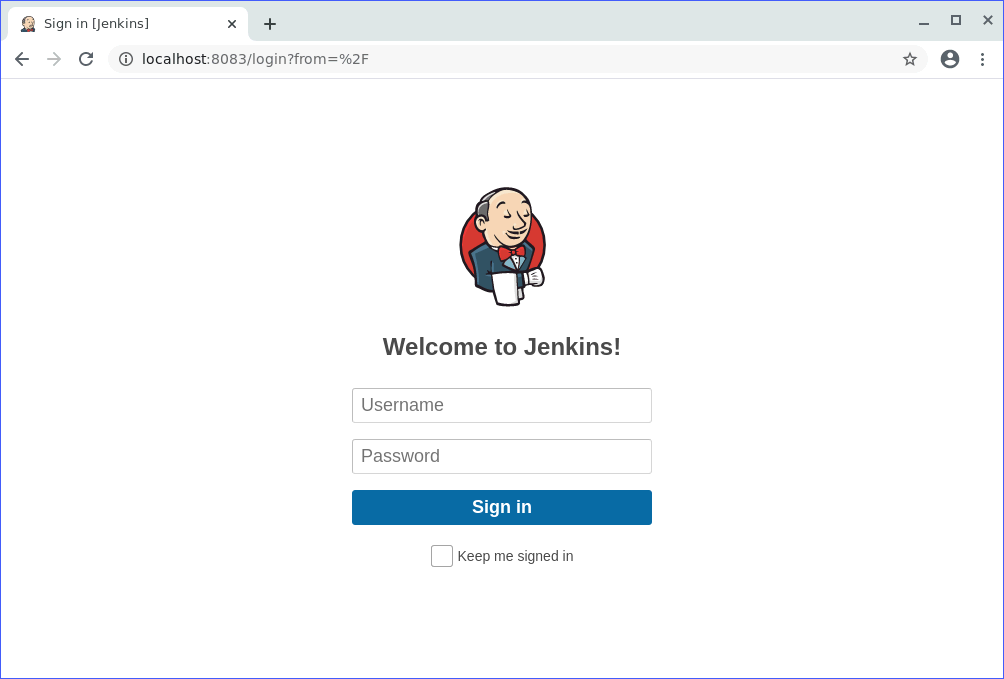
And when you access the Jenkins web interface, the first page you’ll see is the login page instead of the initial setup page. You’ll find that the same Jenkins configuration is retained, including your login credentials.
Summary
In this article, you learned how to run Jenkins using Docker in different ways. You’ve learned how to run Jenkins in Docker with and without a mounted volume. And you’ve learned how to back up the Jenkins data from inside the container to the host.
You also learned how to run a Jenkins instance using Docker Compose with volumes mapped to the Docker host. The Jenkins data files are then saved in the Docker host, making the Jenkins settings persistent and consistent even if the Docker container is deleted.
Using Docker and Docker Compose with volumes gives you the flexibility to back up and ultimately reuse Jenkins’ data. Which method of running Jenkins in Docker do you think you would use more?