Are you struggling to manage and configure many computing resources for your Amazon Web Services (AWS)’s infrastructure? Why not try AWS Batch? AWS Batch allows you to run batch computing workloads in the AWS Cloud with no sweat.
With AWS Batch, you can submit batch jobs to provision capacity according to the requirements and reduce the compute cost and capacity issues. And in this tutorial, you’ll learn how to run an AWS Batch job and deploy it to the AWS cloud.
Read on and start automating jobs with AWS Batch!
Prerequisites
This tutorial will be a step-by-step demonstration. If you’d like to follow along, ensure you have the following in place:
- An AWS IAM user, an access key ID, and a secret key set up on your local machine with access to create and manage EC2 instances – This tutorial will use an IAM user called ec2user.
Ensure the IAM user is set up for programmatic access and that you assign it to the existing policy of AmazonEC2FullAccess.
- Your compute environments and container instances will require an AWS IAM role with administrator access.
- A private AWS ECR repository.
- An AWS VPC.
Setting up the Compute Environment
AWS Batch runs jobs based on various networking components. These networking components are but are not limited to:
- Resource utilization, such as CPU and memory
- Infrastructure computes services, such as AWS Fargate, Amazon EC2, etc.
But before running your first job, setting up your compute environment is a crucial part of the process.
To create your AWS Batch compute environment:
1. Sign in to the AWS Management Console with your AWS account.
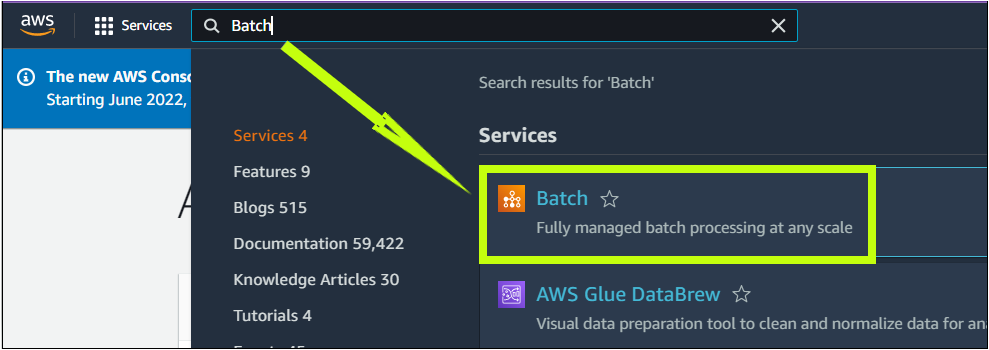
2. Next, search for Batch, select the Batch service, and your browser redirects to the AWS Batch page (step three).
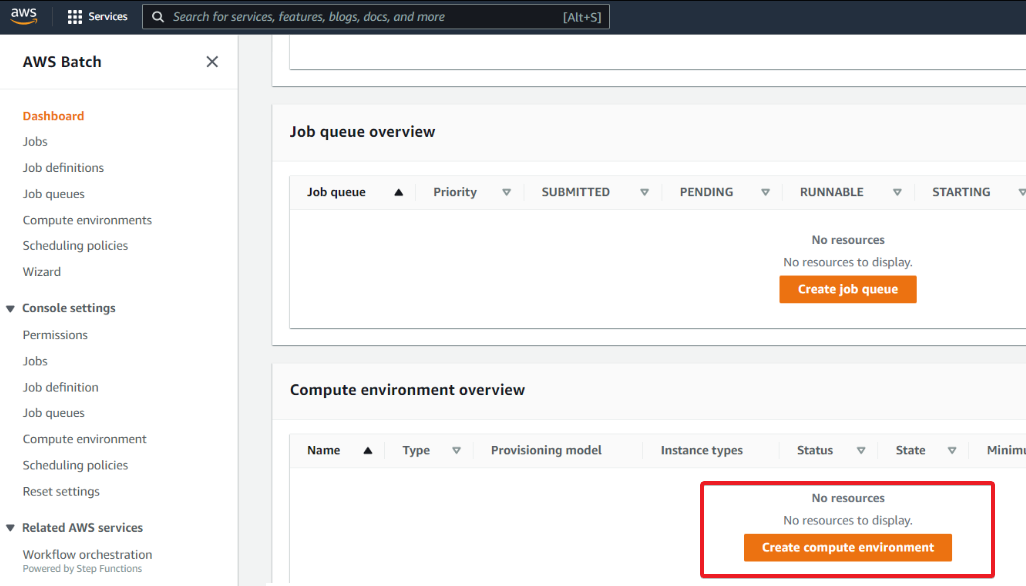
3. Once on the AWS Batch page, click on Create a compute environment button, as shown below, to initiate creating a compute environment.
Your browser redirects to a page where you’ll configure a compute environment (step four).
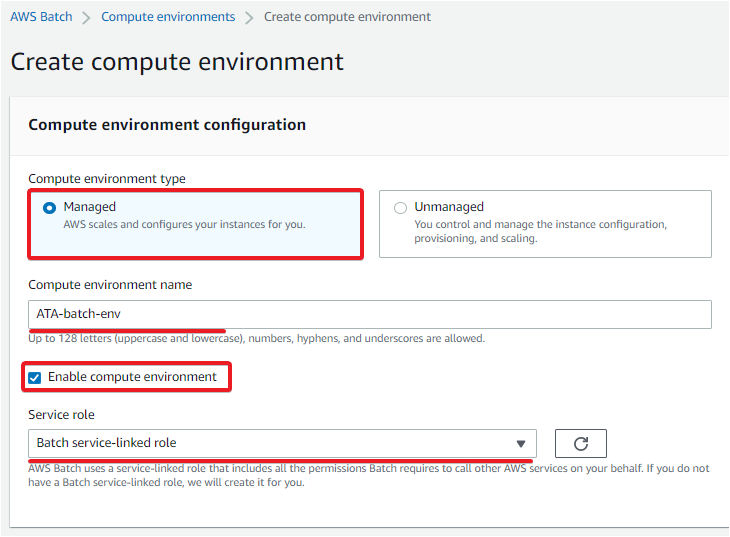
4. Now, configure the compute environment with the following under the Compute environment configuration section:
- Compute environment type – Select Managed so that AWS takes care of your instances.
- Compute environment name – Provide an environment name you like, but this tutorial’s choice is ATA-batch-env.
- Service role – Choose a service role that has permission to call other AWS services on your behalf. And even if you don’t have a service role, one is created on your behalf.
The Service role is set for this tutorial to the Batch service-linked role.
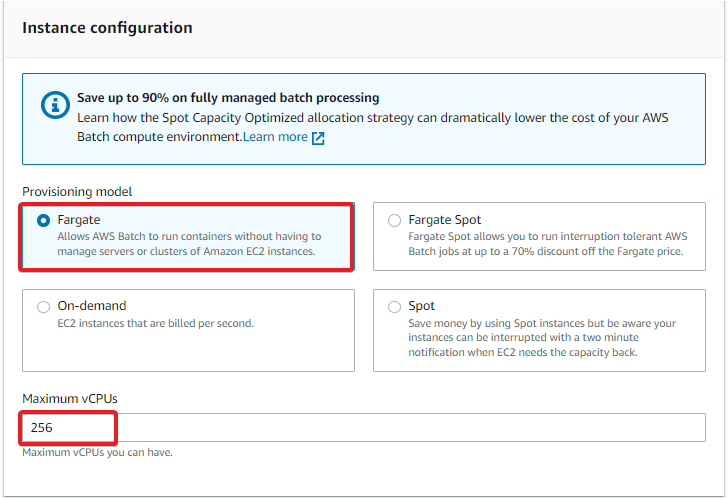
5. Under the Instance configuration, set the following options:
- Provisioning model – Select Fargate, which allows you to run containers without needing any instances you create.
- Maximum vCPUs – Input 256, the default that the Fargate instance will use.
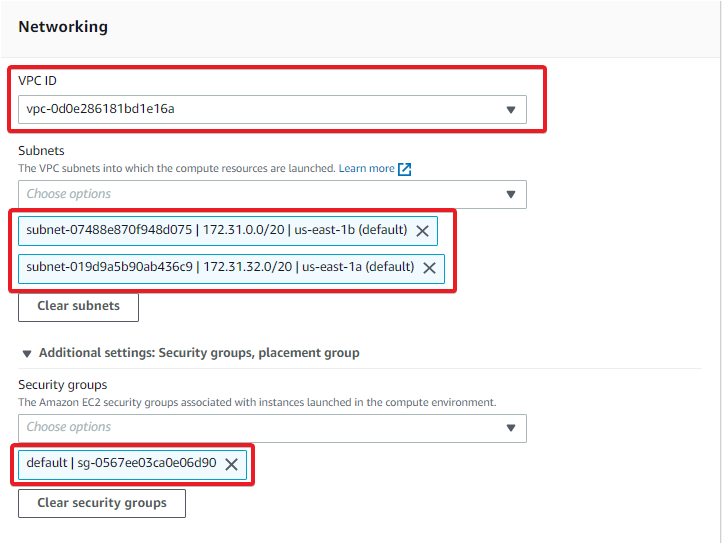
6. Next, scroll down to the Networking section, and configure the following:
- VPC ID – Select the VPC ID you created for this tutorial as a prerequisite.
- Subnets – There are subnets available for your AWS account you can select from the dropdown field. But if you wish to use the subnets of your choice, select the appropriate subnets where the compute resources will be launched.
This tutorial uses the Default subnets, as shown below.
The VPC ID and Subnets groups will be different for each account. The VPC and Subnets groups you see in this tutorial will differ from your AWS account.
- Expand the Additional settings: Security groups, placement group option, and you’ll see the default security groups already selected. But again, you can associate the security group of your choice.
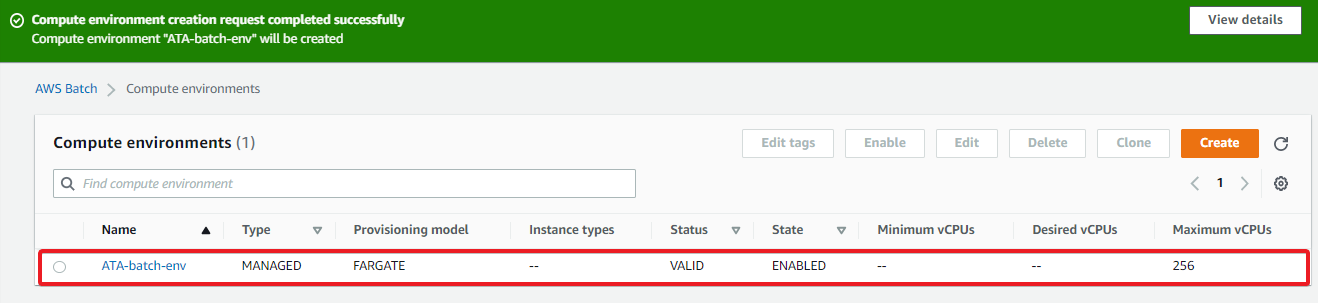
7. Finally, click on the Create compute environment button (bottom-right), as shown below, to finalize creating the compute environment.

After a few seconds, you’ll notice in the Compute environments tab that the environment you specified is now enabled, as shown below.
Creating an AWS Batch Job Queue
You’ve just launched a compute environment for AWS Batch to run a job. But the compute environment is doing nothing until you create a job queue.
A job queue stores your submitted jobs until the AWS Batch Scheduler runs the job on a resource in your computing environment.
To create a job queue, follow these steps:
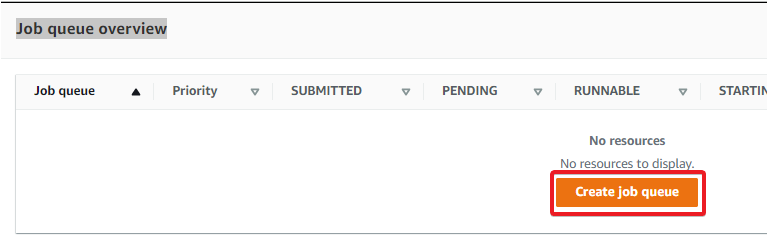
1. On the AWS Batch Dashboard, click on Create job queue under the Job queue overview section. This action redirects your browser to a page where you’ll configure a job queue (step two).
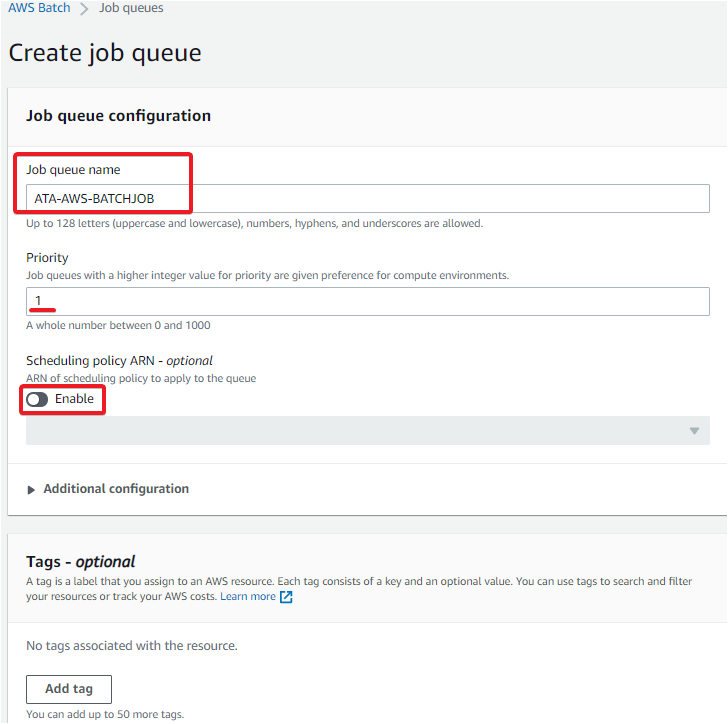
2. In the Job queue configuration section, provide the following details:
- Job queue name – Enter a unique name, but this tutorial’s choice is ATA-AWS-BATCHJOB.
- Priority – Enter an integer between 0 and 100 for the job queue. This tutorial uses the default value 1.
- Scheduling policy ARN – Keep this option disabled since the scheduler manually keeps it disabled.
- Adding tags is optional, so ignore the tags for this tutorial.
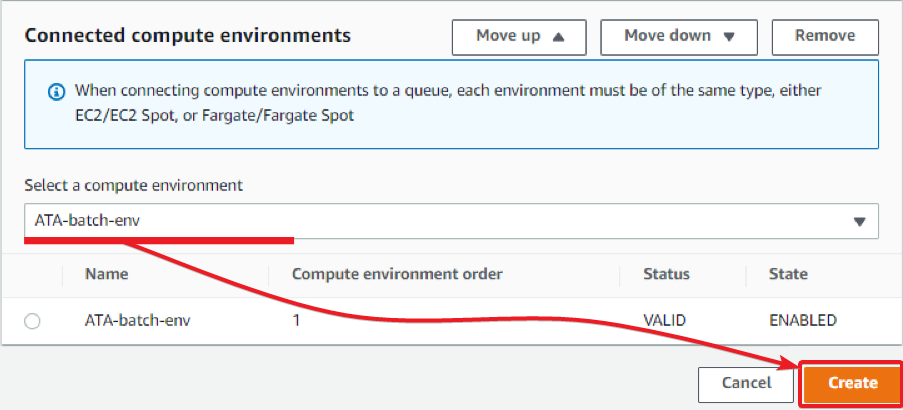
- Scroll down, and select the ATA-batch-env you created in step four of the “Setting up the Compute Environment” section as the compute environment.
After setting the compute environment, click the Create button to create the job queue.
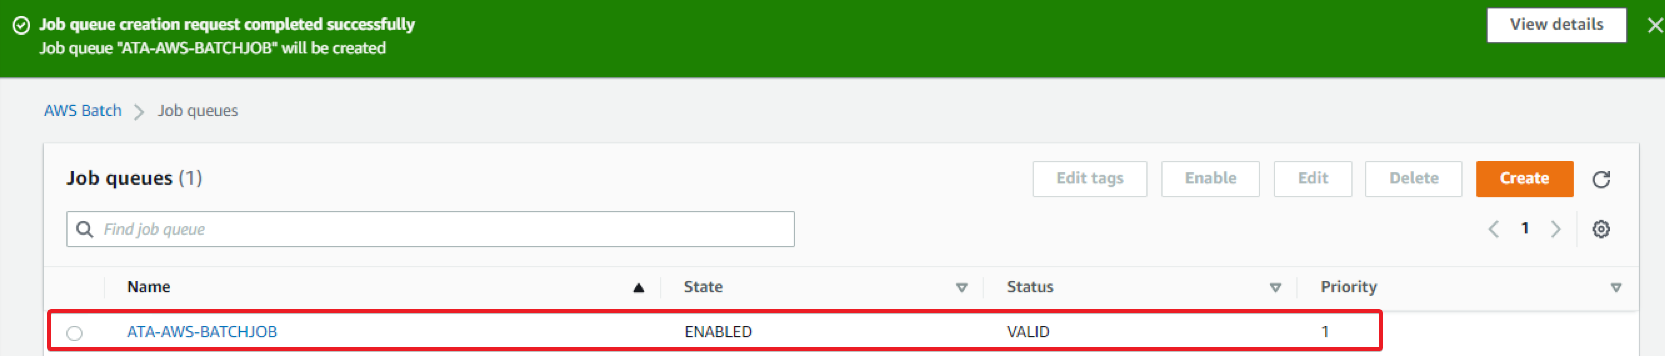
4. Finally, click on Job Queues in the left panel on the AWS Batch page to verify the newly-created job queue, as shown below.
Creating an AWS Batch Job Definition
You now have a job queue where your job will reside. But one more component you need to create, which is job definition, before finally submitting your job. The job definition contains all the job details, such as timeouts, AWS ECR links, etc.
To create the job definition:
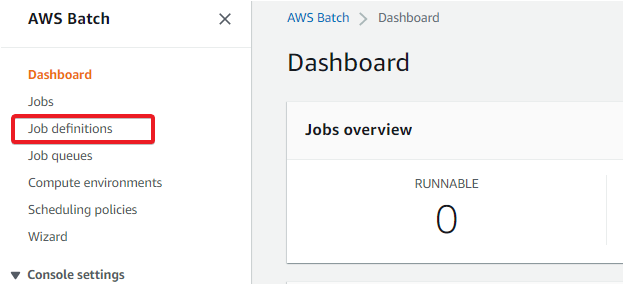
1. Navigate to the AWS Batch Dashboard, and click on Job definitions, as shown below, to access the list of job definitions.
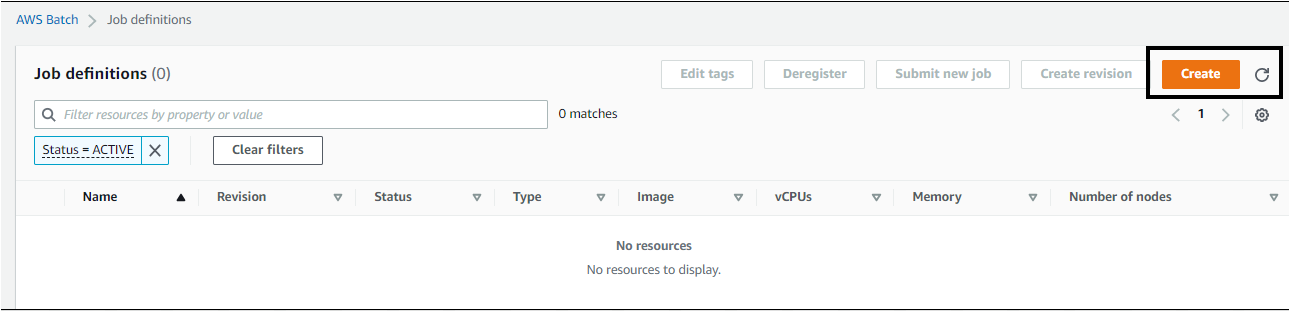
2. Next, click the Create button (top-right) to initialize a new job definition. Your browser redirects to a page where you’ll configure the new job definition (step three).
3. On the Create job definition page, provide the following details:
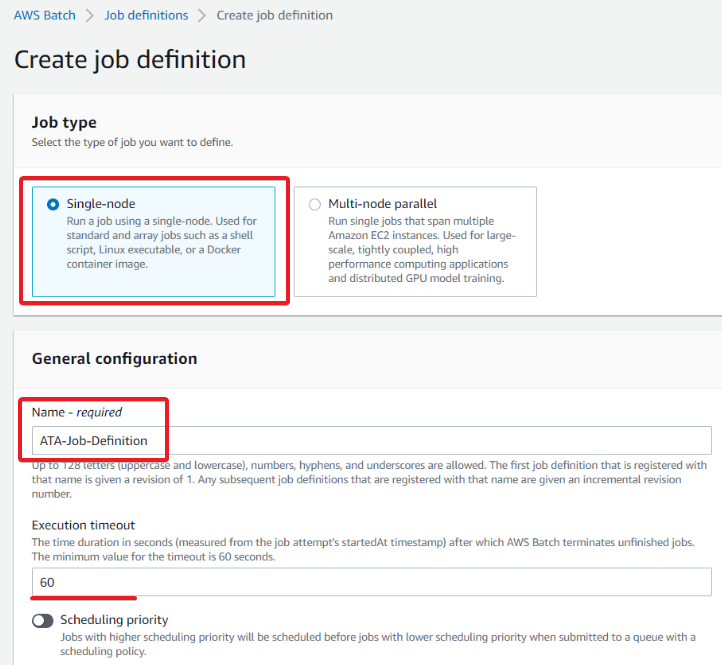
- Select the Single-node option under the Job type section since you’ll only run your job on a single node.
- Provide a job’s Name as you like under the General configuration section. But this tutorial’s choice is ATA-Job-Definition.
- Execution timeout – Enter the amount of time, in seconds, that an unfinished job terminates after running. The minimum timeout is 60 seconds.
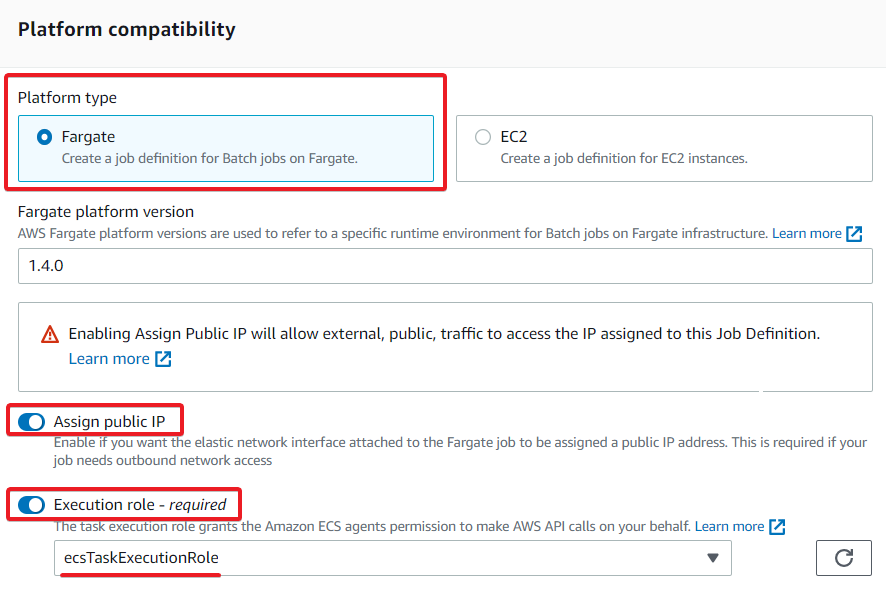
4. Scroll down to the Platform compatibility section, and configure the following:
- Platform type – Choose Fargate, a server-less compute engine that allows you to build applications without managing a server.
- Enable the Assign public IP option, so your AWS Batch job is accessible publicly if required.
- Enable the Execution role option, and choose a task execution role that lets Amazon Elastic Container Service (Amazon ECS) agents make AWS calls on your behalf. This tutorial uses the ecsTaskExecutionRole execution role.
5. Now, set the following under the Job configuration section:
- Image – Enter the Name of the image in repository-url/image:tag format that will be used to launch the container. This tutorial uses the AWS ECR created as a prerequisite.
Images in Amazon ECR repositories use the registry/repository[:tag], and images in other online repositories use the domain name, such as google.com/assemblyline/ubuntu.
- Choose Bash for the Command syntax, then specify the below Command to pass to the container. When you submit a new AWS Batch, the job container executes the below command.
echo "hello world"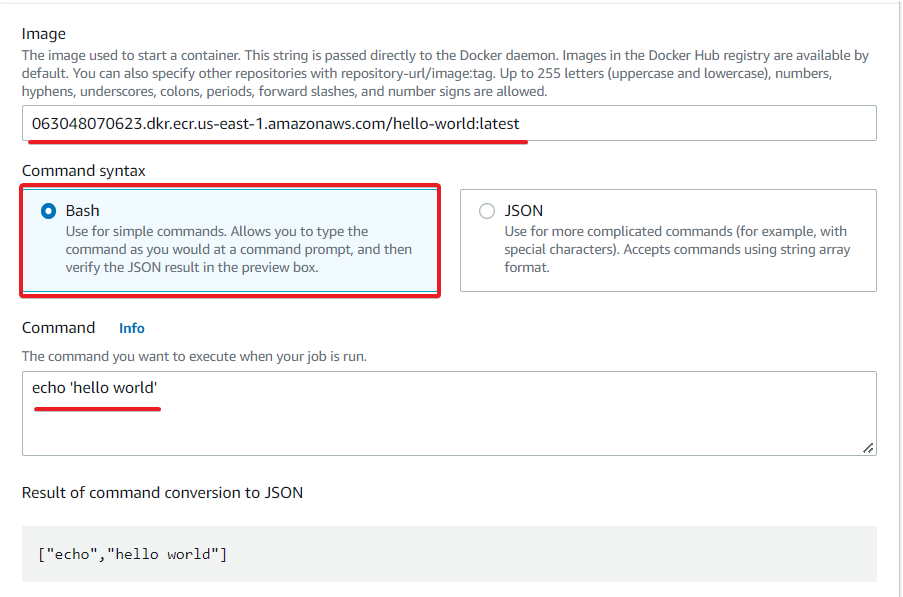
6. Scroll down, and continue configuring the job definition with the following:
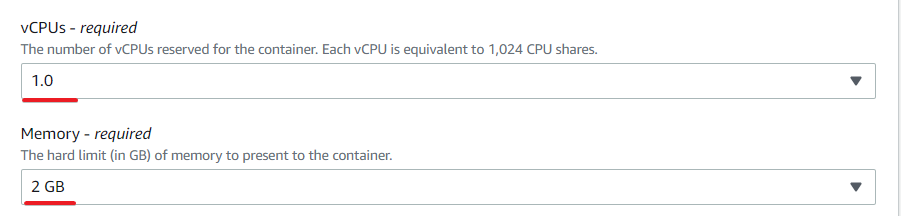
- vCPUs – Specify the number of vCPUs to reserve for the container. The AWS Batch will not be too heavy, so this tutorial uses only one vCPU (1.0).
- Memory – Specify the hard limit (in MiB) of memory (2 GB) to present to the job container.
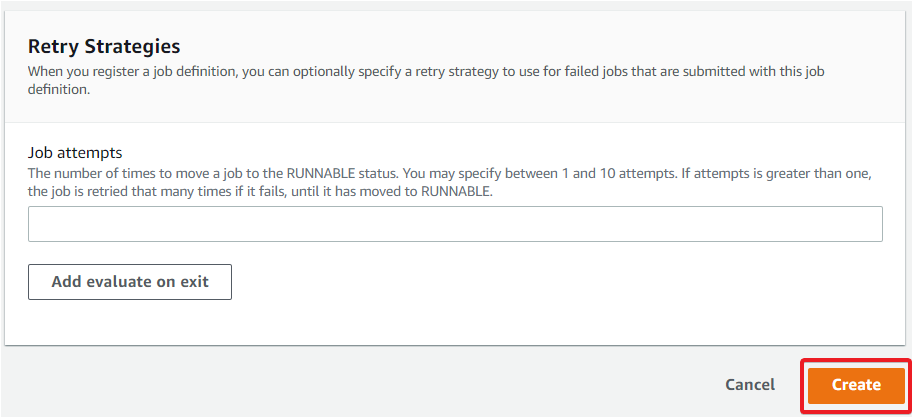
7. After specifying configurations in the job definition, click on the Create button (bottom-right) to create the job definition.
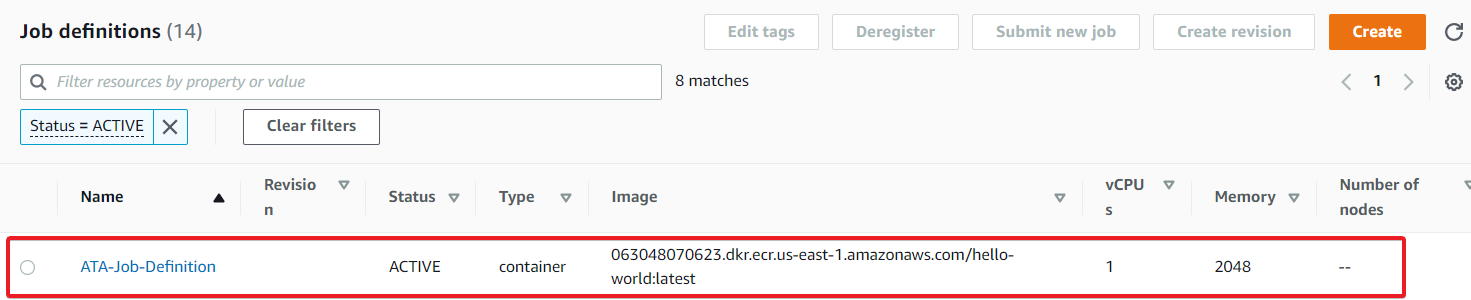
8. Navigate to the Job definitions page again to verify the newly-created job definition, as shown below.
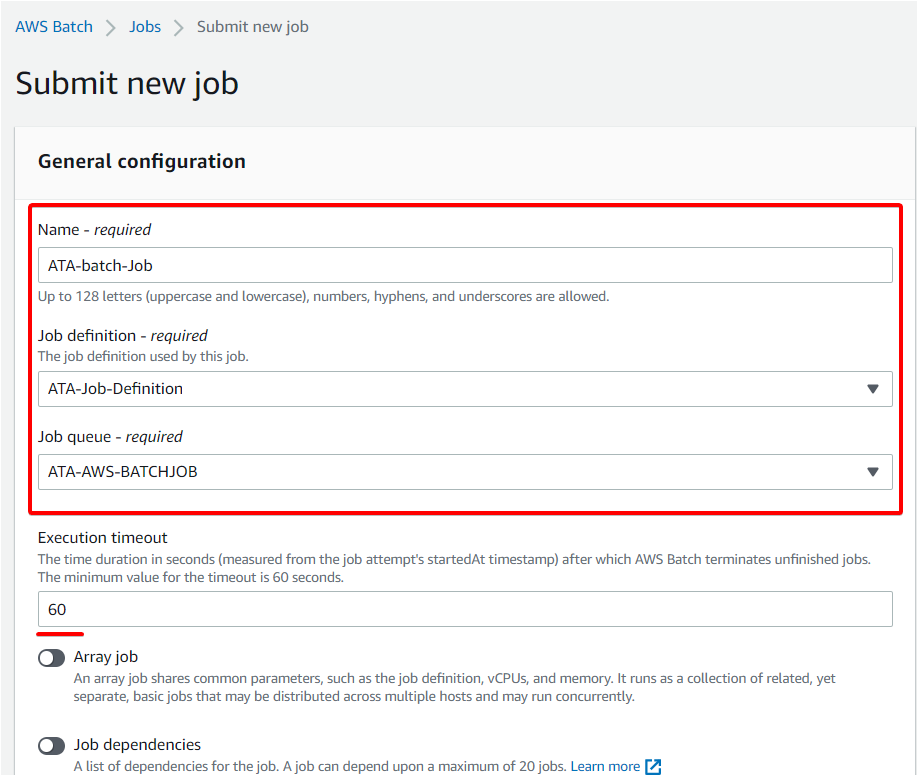
9. Now, navigate to the Jobs page, and click on Submit new job (top-right) to submit your first AWS Batch job.

10. Lastly, specify the following for the AWS Batch job you’re submitting:
- Name – Provide a job name (ATA-batch-Job).
- Job definition – Select the job definition you created in step three (ATA-Job-Definition).
- Job queue – Select the job queue (ATA-AWS-BATCHJOB) you created in step two of the “Creating an AWS Batch Job Queue” section.
- Execution timeout – Set the execution timeout to the minimum (60).
- Click on Submit at the bottom of the page to submit the new job.
Verifying the AWS Batch Job and Monitoring the Job
You’ve successfully submitted your first AWS Batch job, but how can you confirm if the job is working? AWS Batch creates logs for each running job, where you can verify whether your job is running or not.
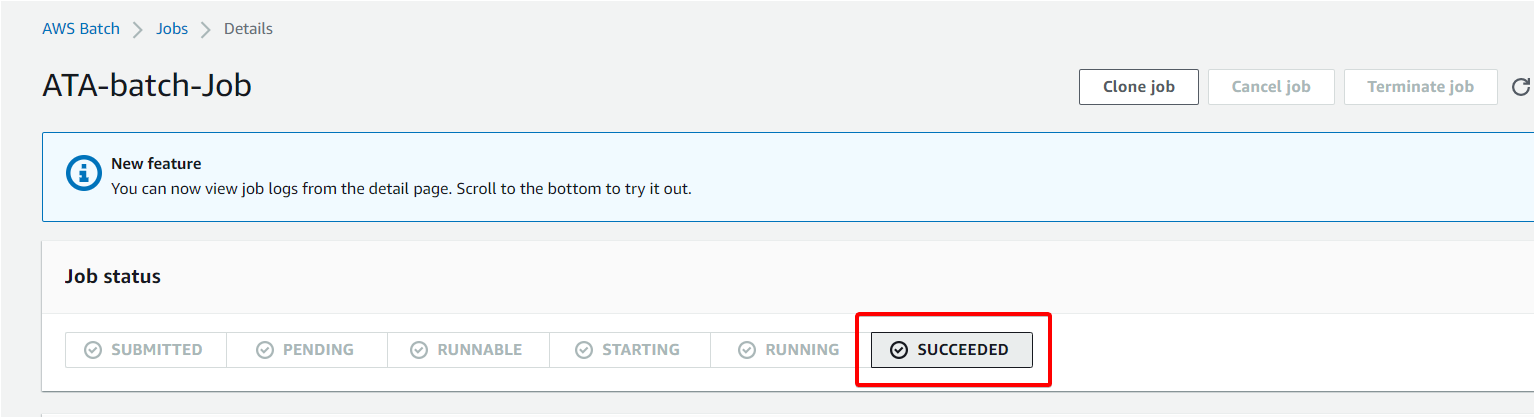
Navigate to the Jobs page, and your job status says SUCCEEDED (bottom-right), as shown below. But if it’s not enough, you can get more information about your job’s status.
Click on your AWS Batch job (ATA-batch-job), and your browser redirects to your job’s status and logs.
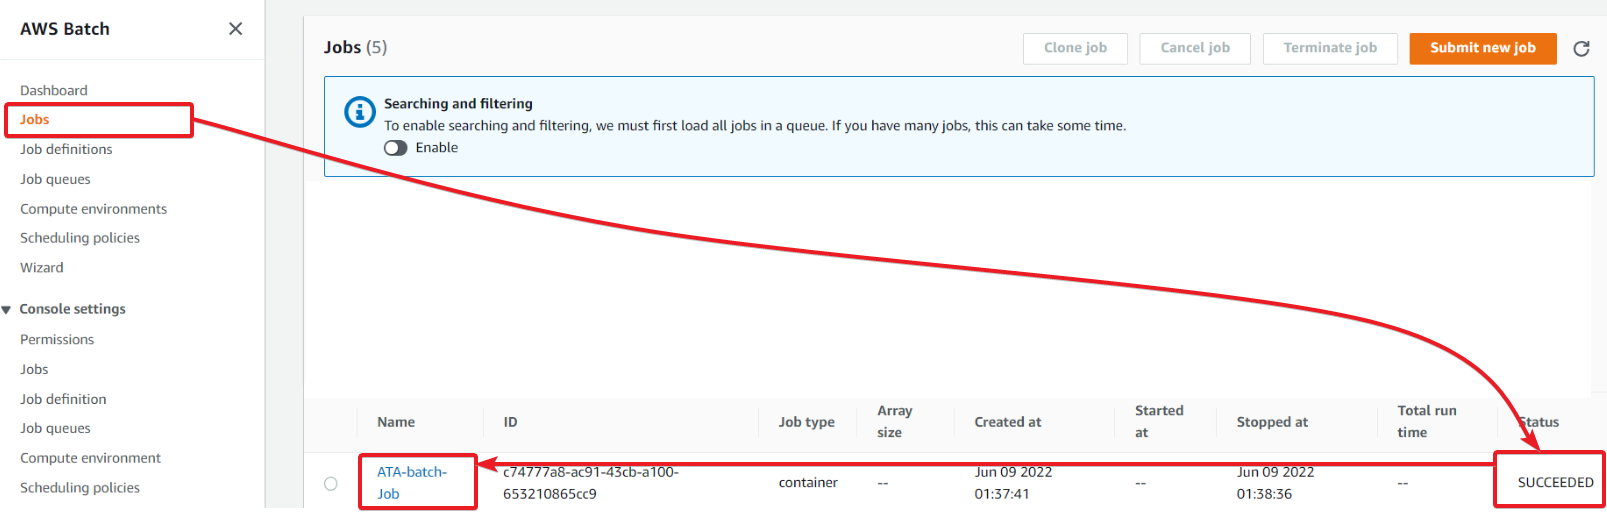
Below, you can see the status also says SUCCEEDED.
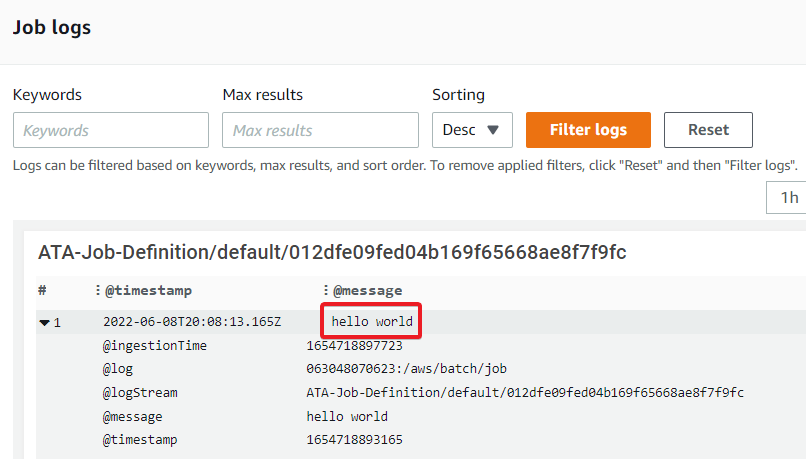
Now, scroll to the bottom, and you’ll notice that the job ran successfully on the container, and executed the command you specified in the job definition.
Conclusion
In this tutorial, you’ve learned how to use AWS Batch to run jobs against job definitions. AWS Batch Job provides a handy logging system that gives you in and out details of the Job that you execute.
The best part is that AWS batch is a free service that allows you to run the batch jobs periodically or on-demand while you only pay for the resources you use.
Now, why not use this newfound knowledge with other AWS services and build vital services?