Are you looking to transform your home into a smart oasis without breaking the bank? Well, fortune favors you! With HOOBS and Raspberry Pi, you can easily create a cost-effective DIY smart home.
This tutorial will walk you through installing HOOBS on your Raspberry Pi device and have you all set up in a jiffy.
Continue reading and turn your home into a smart haven!
Prerequisites
Before you dive into the exciting world of the perfect DIY smart home combo, ensure you have the following in place:
- A Raspberry Pi device 2 or later running Raspberry Pi OS – This tutorial uses Raspberry Pi 4 running Raspberry PI Bullseye Desktop 64-bit.
- SSH access to your Raspberry Pi device or a physical connection to the Pi device ( monitor, keyboard, and mouse).
- A Linux and a Windows system to access the HOOBS UI – This tutorial uses Ubuntu 20.04 and Windows 11.
Preparing the System to Install HOOBS
HOOBS is a platform designed to enhance compatibility and connectivity between your smart home accessories and various popular ecosystems. These ecosystems include Apple HomeKit, Google Home, and Amazon Alexa.
But before taking advantage of HOOBS, you must prepare your system for installation. Doing so sets the stage for a hassle-free installation process. You will be less likely to run into unexpected roadblocks or technical glitches along the way.
To prepare your system to install HOOBS, carry out these steps:
1. Execute the below wget command in your terminal to download and run the HOOBS bash shell script. This script automatically adds the HOOBS repository and GPG key, preparing the system to install HOOBS.
sudo wget -qO- https:/dl.hoobs.org/stable | sudo bash -
2. Next, run the following apt update command to pick up the HOOBS repository and ensure your Raspberry Pi’s package list is current.
sudo apt update -y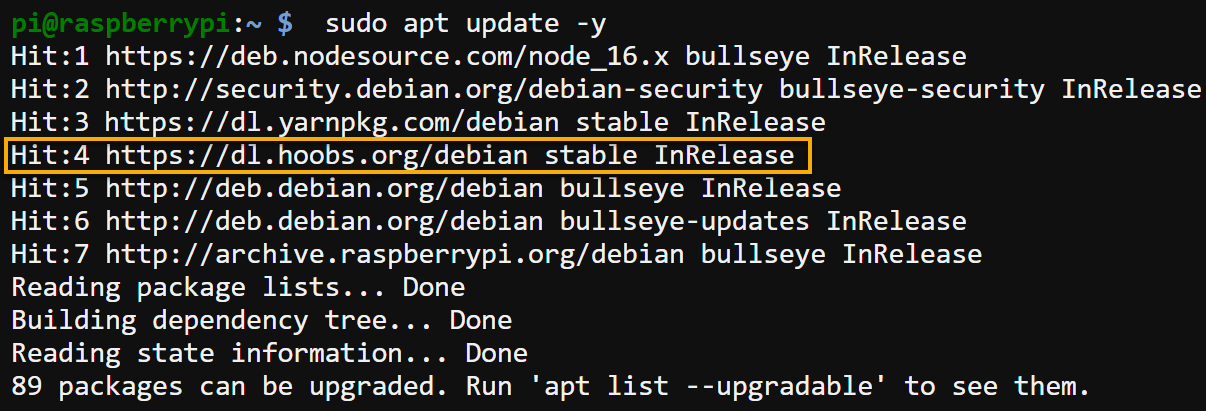
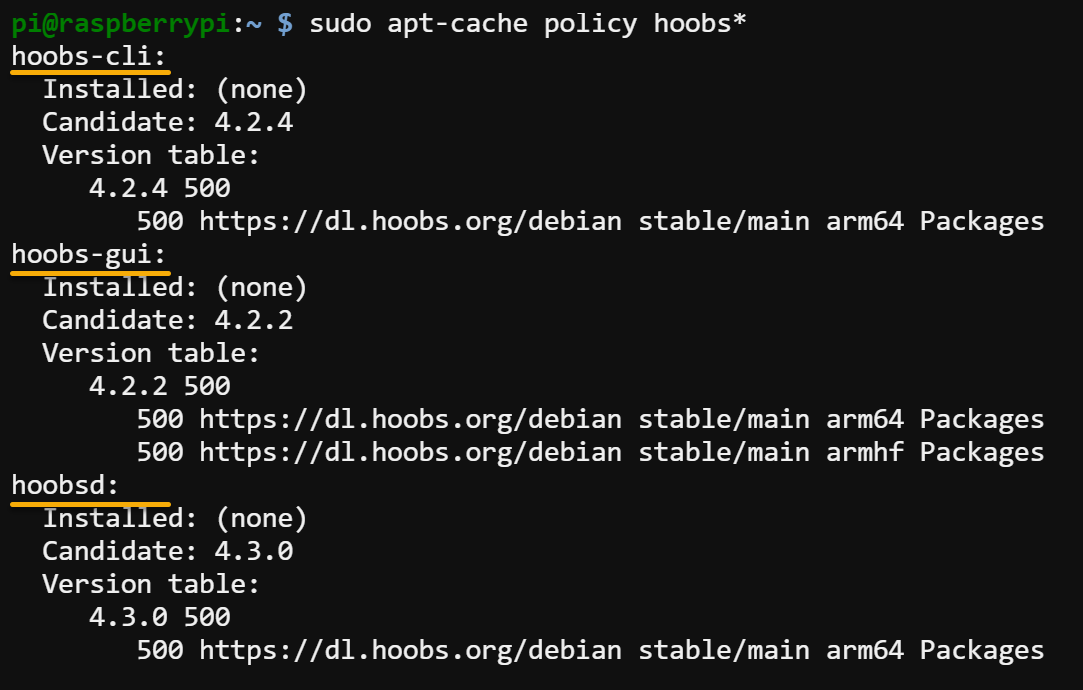
3. Once updated, run the below apt-cache command to check the hoobs package versions and their repositories available for installation.
sudo apt-cache policy hoobs*You will see three different HOOBS-related packages, as shown below:
- hoobs-cli – Provides command-line tools for managing HOOBS.
- hoobs-gui – Provides a graphical interface for managing HOOBS.
- hoobsd – The core daemon that powers the HOOBS functionality.
Installing HOOBS on a Raspberry Pi Device
With your system primed and ready, you are one step closer to turning your Raspberry Pi into a powerful hub for all things smart home! But like other tools, you must first install HOOBS on your Raspberry Pi device, and the quickest way is via the APT package manager.
To install HOOBS on your Raspberry Pi device:
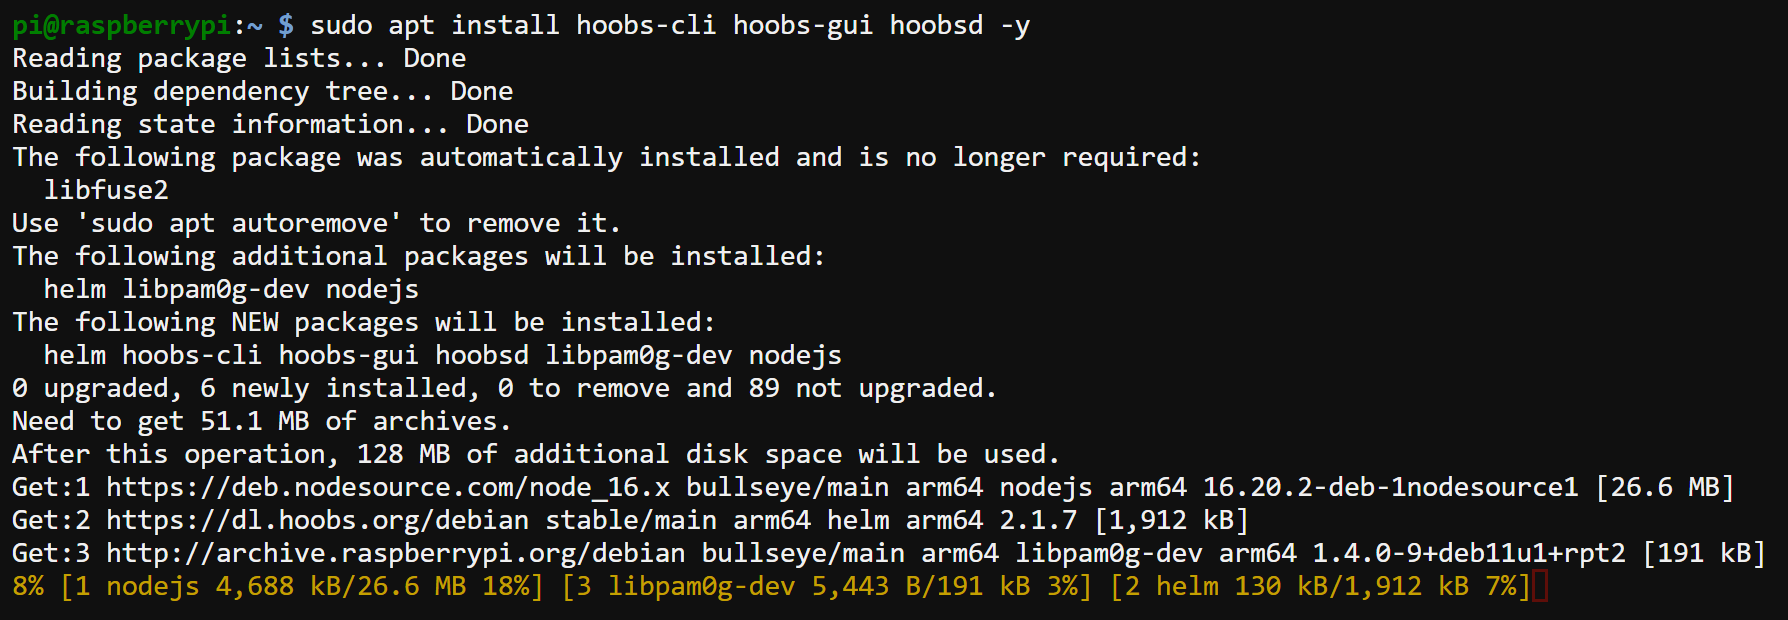
Execute the below apt install command to install the three HOOBS-related packages (hoobs-cli, hoobs-gui, and hoobsd) to your Raspberry Pi device.
sudo apt install hoobs-cli hoobs-gui hoobsd -yWait for the installation to complete, which may require some time.
Now, run the below command to set HOOBS (hbs) as a service in the background. Doing so lets you access HOOBs via a web browser or the HOOBS desktop app.
sudo hbs installProvide a port number when prompted, as shown below, and press Enter.
This tutorial’s choice is port 80, which tells HOOBS to listen and respond to incoming network requests on port 80.
💡 Conflicts may arise if another service is already running on port 80. In that case, you must choose another port, like 8080 or 8000.

Accessing the HOOBS Dashboard via a Web Browser
After successfully installing HOOBS on your Raspberry Pi, it is time to explore its possibilities. One of the most exciting aspects is accessing the HOOBS dashboard, granting you control over your smart home setup via a web browser like never before.
To access the HOOBS dashboard, follow these steps:
1. Run the below hostname command to find the local IP address of your Raspberry Pi device.
hostname -ICopy the displayed IPv4 address from the output, as you will need it to access the HOOBS dashboard.

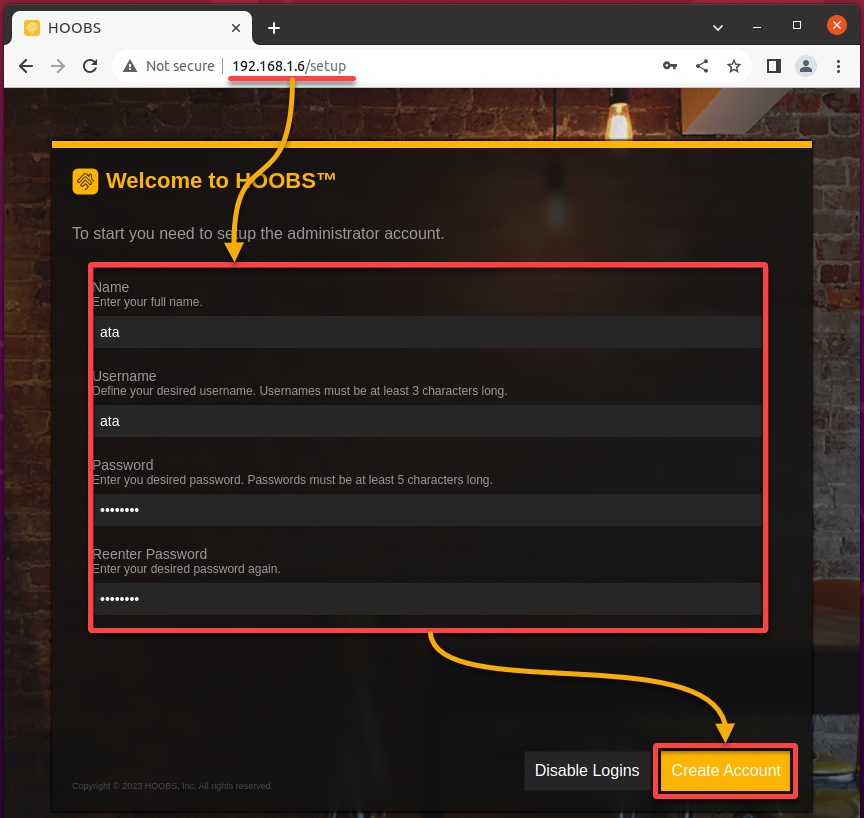
2. Next, open your web browser and navigate to the IP address you noted in step one, followed by /setup (i.e., 192.x.x.x/setup). If successful, your browser redirects to the HOOBS sign-up page, as shown below.
💡 This tutorial uses Google Chrome, but any modern browser should work fine.
Fill in all the required information, and click Create Account to set up an administrator account for accessing your HOOBS dashboard.
3. Now, navigate to your IP address, followed by /login (i.e., 192.x.x.x/login ), redirecting your browser to the HOOBS login page.
Provide the administrator credentials you previously set in step two and click the Log In to access your HOOBS dashboard.
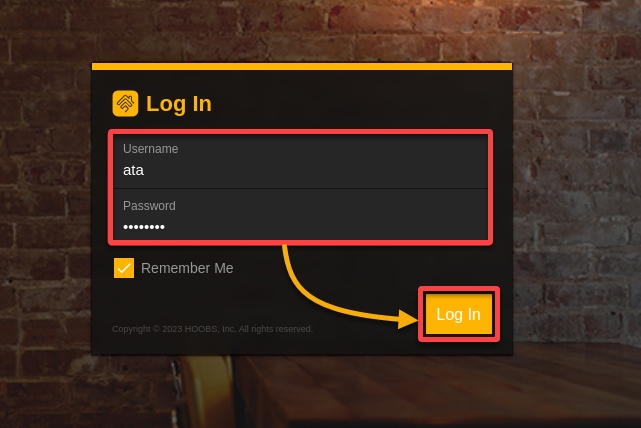
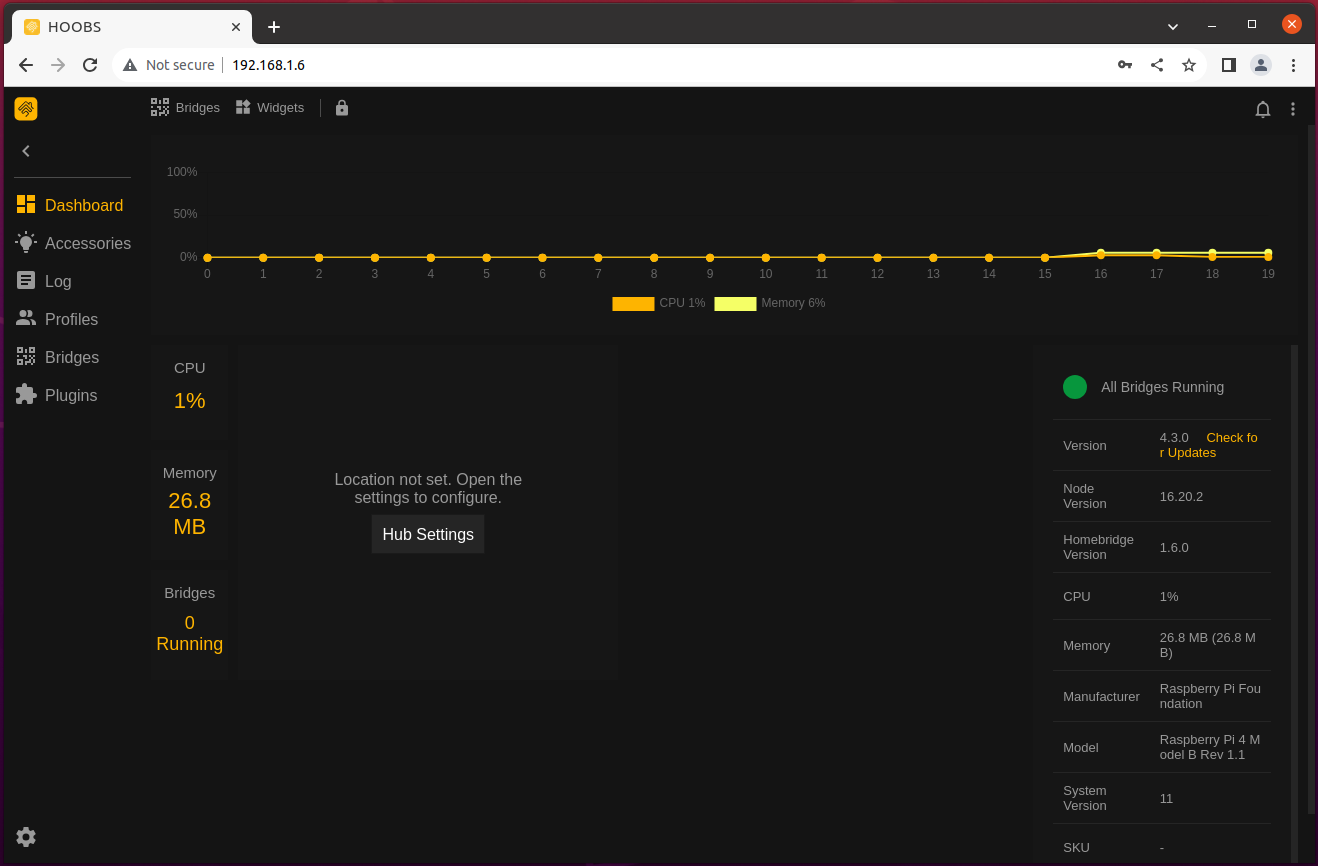
Once logged in, you will see your HOOBS dashboard, as illustrated below, and you are ready to start using HOOBS!
In the world of smart home technology, different manufacturers often create devices compatible with specific ecosystems. This factor can result in devices from diverse ecosystems not seamlessly working together.
HOOBS aims to solve this problem by bridging these ecosystems and their respective accessories via the HOOBS dashboard. This dashboard is an intuitive user interface designed to help you configure and manage all your IoT devices in one place.
Accessing the HOOBS Dashboard via The HOOBS Desktop App
Accessing your HOOBS dashboard on a web browser works great and all. But if you lean toward a specialized app interface, the HOOBS Desktop App is the solution you are looking for.
The HOOBS Desktop App is explicitly tailored for managing your HOOBS instance for optimized performance and compatibility — a smoother experience than a web browser.
To access your HOOBS dashboard via the HOOBS Desktop App:
1. On your web browser, navigate to the official download page and download the HOOBS Desktop App executable file.
2. Once downloaded, open the HOOBS Desktop app.
3. Click Advance in the HOOBS Desktop App’s main window to begin setting up your HOOBS IP address.
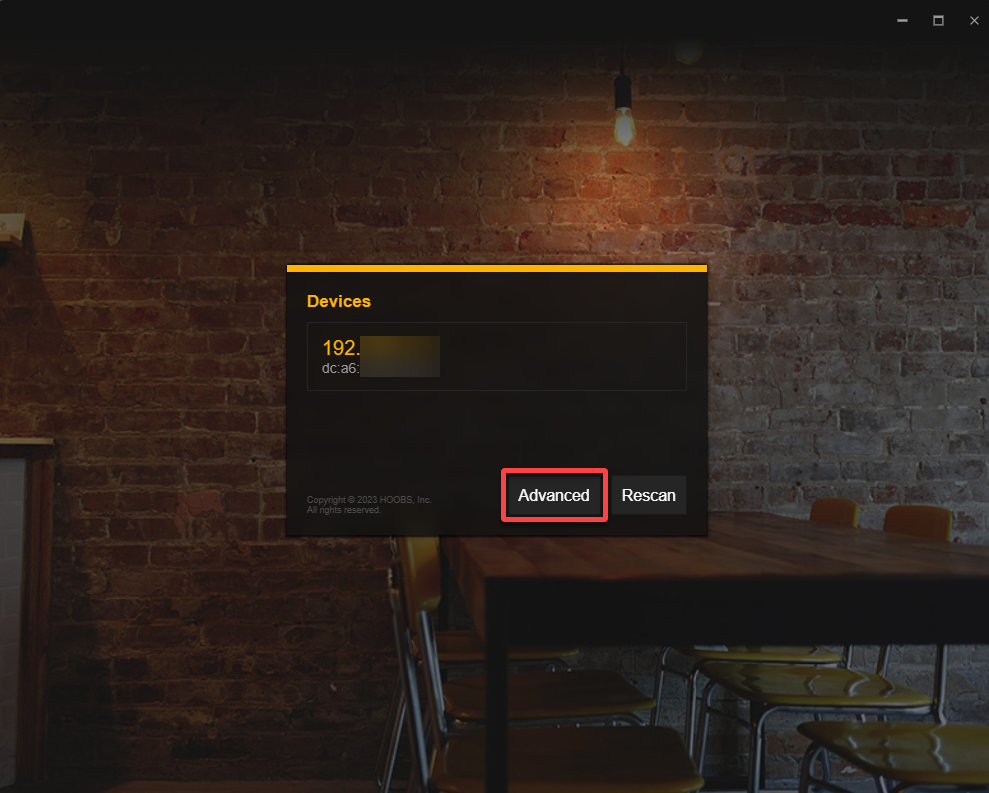
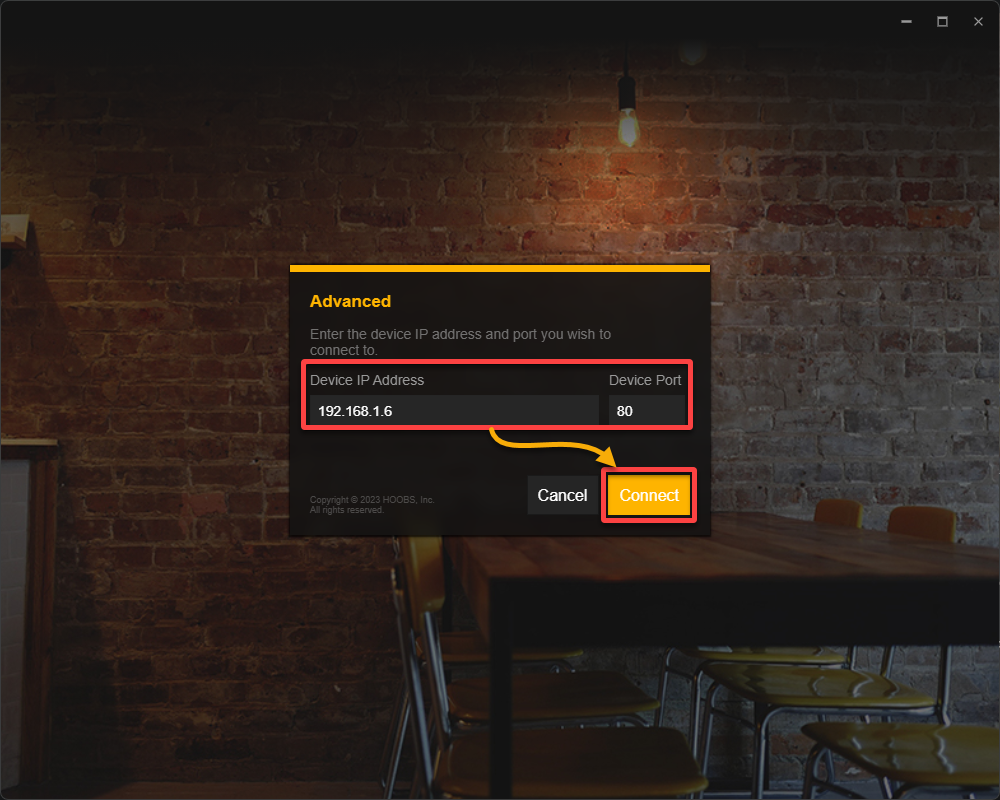
4. Now, configure the following advanced settings:
- Device IP Address – Provide your local IP address.
- Device Port – Provide the port (i.e., 80) you set upon installing HOOBS on your Raspberry Pi device.
Once configured, click Connect to connect to your HOOBS dashboard.
5. When prompted, log in with your administrator credentials and click Log in to access your HOOBS dashboard.
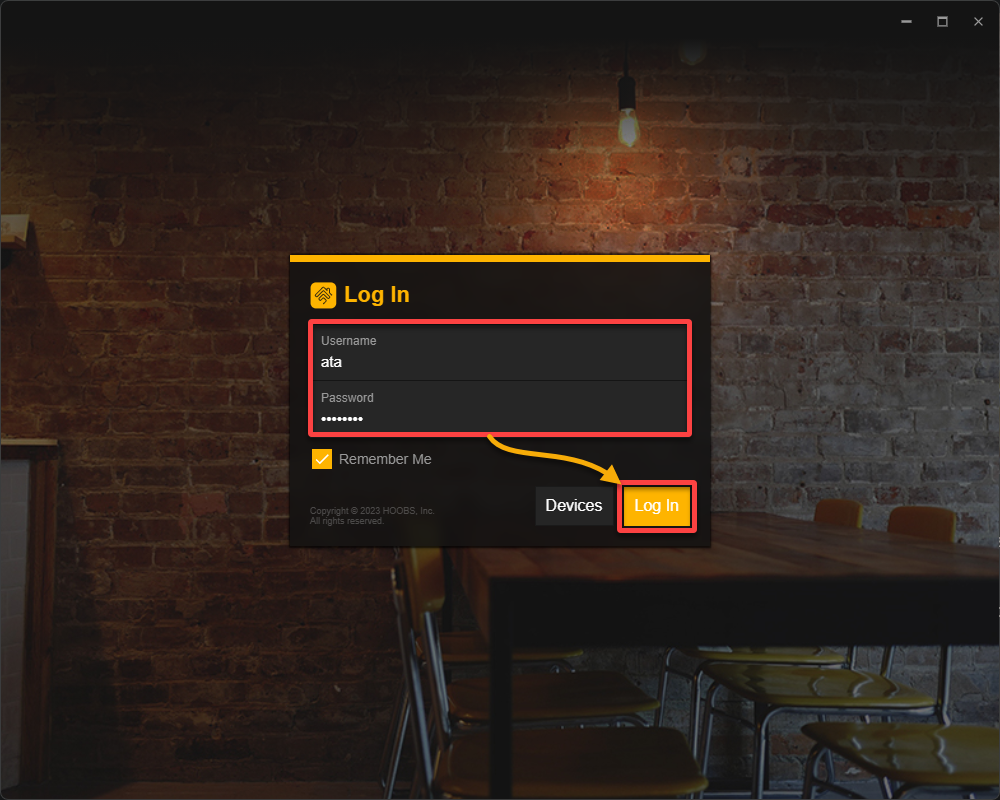
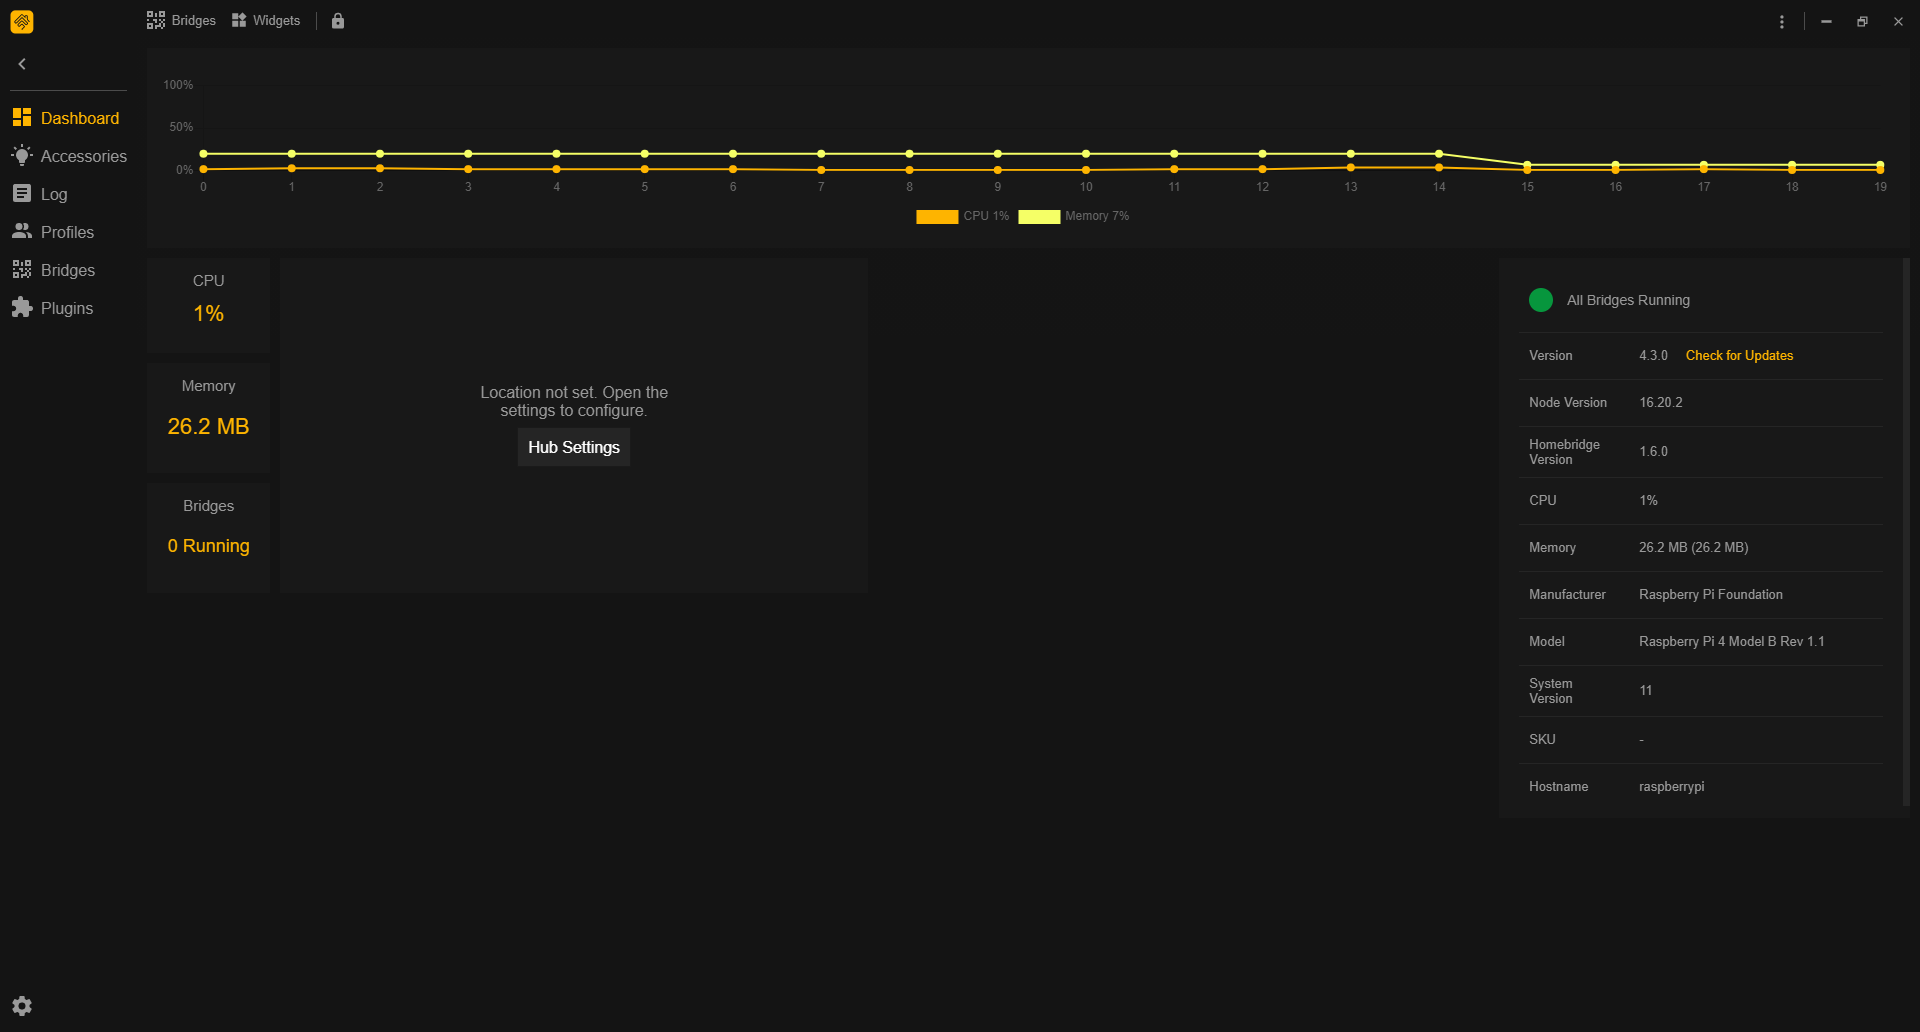
Once logged in, you will be greeted by the dashboard, as shown below.
Congratulations! You can now quickly manage and configure all your home automation devices via the HOOBS Desktop App.
Conclusion
Throughout this tutorial, you have unlocked the door to a smarter home without straining your budget with HOOBS, an accessible and user-friendly home automation solution for everyone!
You have configured HOOBS on your Raspberry Pi, encompassing tasks like incorporating software repositories, installing the HOOBS application, and seamlessly accessing the HOOBS dashboard.
Take this opportunity to unleash your creativity and personalize your automation rules and scenes, immersing yourself in a genuinely intelligent home environment.
Now, why not explore the HOOBS plugins marketplace today? See what incredible features you can add to your new home automation system!


